The Polytone Maxi-Brute Model 104 Guitar Amp
Last updated 1/1/2025
By Paul Marossy
In the late 90s, I took a few lessons from a guy that played a Polytone amp. I had never heard of one before then but apparently for a time
these solid state guitar amps were legendary in the jazz world, as cats like Joe Pass and George Benson used a Polytone amp. They have a very
warm and clean sound, and I think these amps are criminally underrated but I am NOT like most guitarists. Sure, I have some "vintage" Fender
amps, and I love them but I don't necessarily like how they color the sound. The Polytone amps pay more attention to reproducing the actual
sound of your instrument wihout adding a lot of "coloration". Therefore, most guitarists would call these amps "ultra-clean". I would like to do a
webpage similar to my Gregory amps page which goes over all of the different Polytone models in some detail, but finding ANY info on these amps online
is very tough. The story of who started and how Polytone got started is interesting but the details are not real
clear. I also like that these amps were made in the USA.
In any case, I found this amp for $100 on FaceBook Marketplace, and after doing a little research, it had enough interesting features that I
had to buy it just to play around with it and to have one of these unknown Polytone amps for myself. The previous owner had bought the amp in
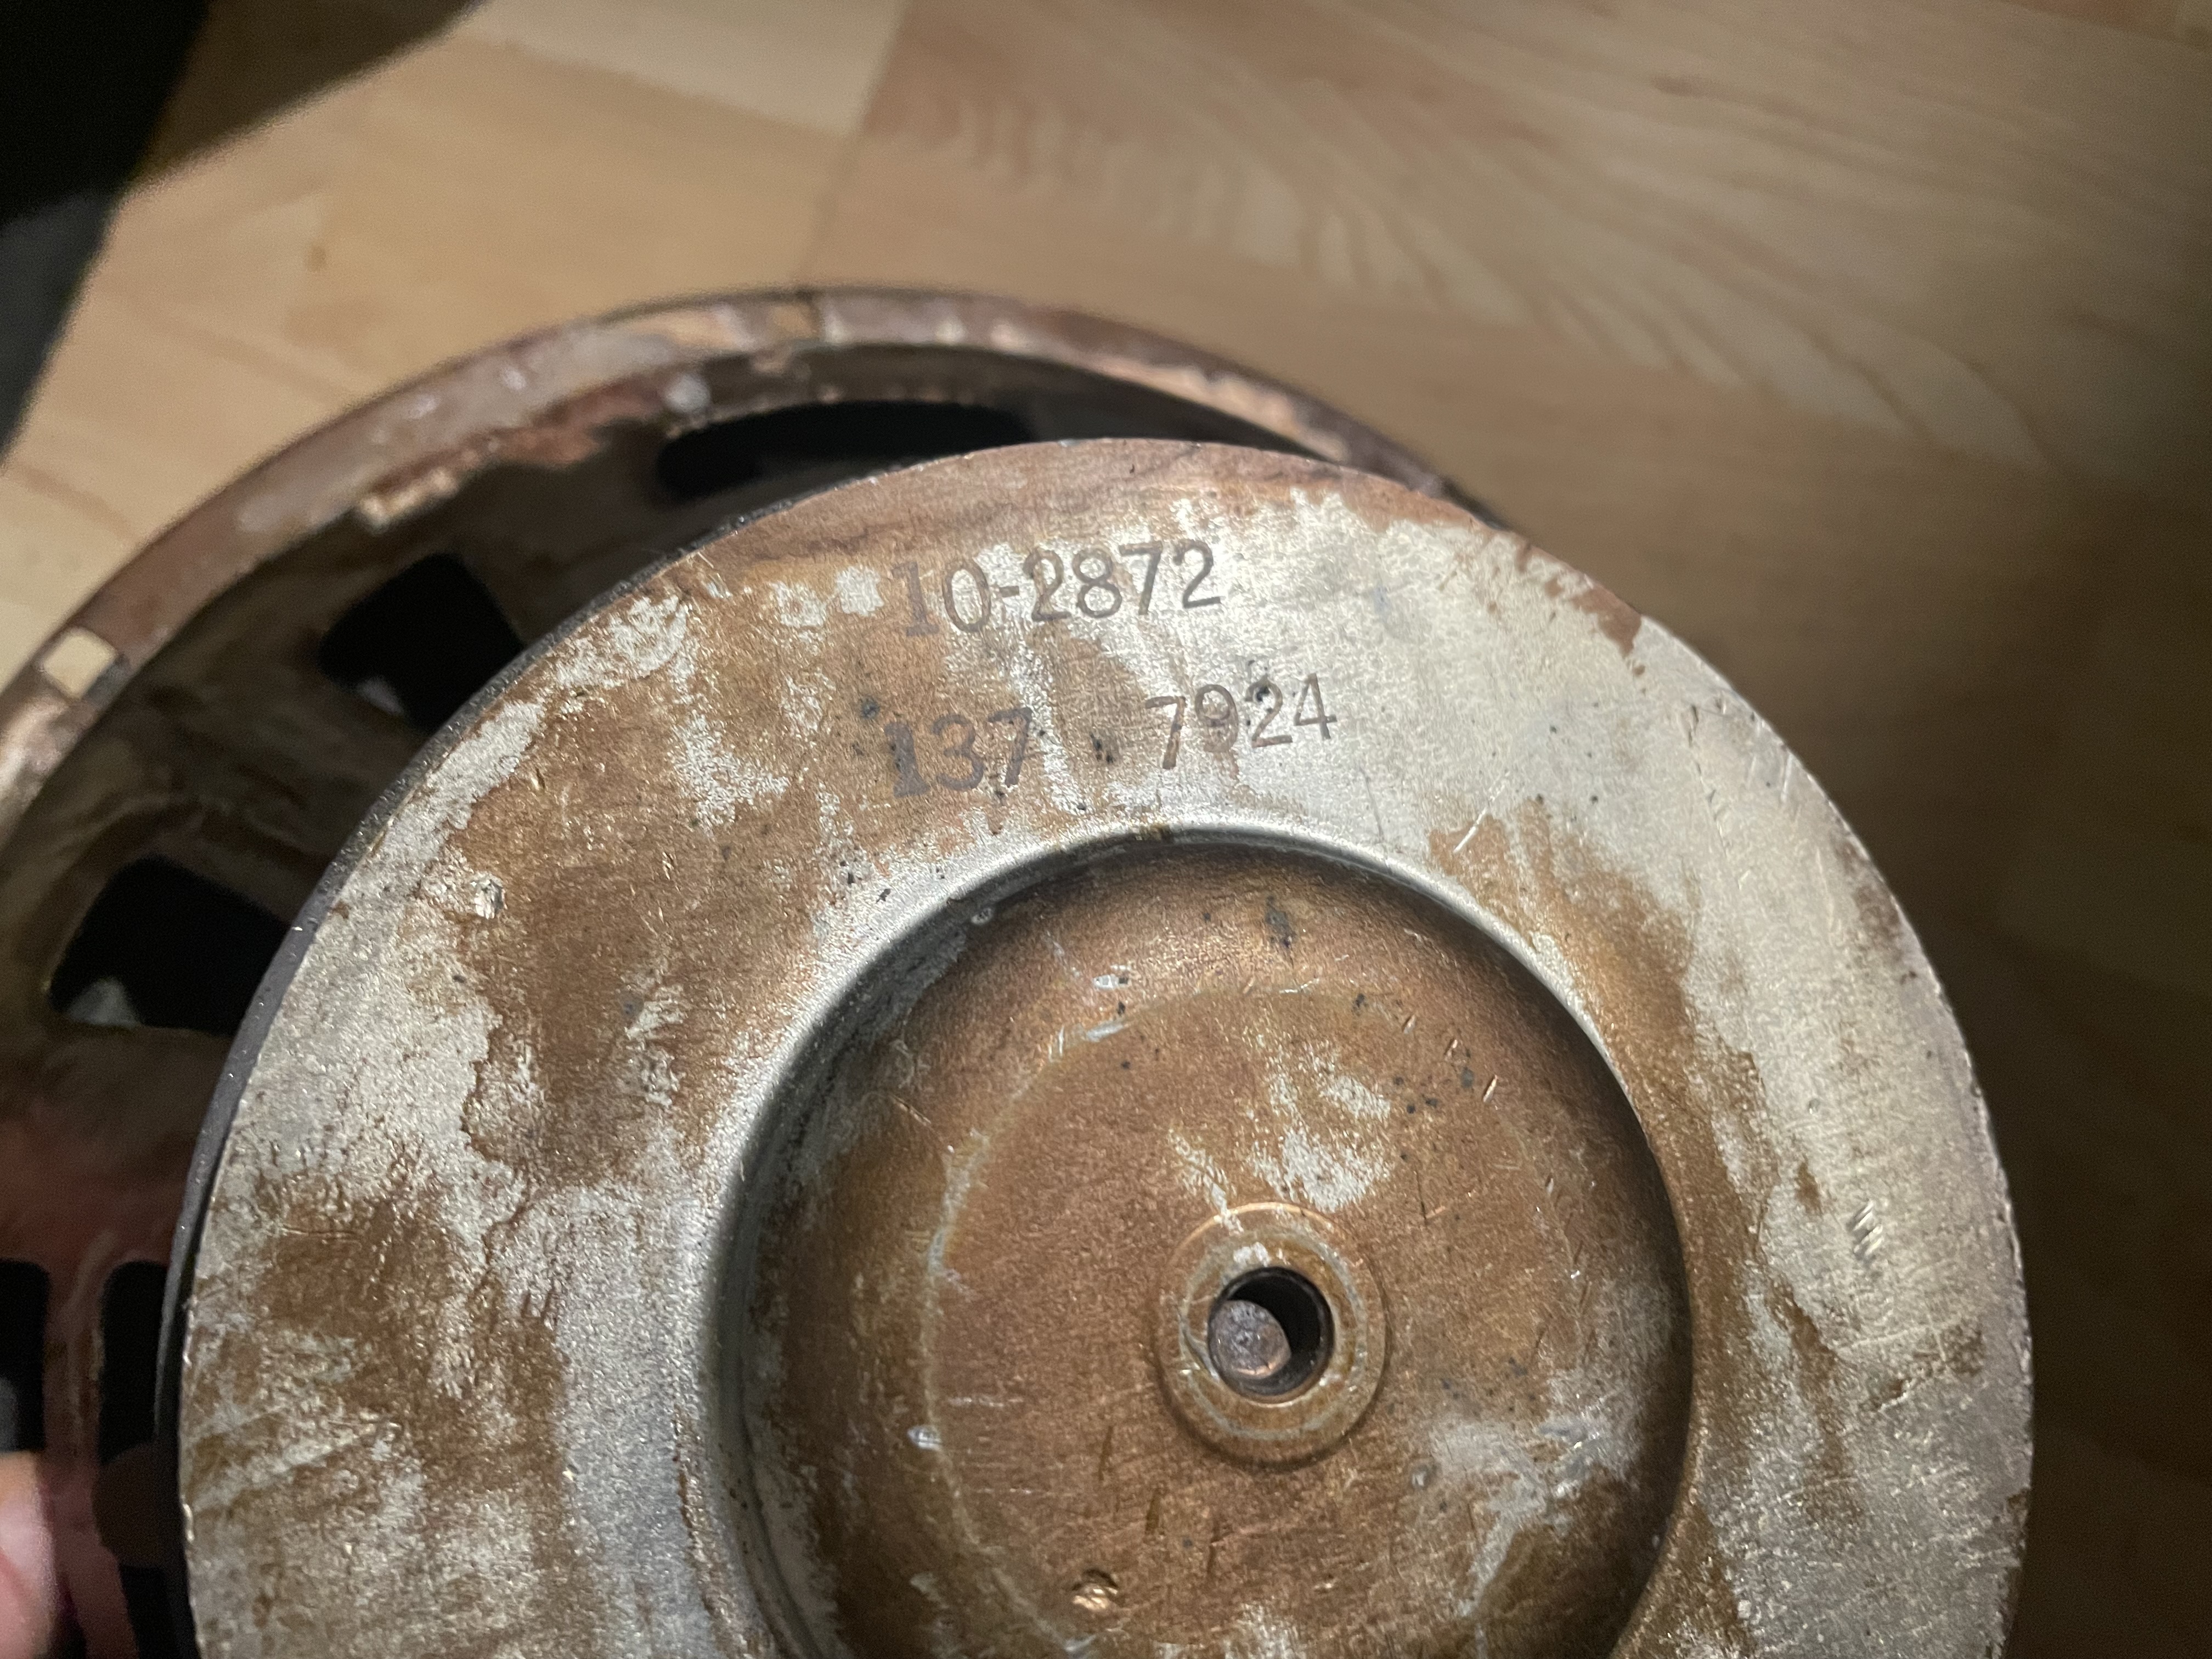
1980 and by dating components inside and from the markings from those who built it, this amp was definitely made in 1979.
Now Polytone amps are known for having a BIG sound out of a small package, so a 4x10 Polytone is a little unusual. I have the Model 104, which
also came in a 2x12 configuration and I believe a version with one 12" speaker and two 8" speakers. The Model 104 is most associated with George Benson, and
it can be heard on his hit tune called Breezin' released in 1976. The version he used on that tune was a 2x12. Anyway, I'm not sure of the actual wattage...
I think it's something like 220-ish watts, and one thing for sure is it's LOUD!
What's most interesting about the Model 104 is the very unique Harmonic Divider circuit,
which is essentially an LFO section that modulates the sound for a vibrato-tremolo effect but also does some interesting frequency seperation,
splitting the lows & highs and sending each to its own power amp for a stereo sound. It's very unique, and with the footswitch (which I had to
make), more interesting options are available. You can get something similar to a Magnatone vibrato to a tremolo-ish sound. You can also turn off
the LFO and just use it as a type of filter effect that is not real blatant but still interesting. The reverb tank is made by Accutronics, and the
reverb sounds pretty good to my ears. The Octave Divider is like having a built-in octave pedal, with one and two octaves lower being available, but only
via the footswitch. There is also what is essentially a tone control on the output of the octave section. See links at bottom of this page for how
I made my own footswitch. The tone controls are simple, just a bass and a treble control. These are essentially baxandall EQ circuits and they work well.
It would have been nice if all I had to do was turn on the amp and the rest was history, but of course NONE of the effects worked and one of the
power amps was not working either. So I had to go thru a lengthy month long process to get it repaired, which also kind of forced me to draw the PCB in
AutoCAD so I could track what was connected to what. For the first time ever in my decades of DIY stuff I actually paid for the schematics because
NONE were to be found online and the circuitry was complex enough to warrant it. I eventually got everything working and I learned a few things in the process.
Fortunately, the power amp which was
not working only needed to be re-capped to fix it. The other pain in the rear was the amount of corrosion on all of the metal parts. The amp had
apparently spent a number of years in Hawaii. The salt air rusted the heck out of any steel parts and the aluminum chassis which was exposed had
bad corrosion on it, which kind of forced to me to do remove all of it so it would not keep on corroding the aluminum. Even though I live in a very dry
desert I still wanted to put a stop to any further corrosion. The graphics were flaking off and it was essentially ruined, so I found a way to fix
it with some new graphics. In spite of all the rust I was able to remove most of it and make those parts of the amp look like it was just normal aging.
Honestly, it was one of the toughest repair/restoration jobs I have ever done but the end result is satisfying. Thanks to those of you at the ssguitar.com forum
that helped me to figure it all out.
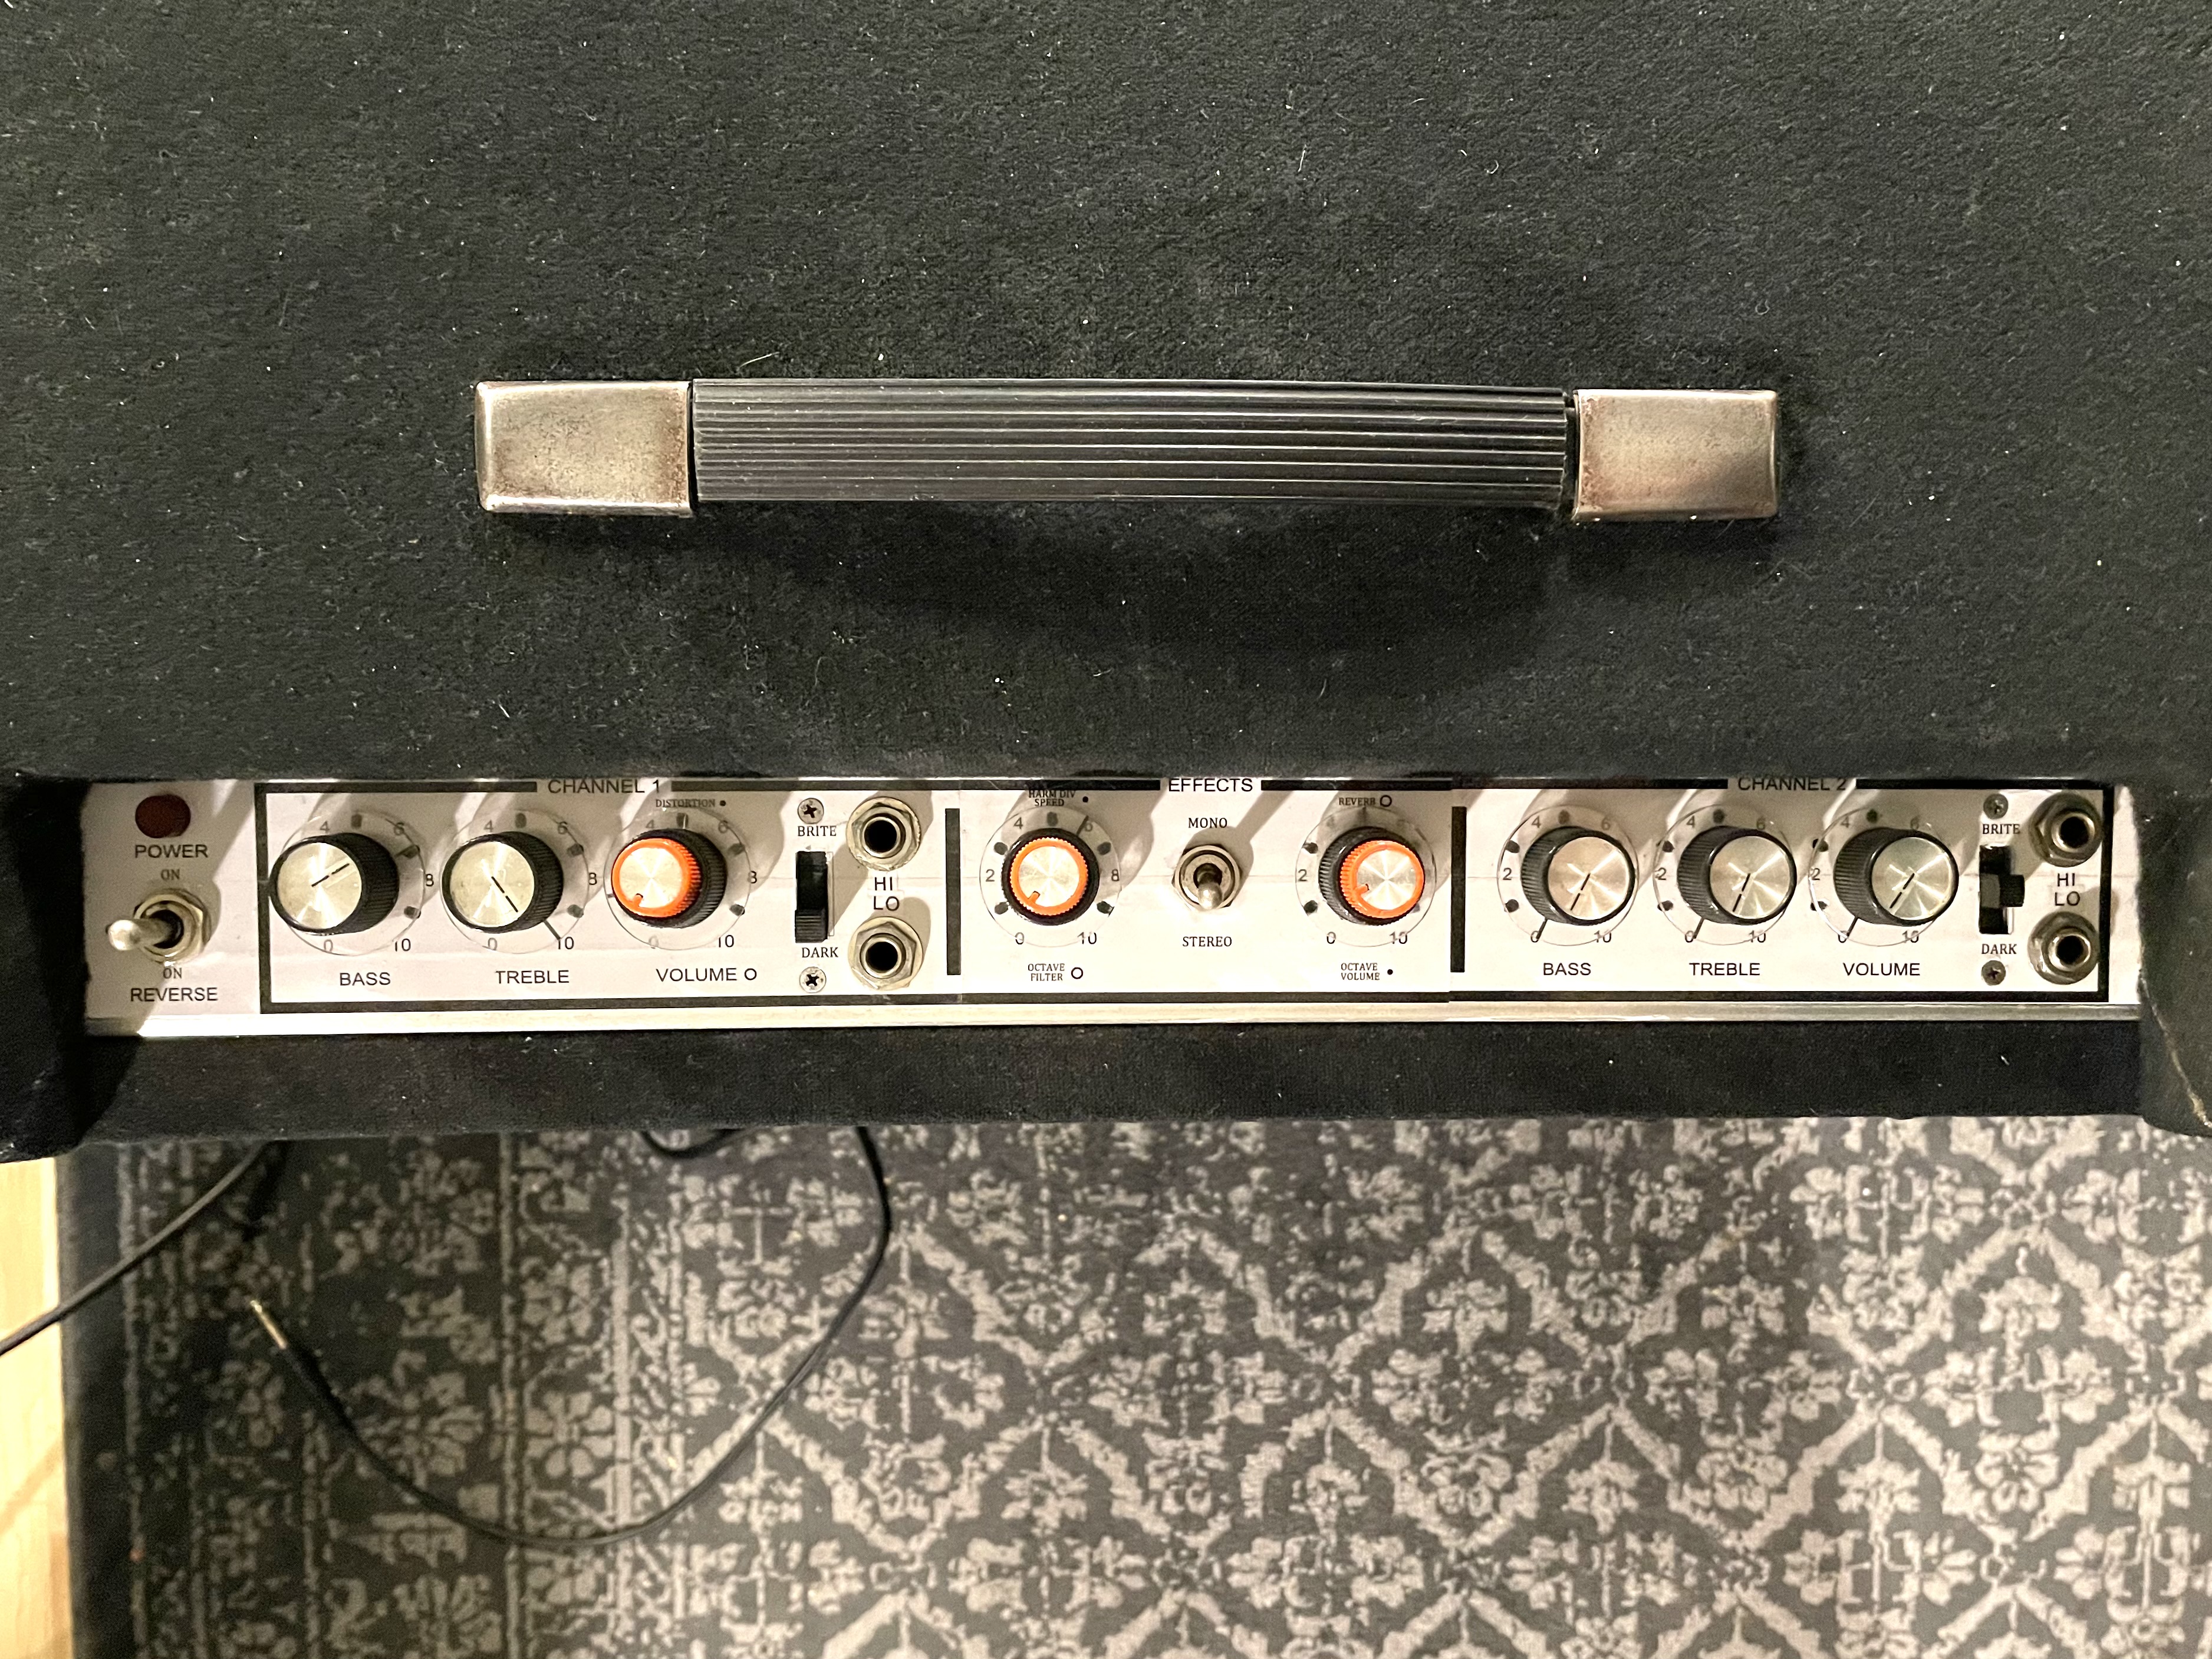
Below are a few details on this interesting amplifier which was "made by musicians for musicians".
 |
Here is the amp in the condition it was in when I acquired it. This picture makes it look a lot nicer than it actually was. There was a tremendous amount of rust and corrosion on ALL of the metal parts - the jacks, corners, etc. - even getting the fuse out of the fuse holder was a real challenge! It was stuck together with corrosion and it's a good thing that I checked that as it had a 20 amp fuse in it. It only needs to be 4 amps. |
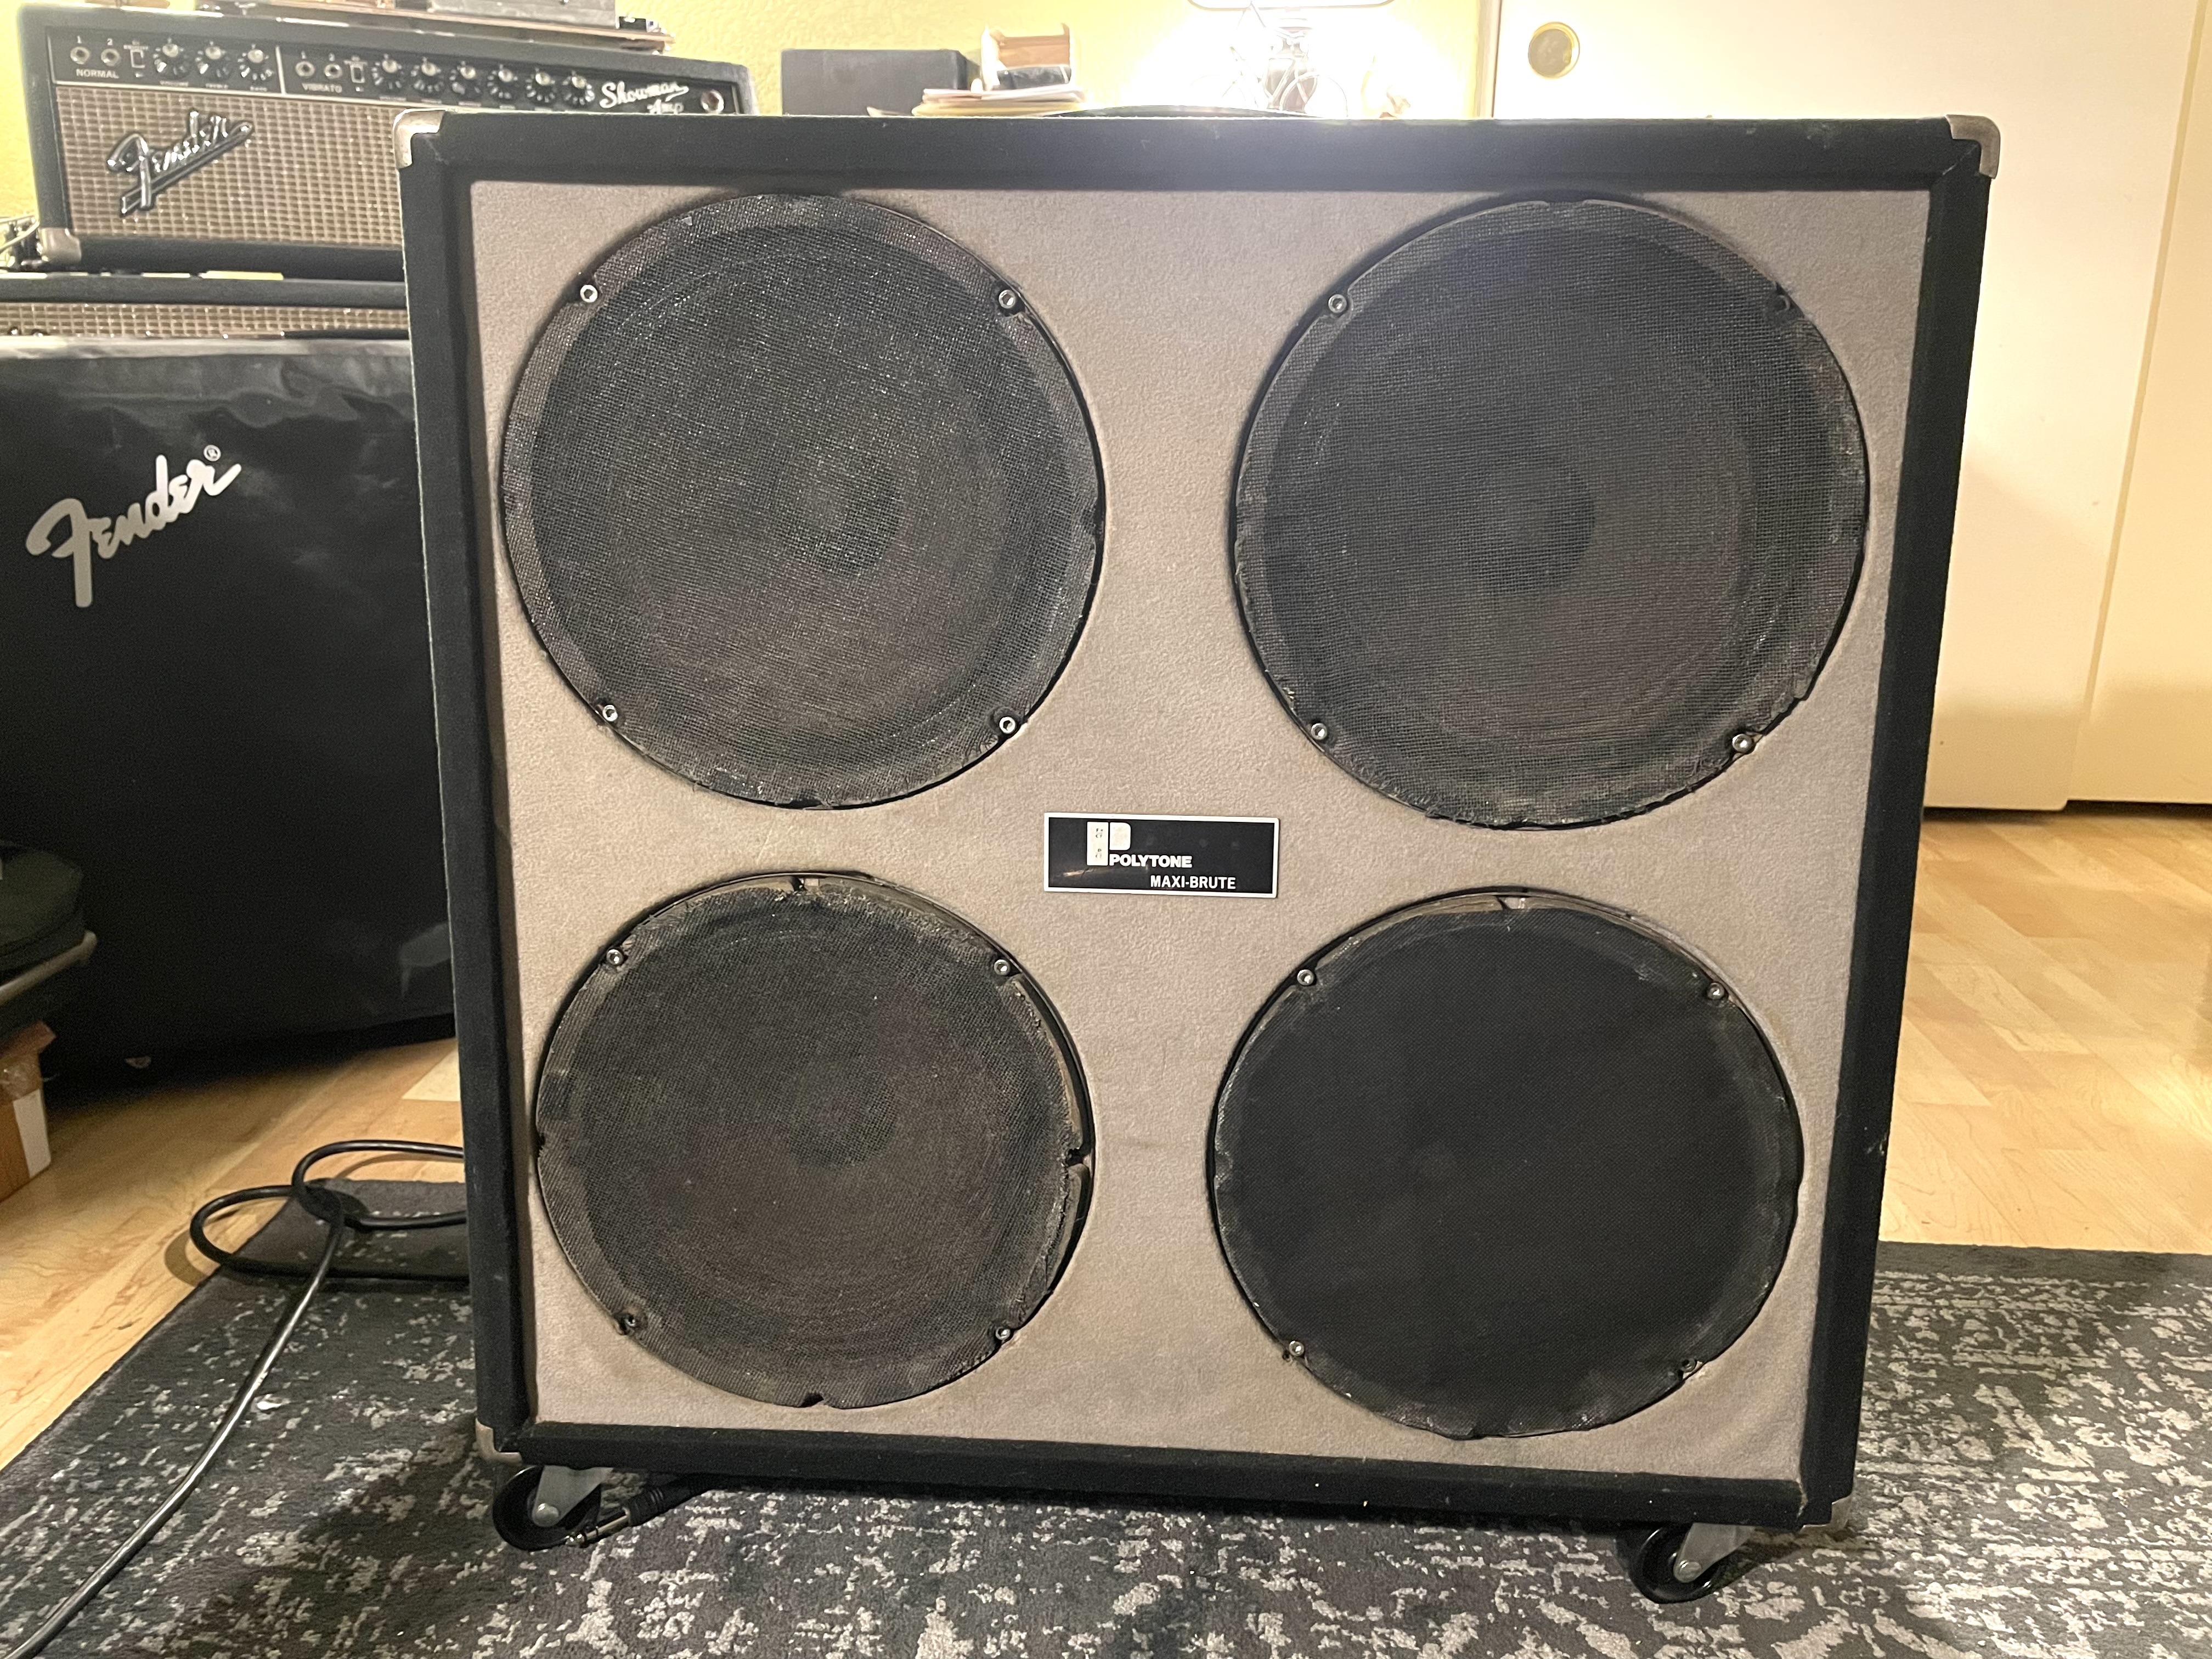 |
Here is the same amp after I had cleaned it up and made some various repairs. There would have originally been a foam speaker baffle cover instead of the more traditional grille cloth, but that apparently disintegrated long ago. I'm still trying to figure out how I might be able to do some sort of speaker grille cloth covering in the shallow area there is to put one. There is only about 3/8" of depth to work with. On each speaker is some type of tough cloth mesh that protects the speaker cones. It almost looks like old school non-metallic window screen material. |
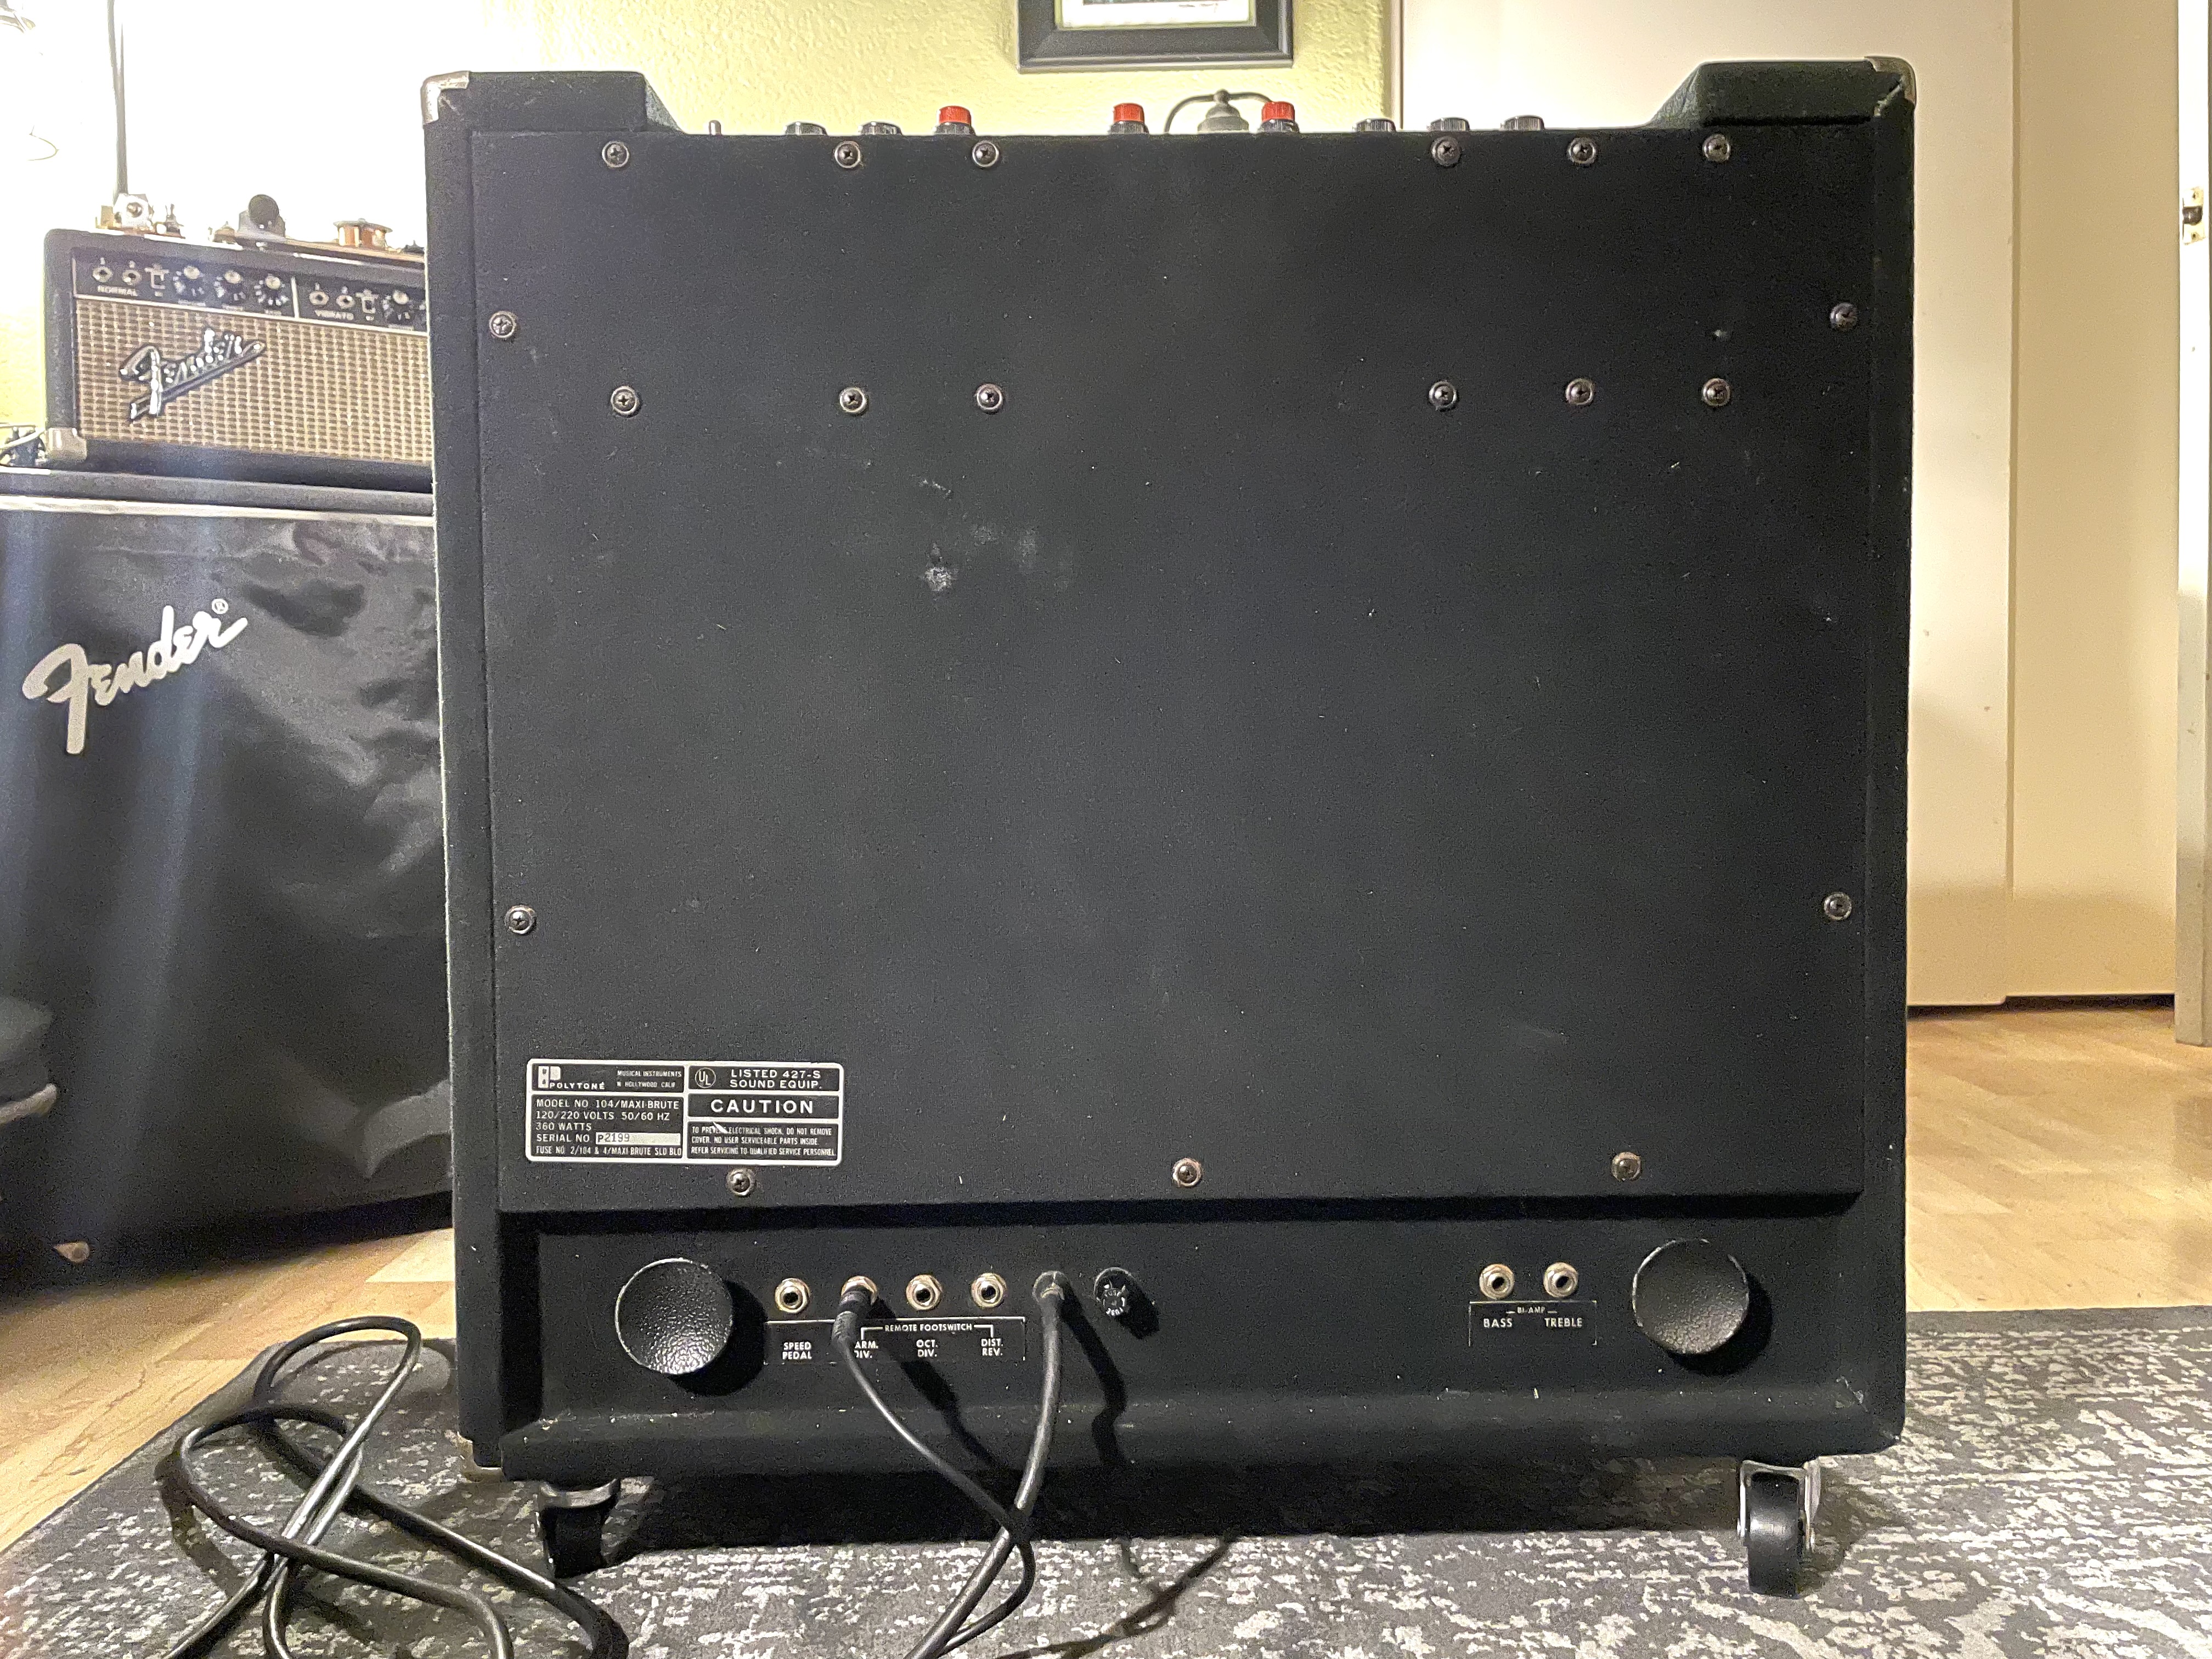 |
This is the back. The jacks for the footswitches are at lower left and the bi amp jacks are at lower right. The name plate says it's 360 watts but that is total power consumption. I think power output is closer to around 200-220 watts. I got some replacement casters, they were missing. Note that Fender casters will NOT work on the Polytone caster sockets - they will fit but fall out for a good inch or so because the retention ring on them is too high. It needs to be very near the wheel for them to stay in. It took a little hunting but I found some suitable replacements on ebay. |
 |
Here the back has been removed. You can see it's thoroughly insulated and there are two power amps at the bottom of the cabinet. They barely fit in there with those tall 7300uF filter capacitors. These capacitors had to be replaced. More on that below. The chassis is held in place by two long bolts on each end, which are tapped into the top of the cabinet. |
 |
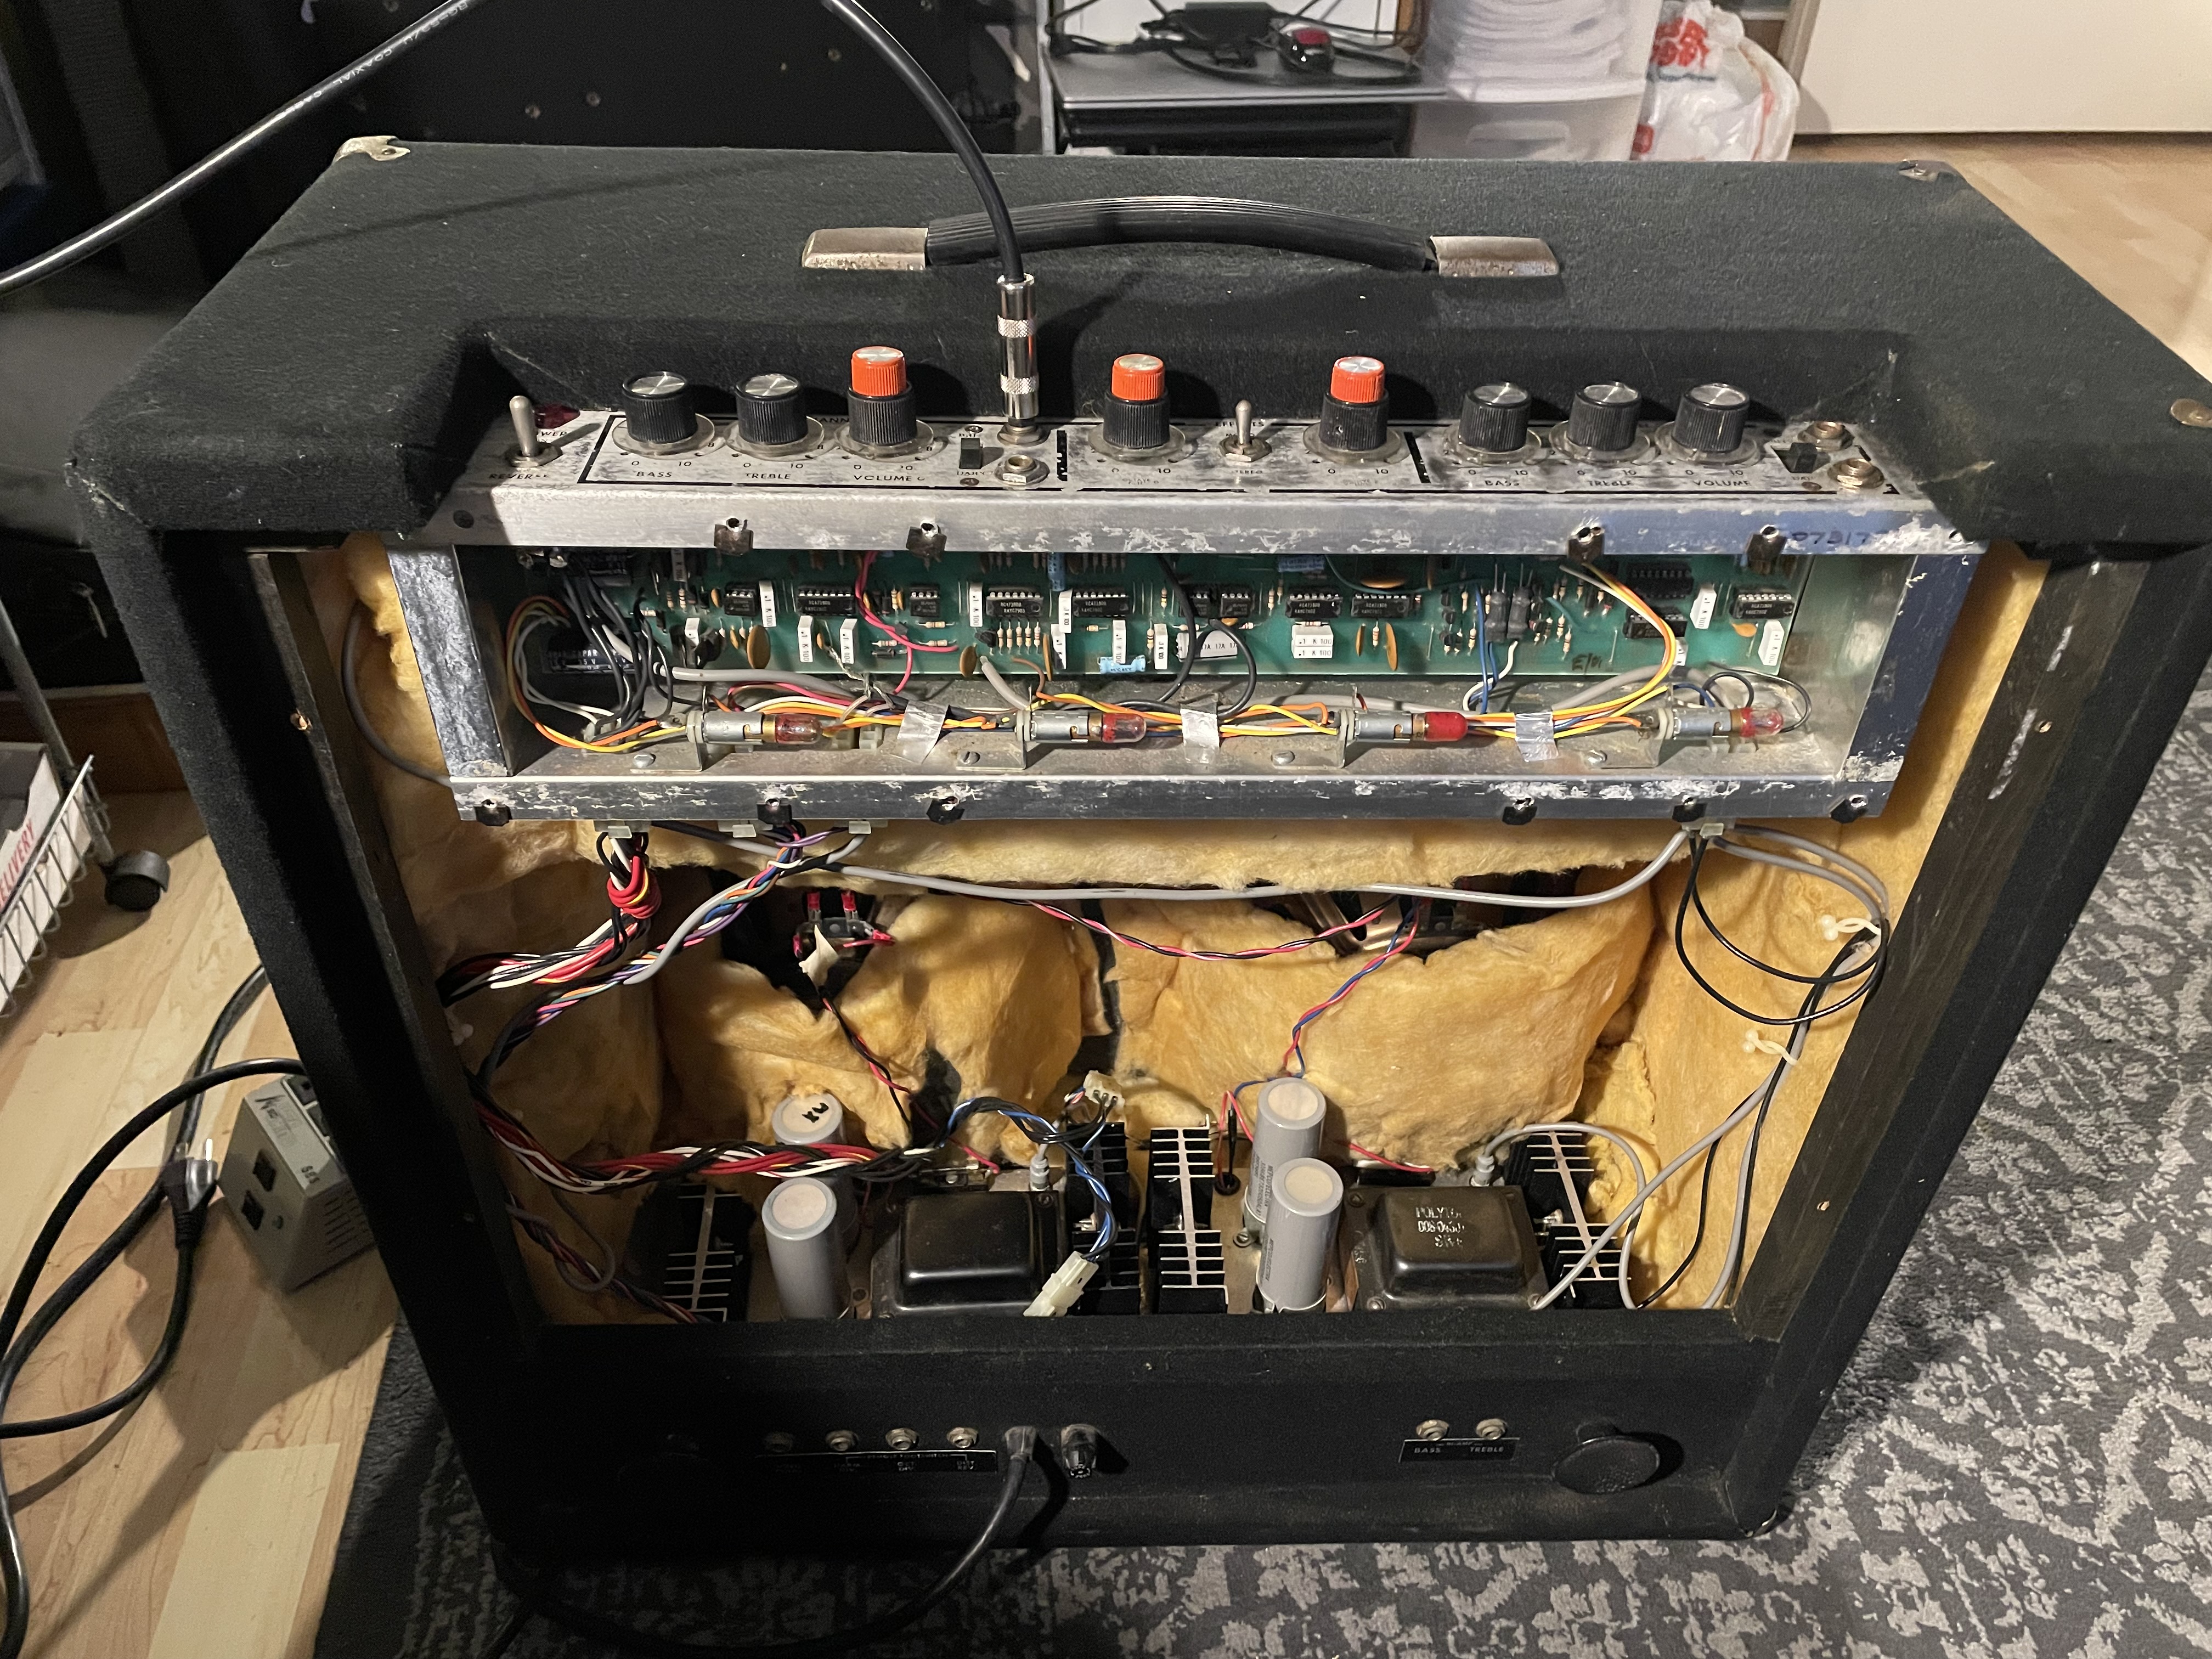
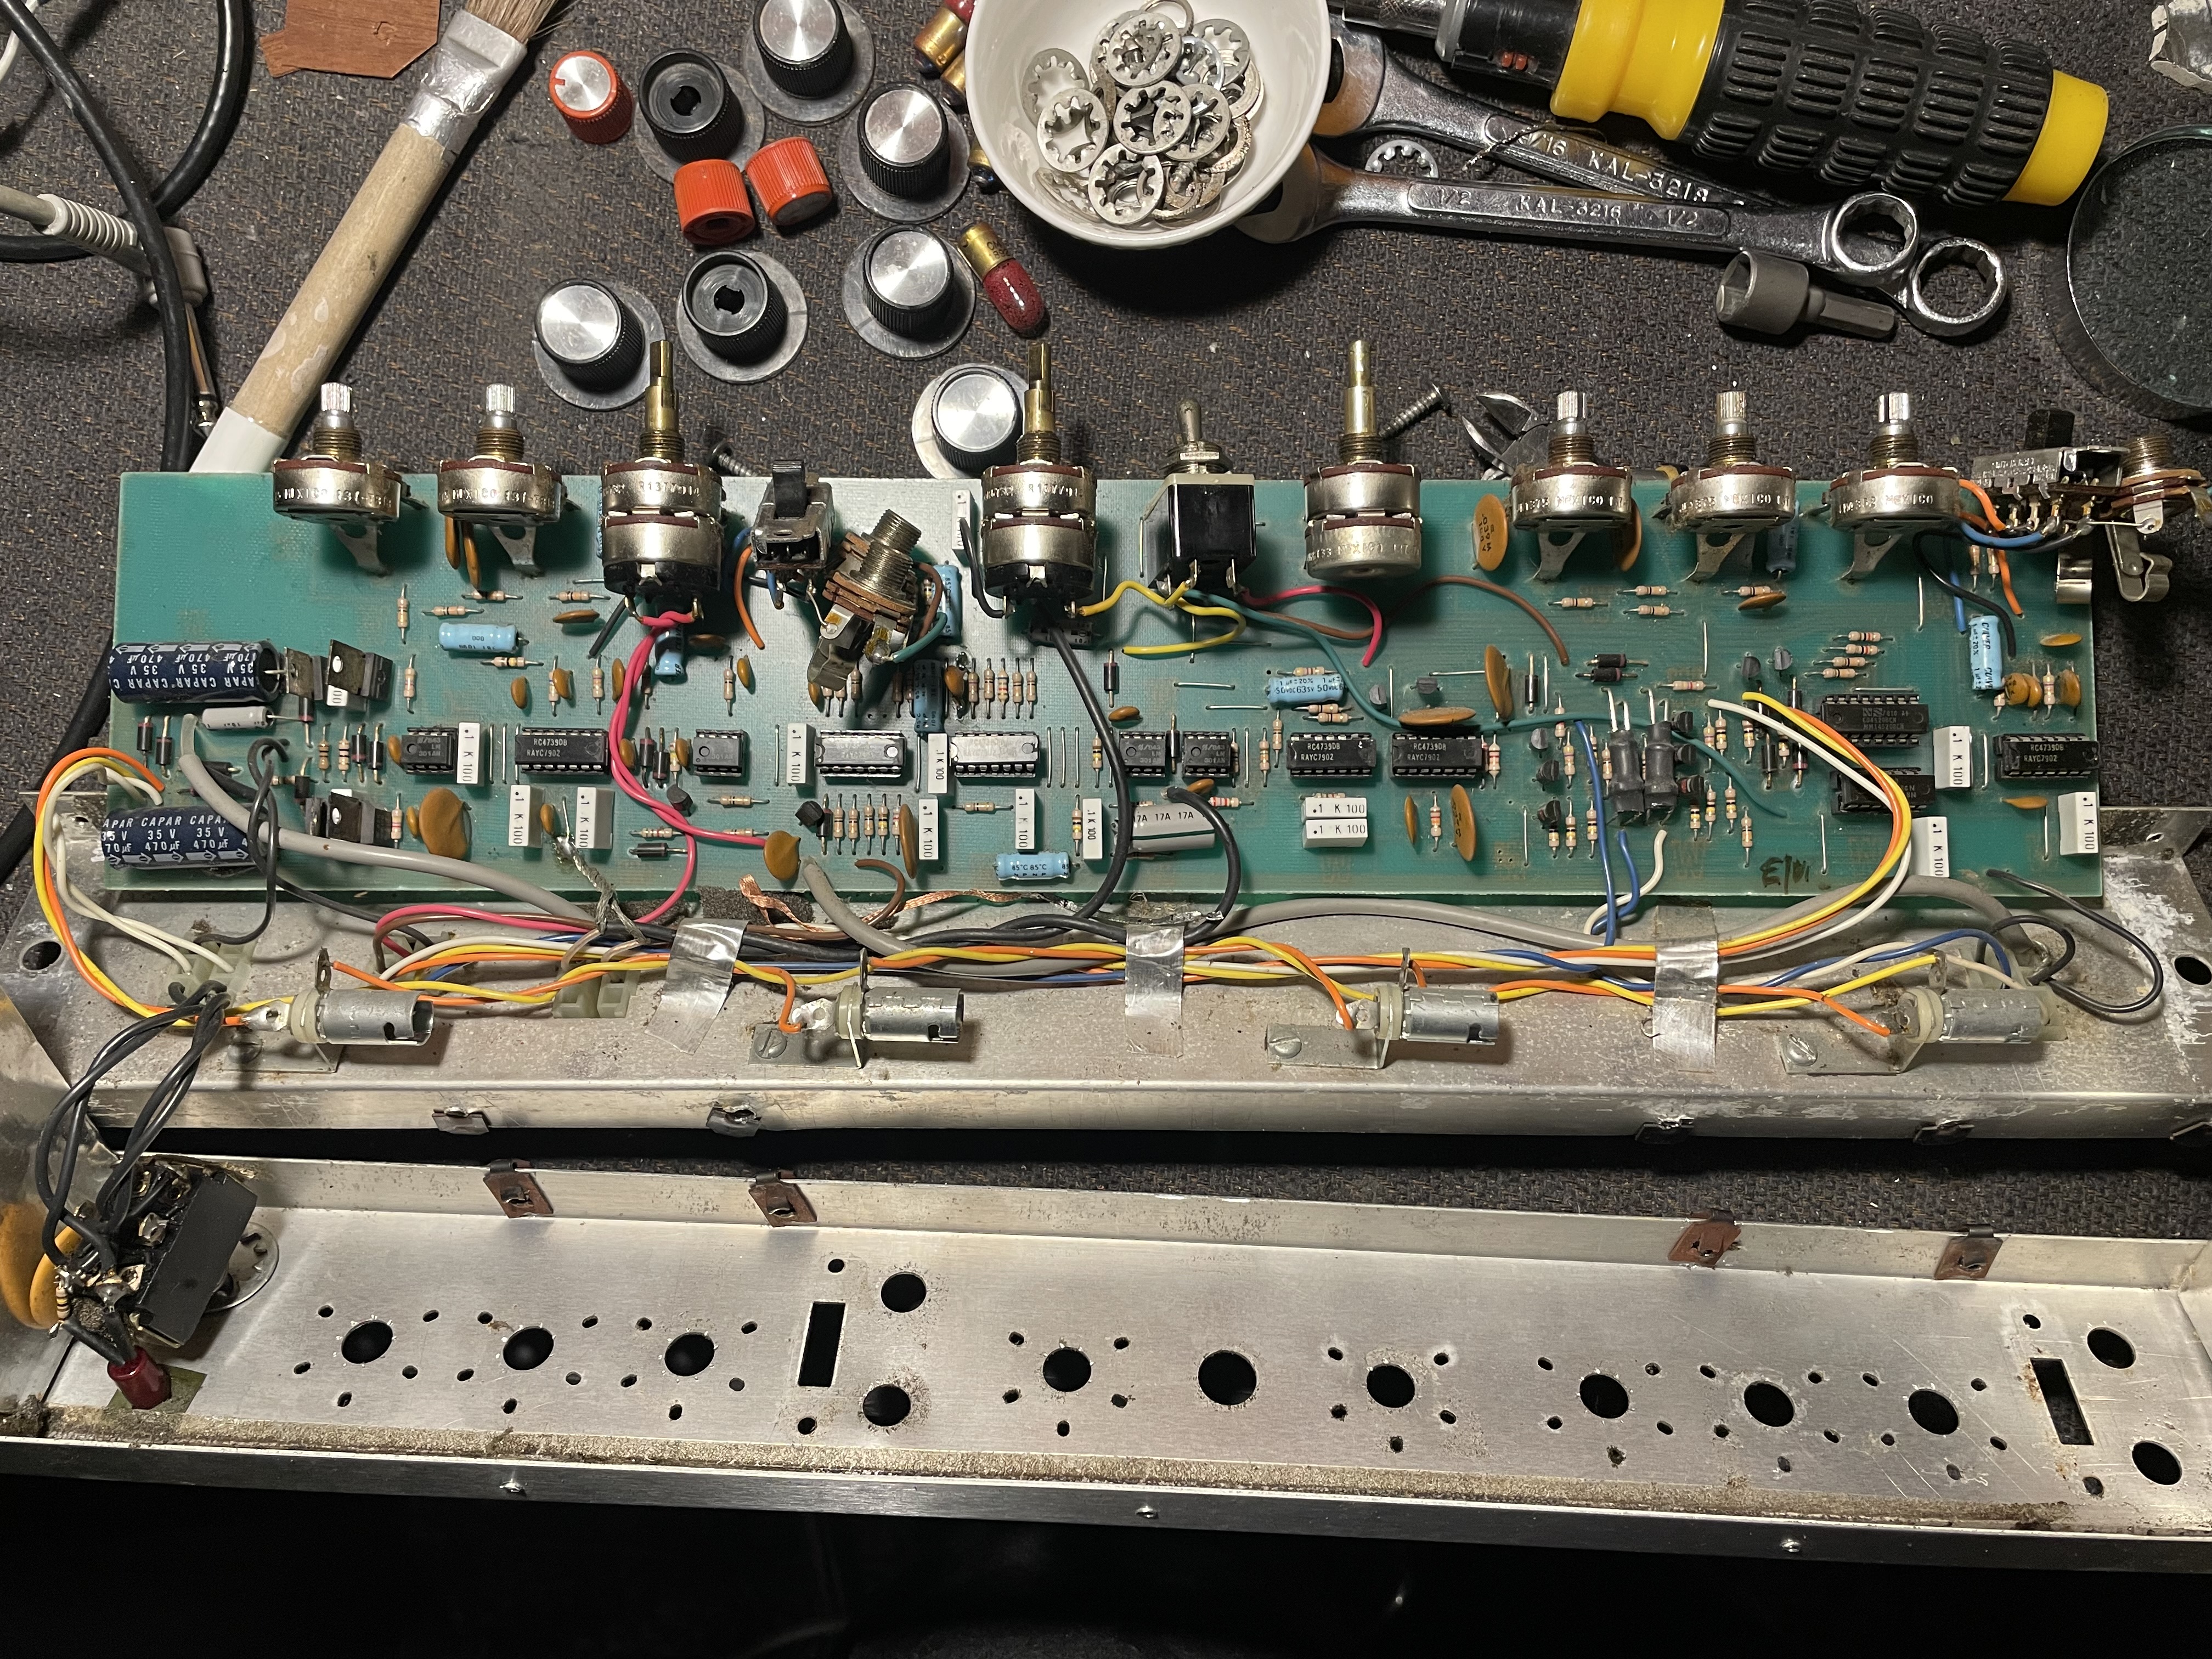
Chassis removed from cabinet. This is the component side. |
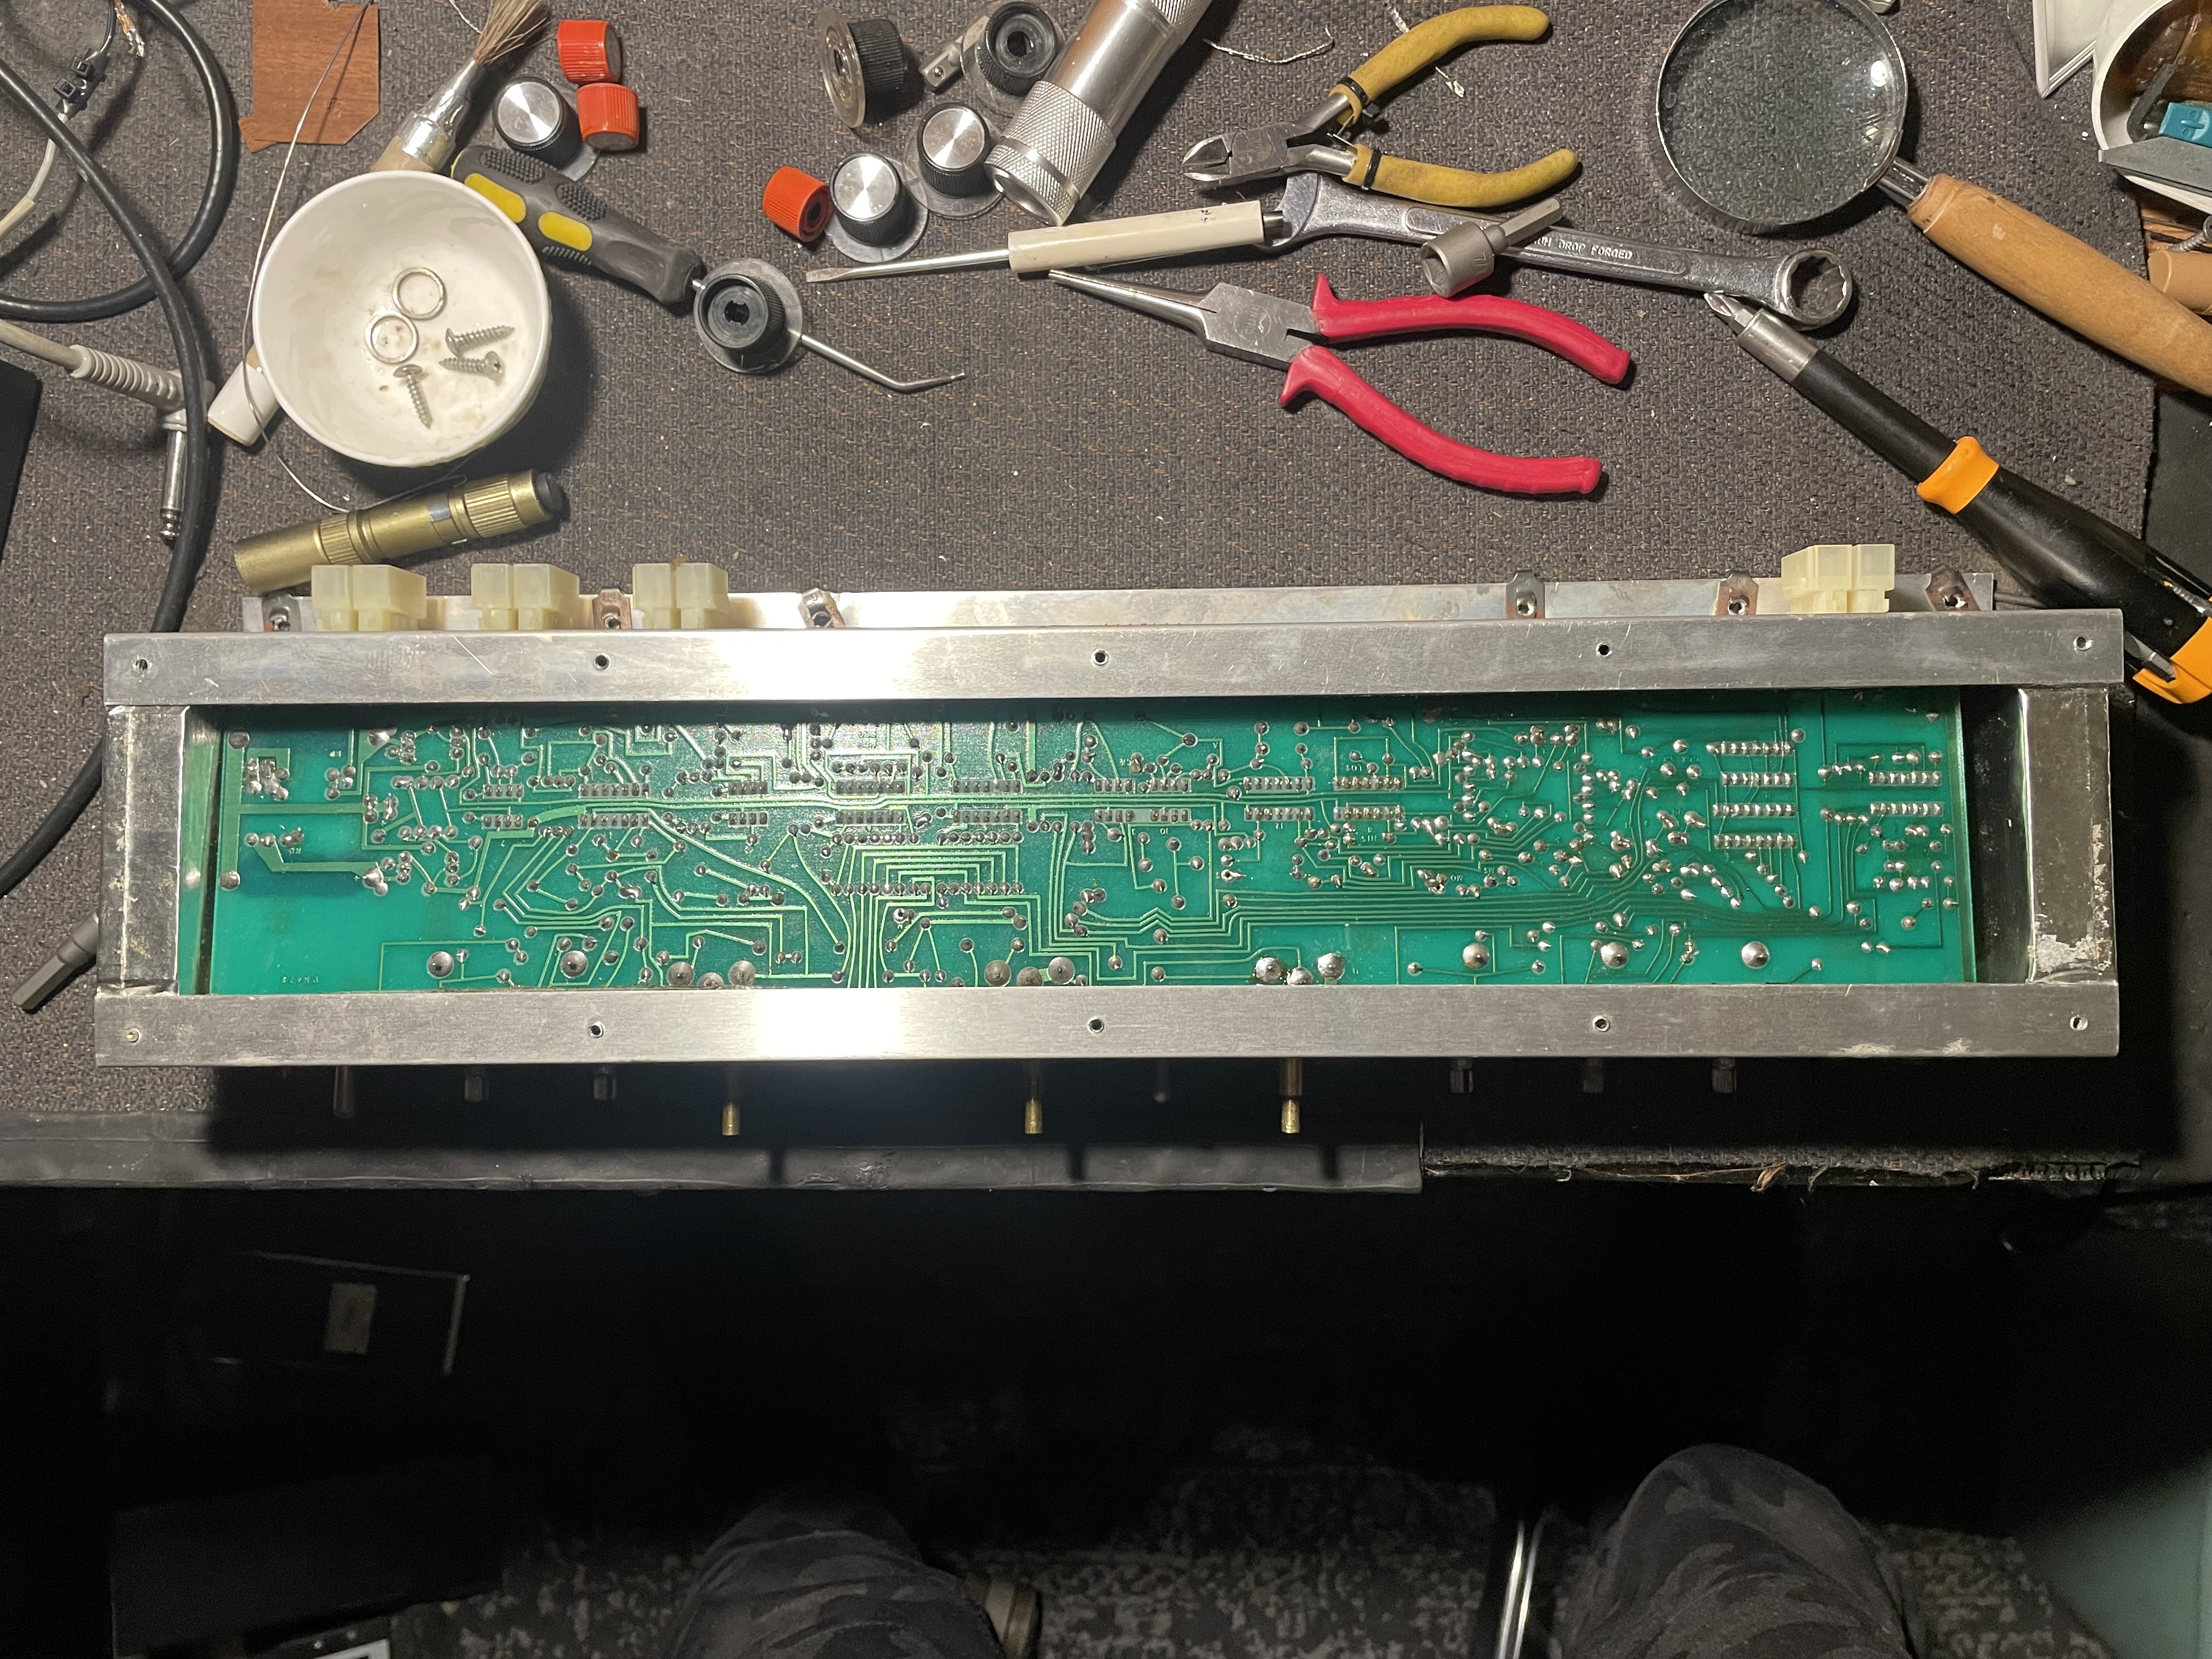 |
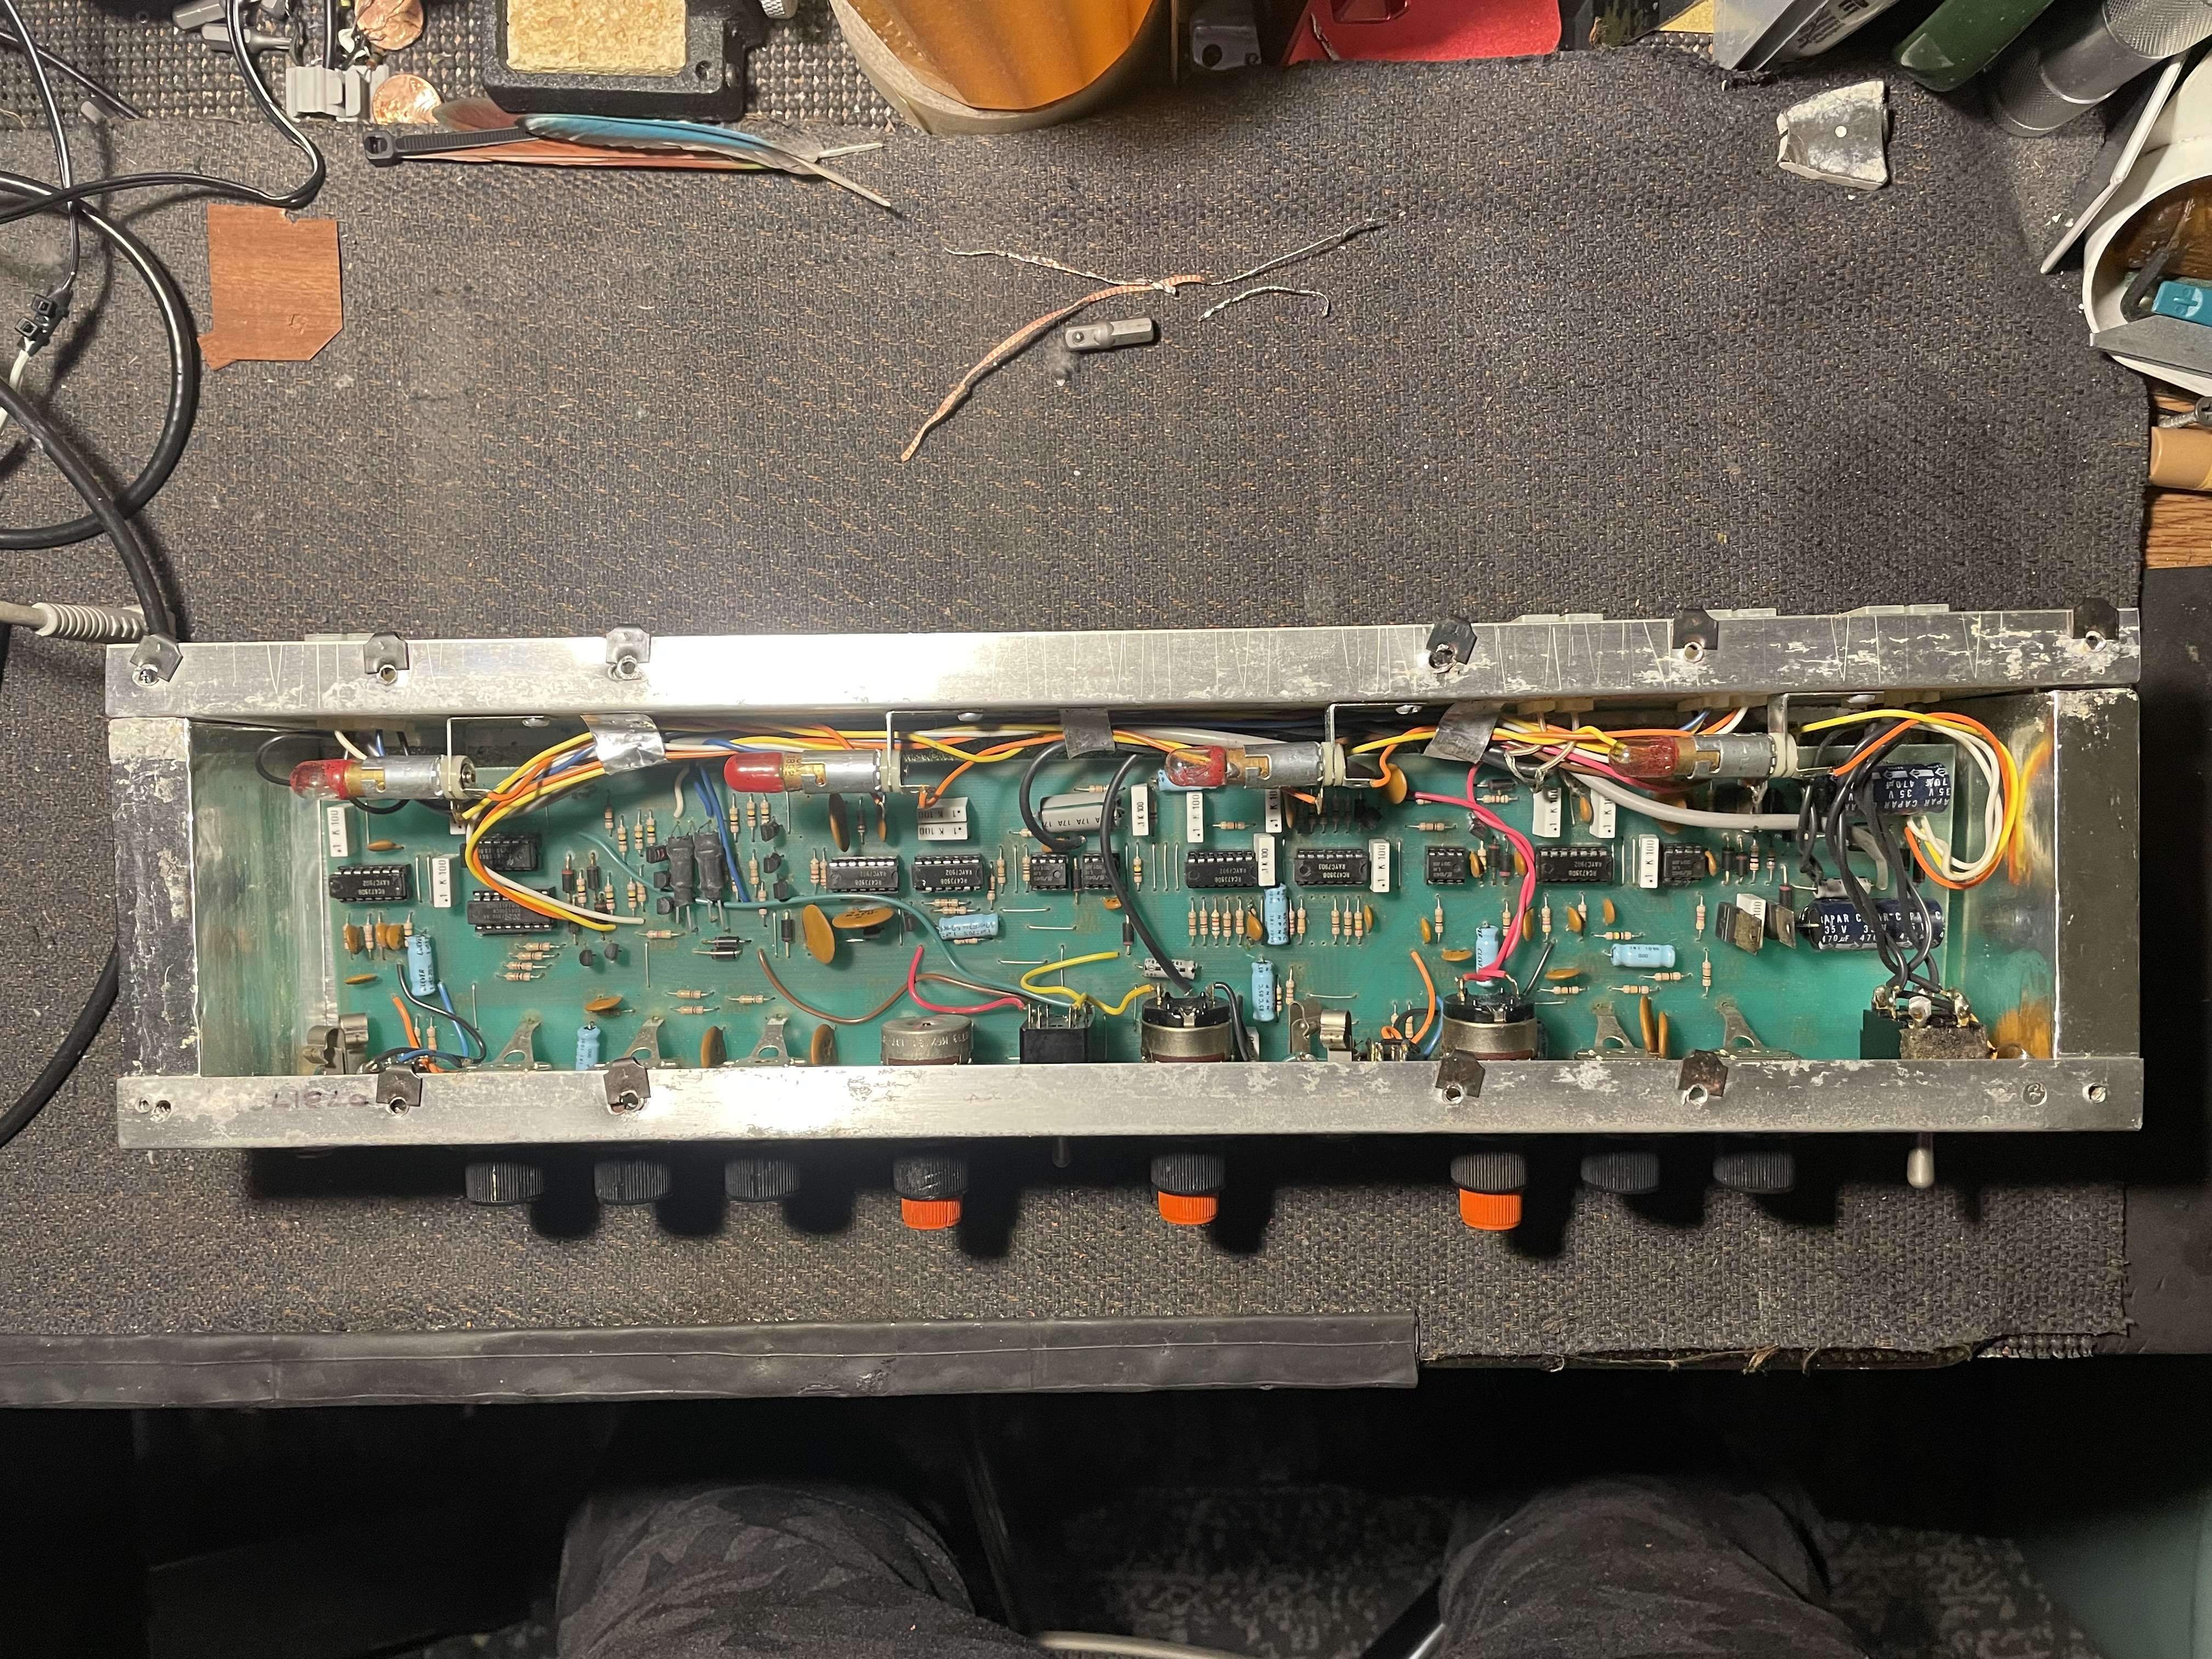
Here is the foil side of the chassis. I intially had to pull the chassis to fix a concentric pot which took a hit and messed up one of the shafts. |
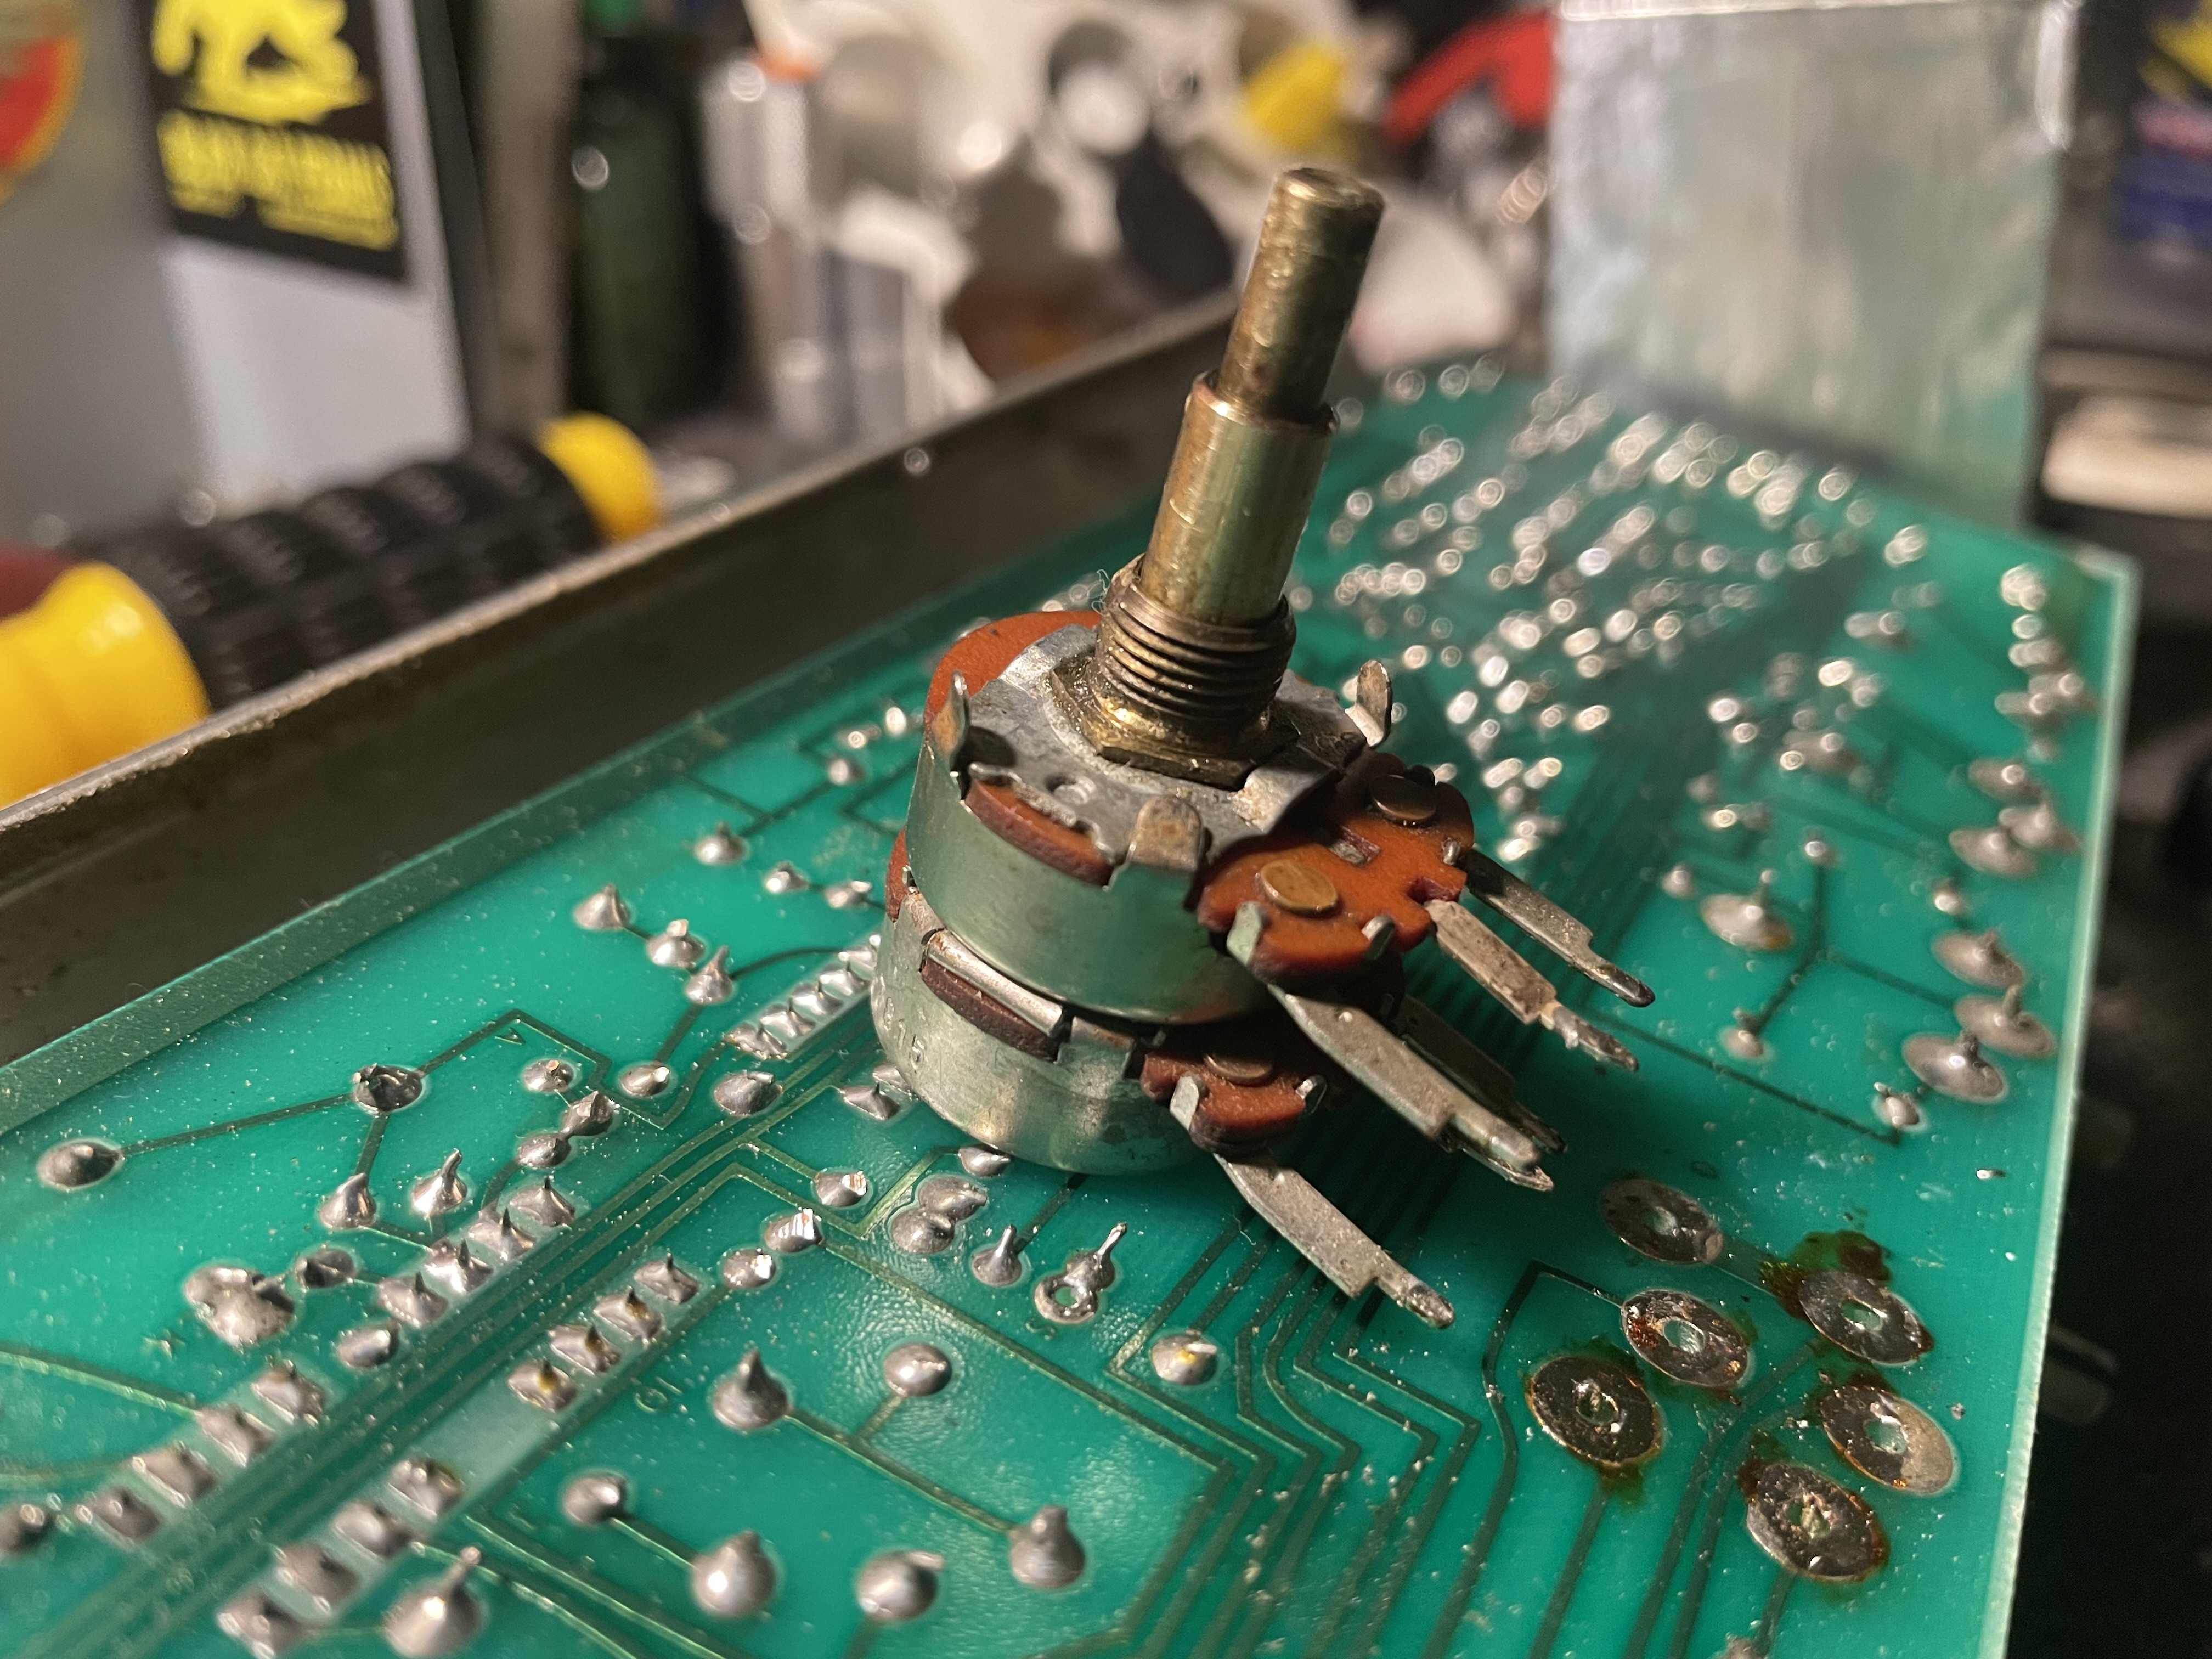 |
Fortunately, I was able to remove the damaged pot, take it apart and repair it. That's a good thing because I would likely never have found a replacement for it! The factory apparently glued the knobs on this particular pot, so the knobs were very difficult to get off. It's different from the other two concentric pots in how the knobs interface, which must be why they glued them on. I modified these two knobs to have grub screws for easy removal. |
 |
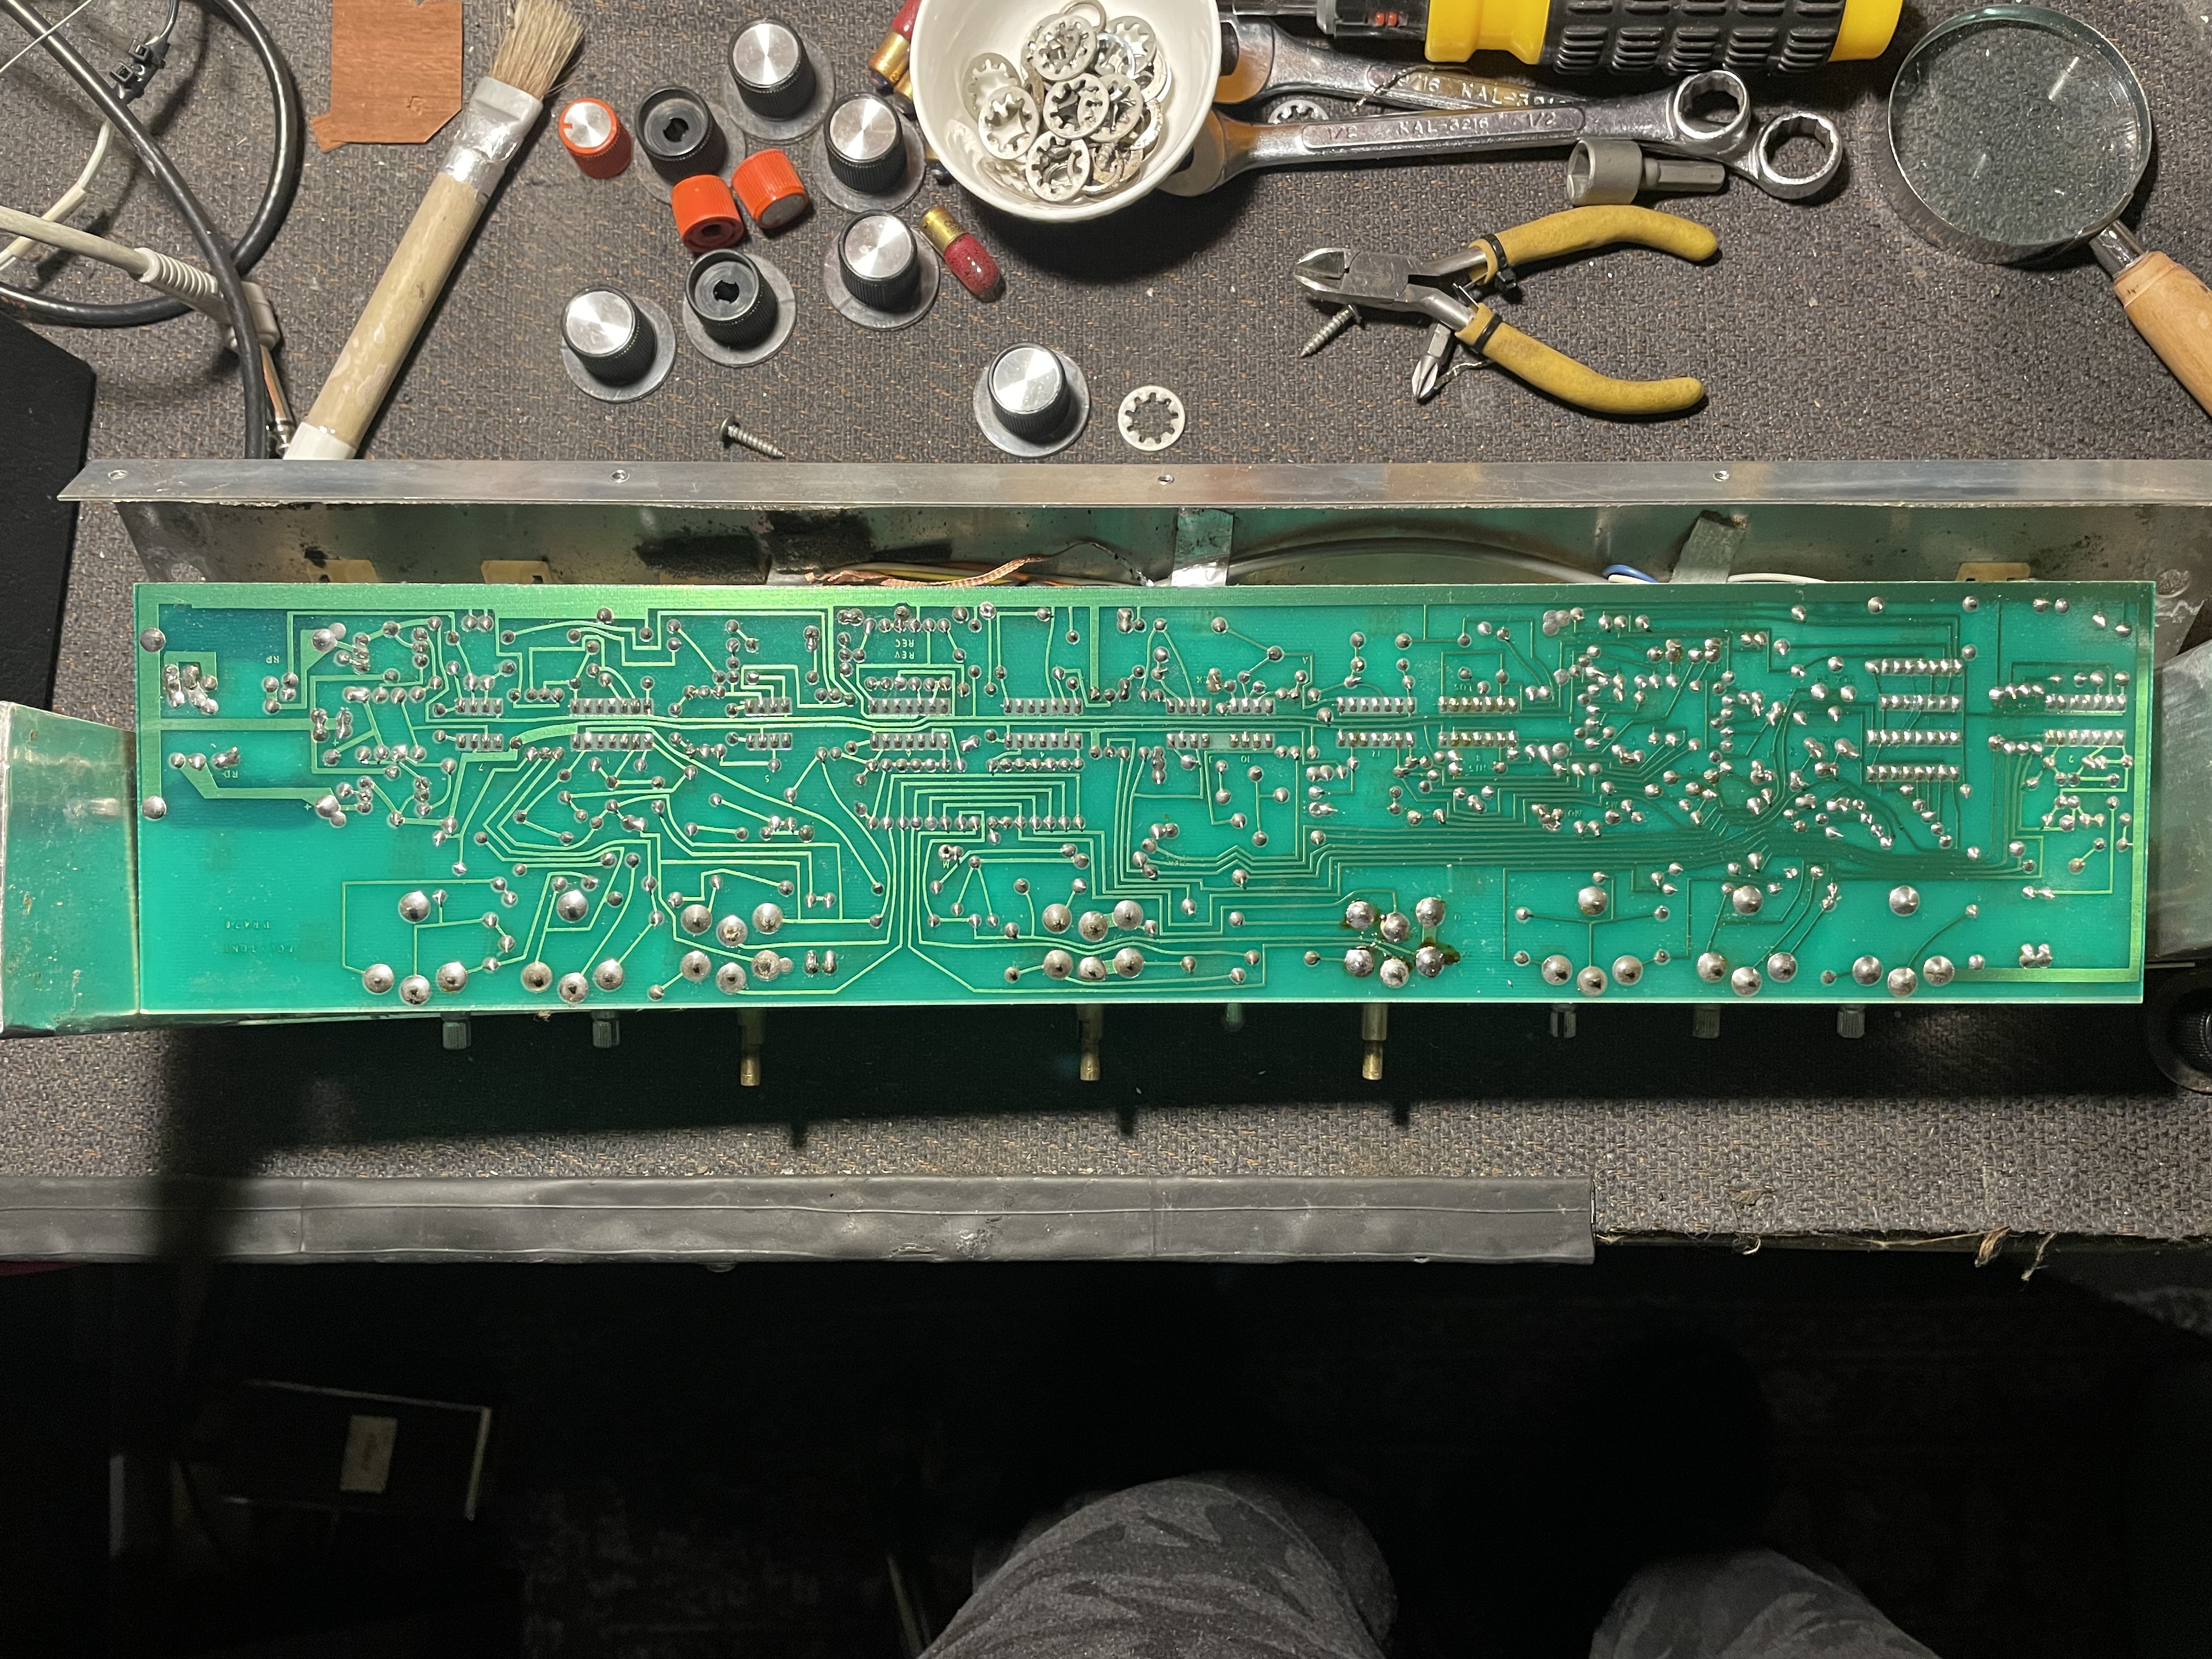
Getting the PCB separated from the chassis wasn't too difficult but getting it back together again was not nearly as easy. Getting the little nuts back on those slide switches was a challenge. |
 |
Completely dismantling the chassis was required so I could get to all of the connections on that damaged dual pot and desolder it from the PCB. |
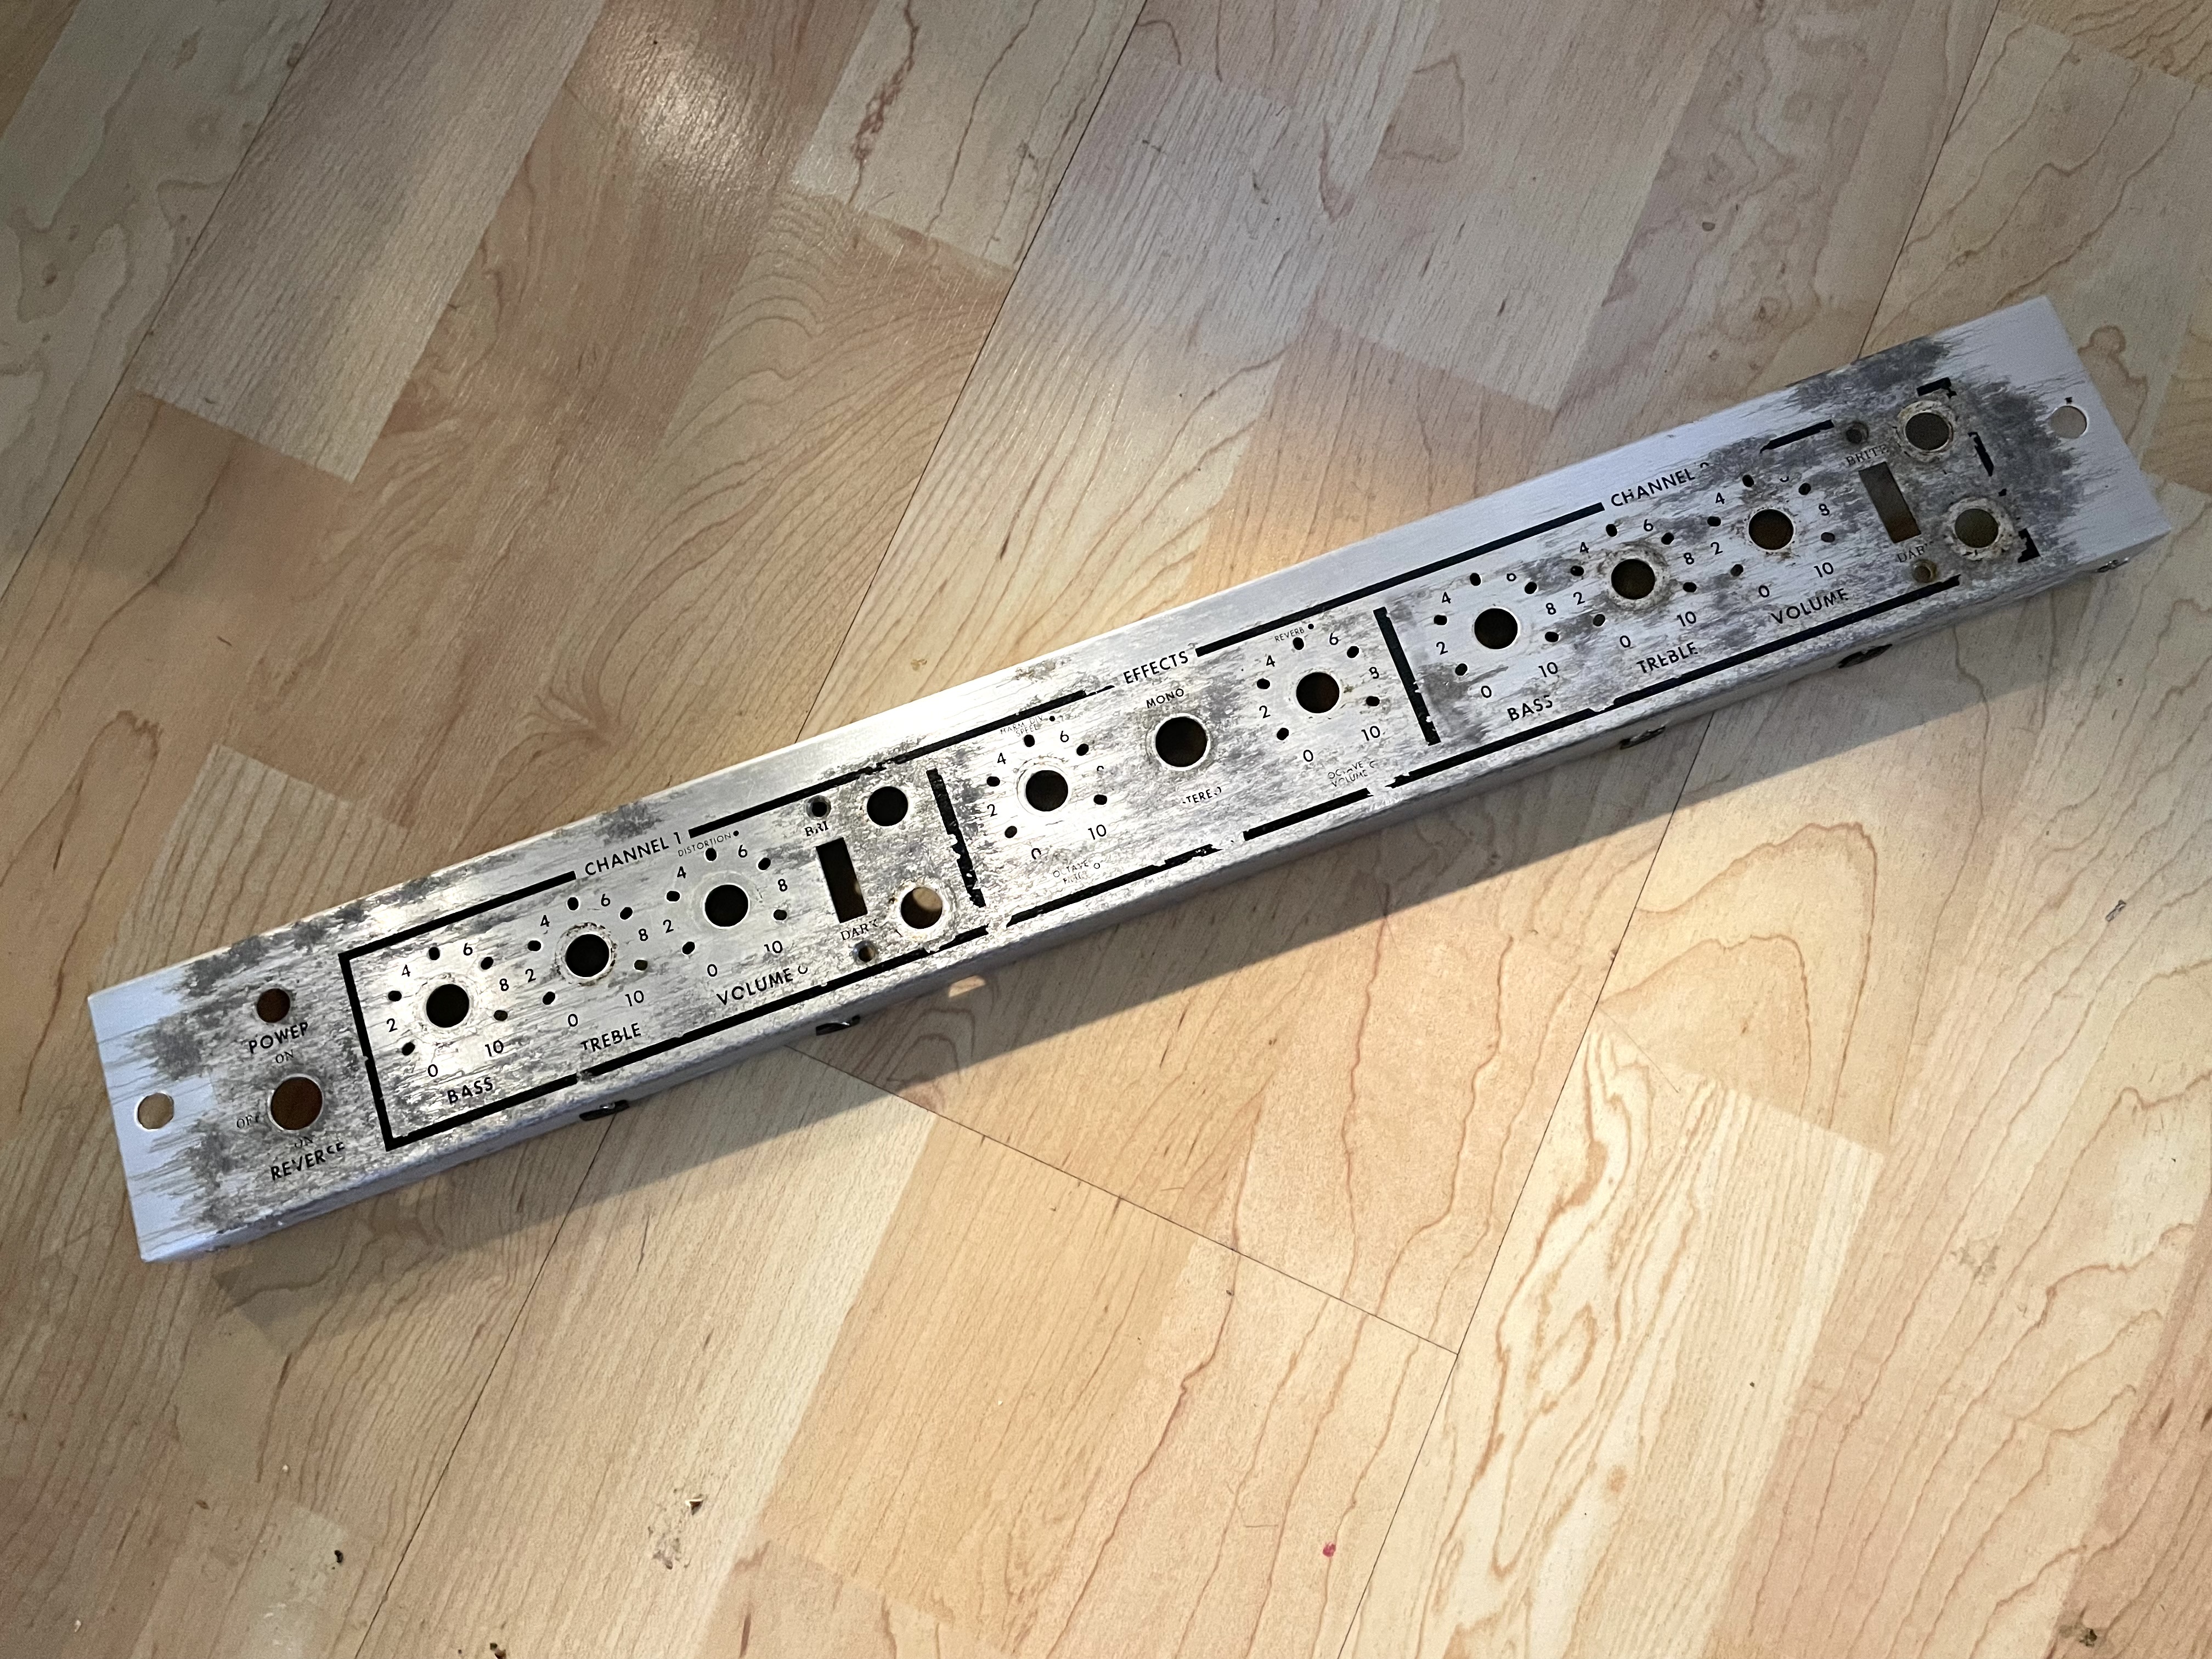 |
Here you can see that the exposed part of the chassis was pretty severely corroded. The graphics were flaking off, and it just looked terrible. I decided to re-do the graphics. |
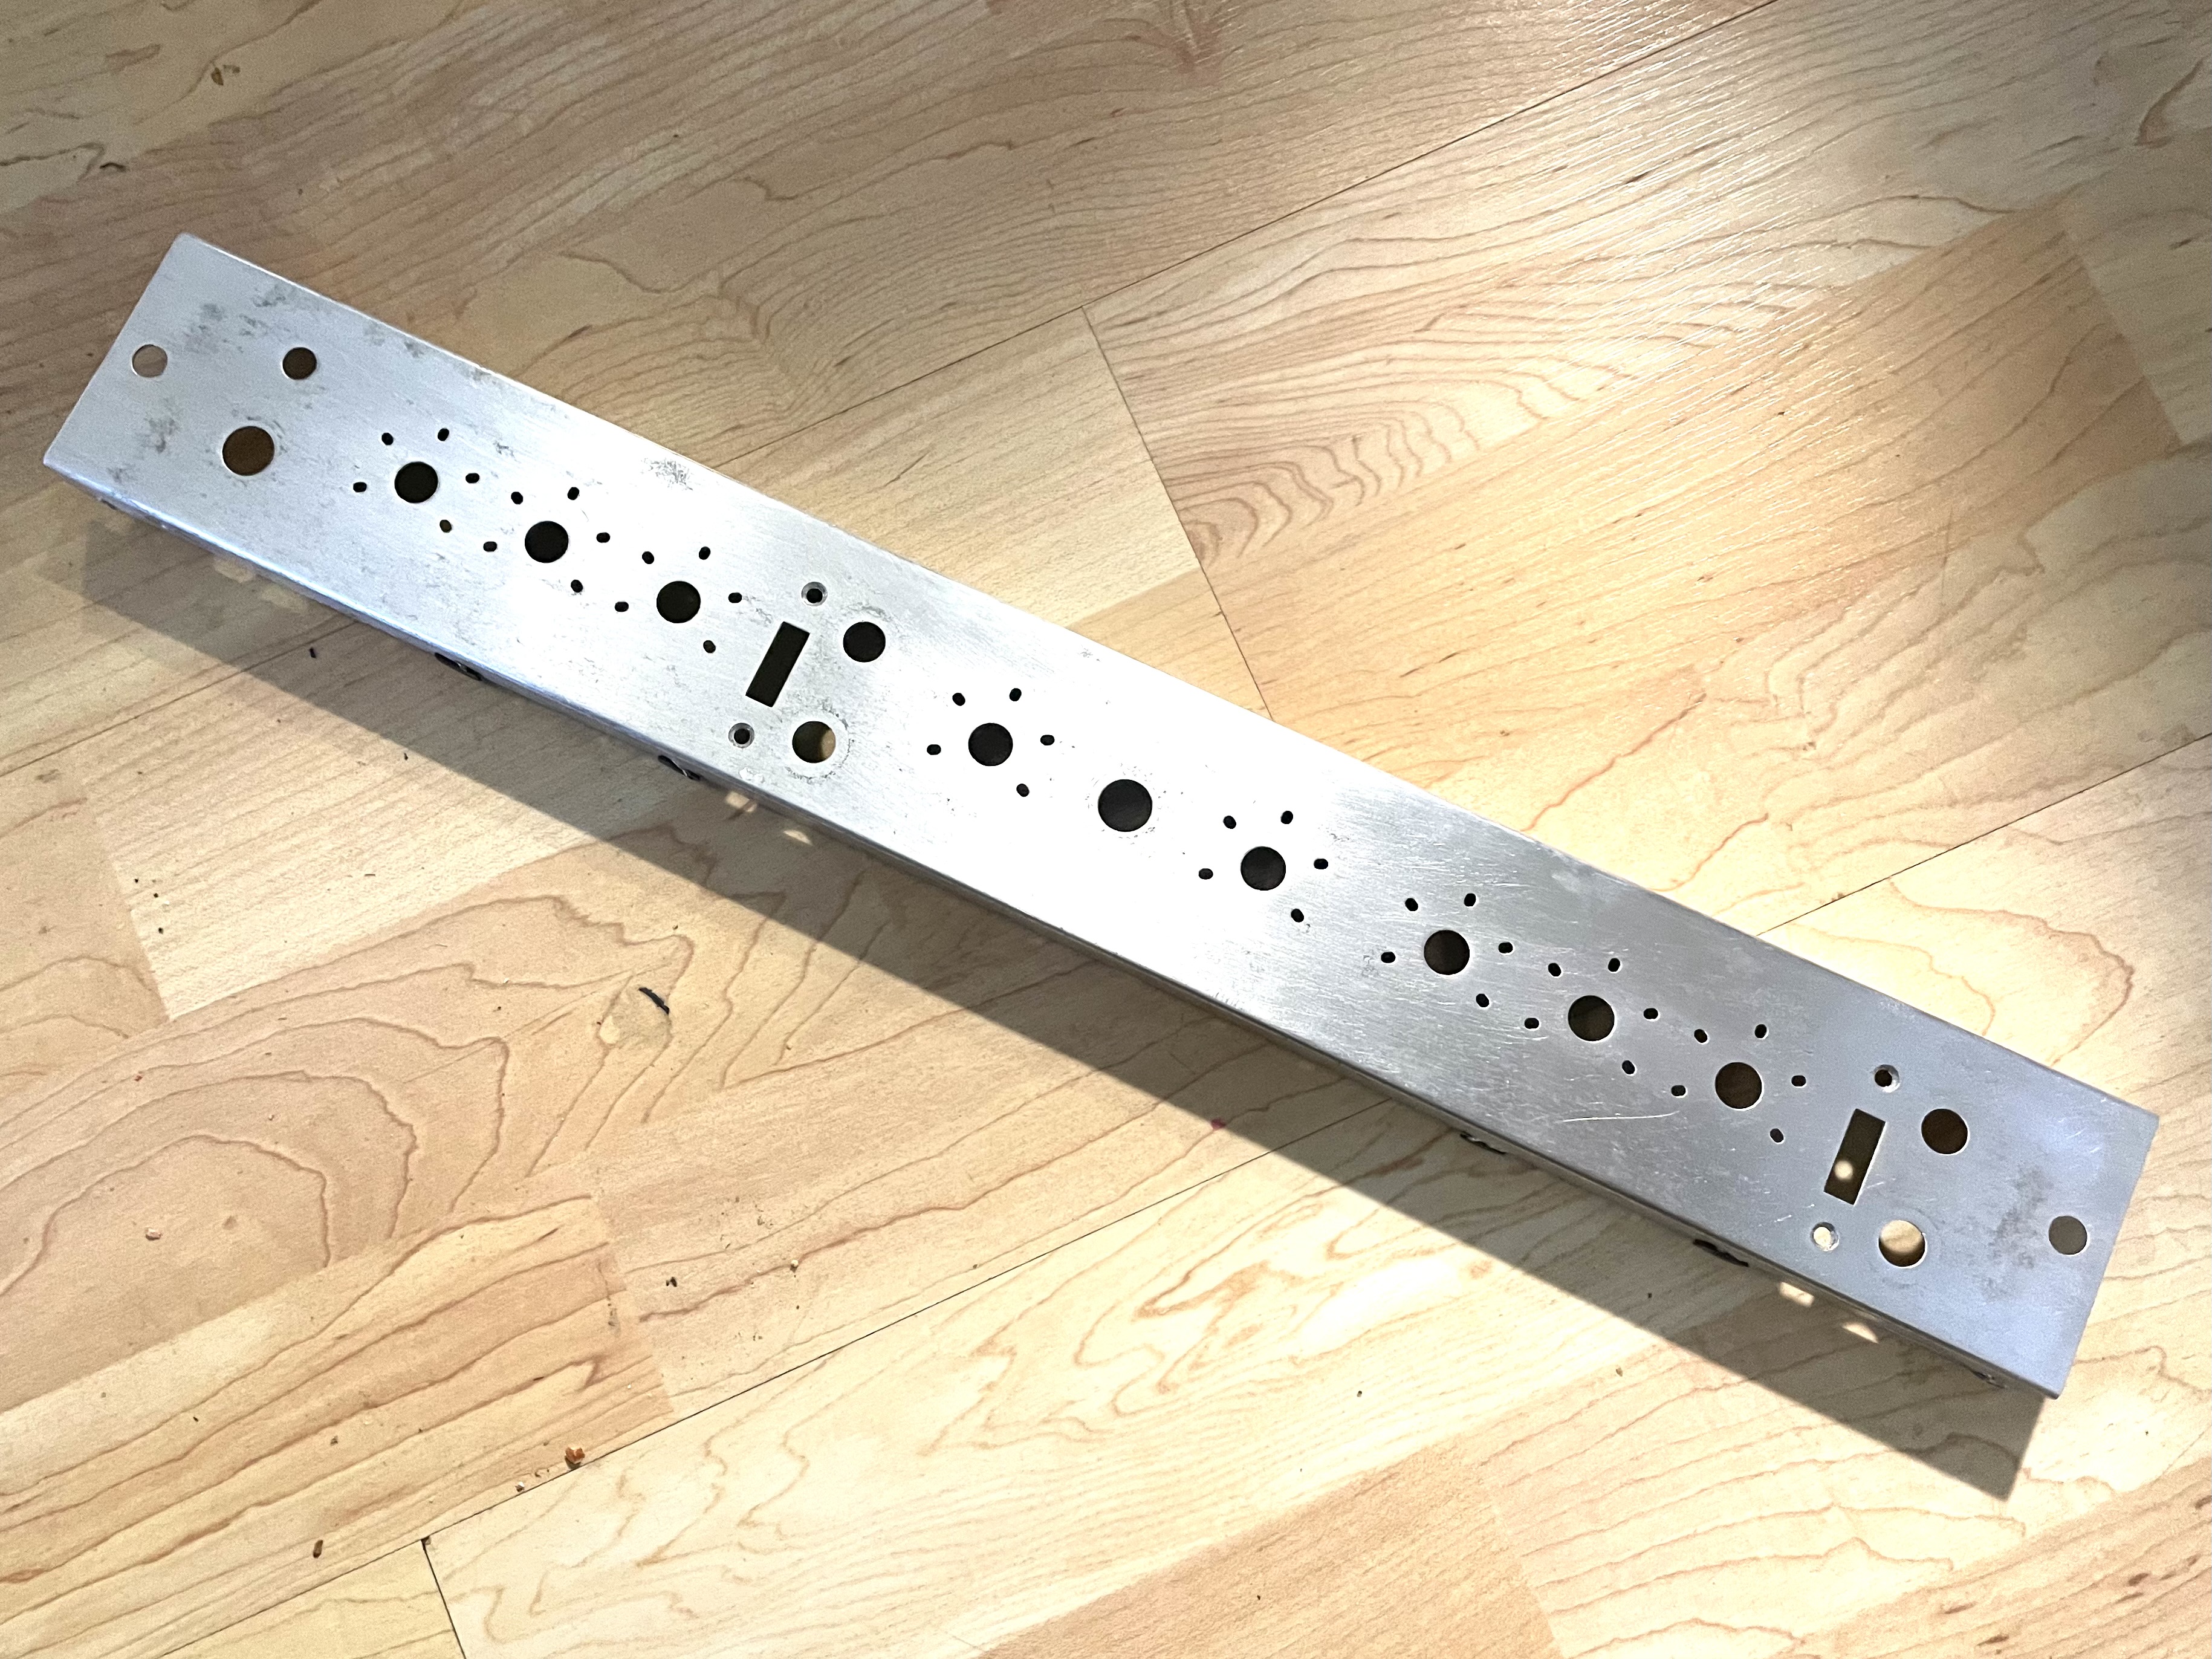 |
Here is the same piece after a considerable amount of sanding. I removed all of the corrosion but in a few places it was still pitted, but fortunately that was in places where it didn't really matter. |
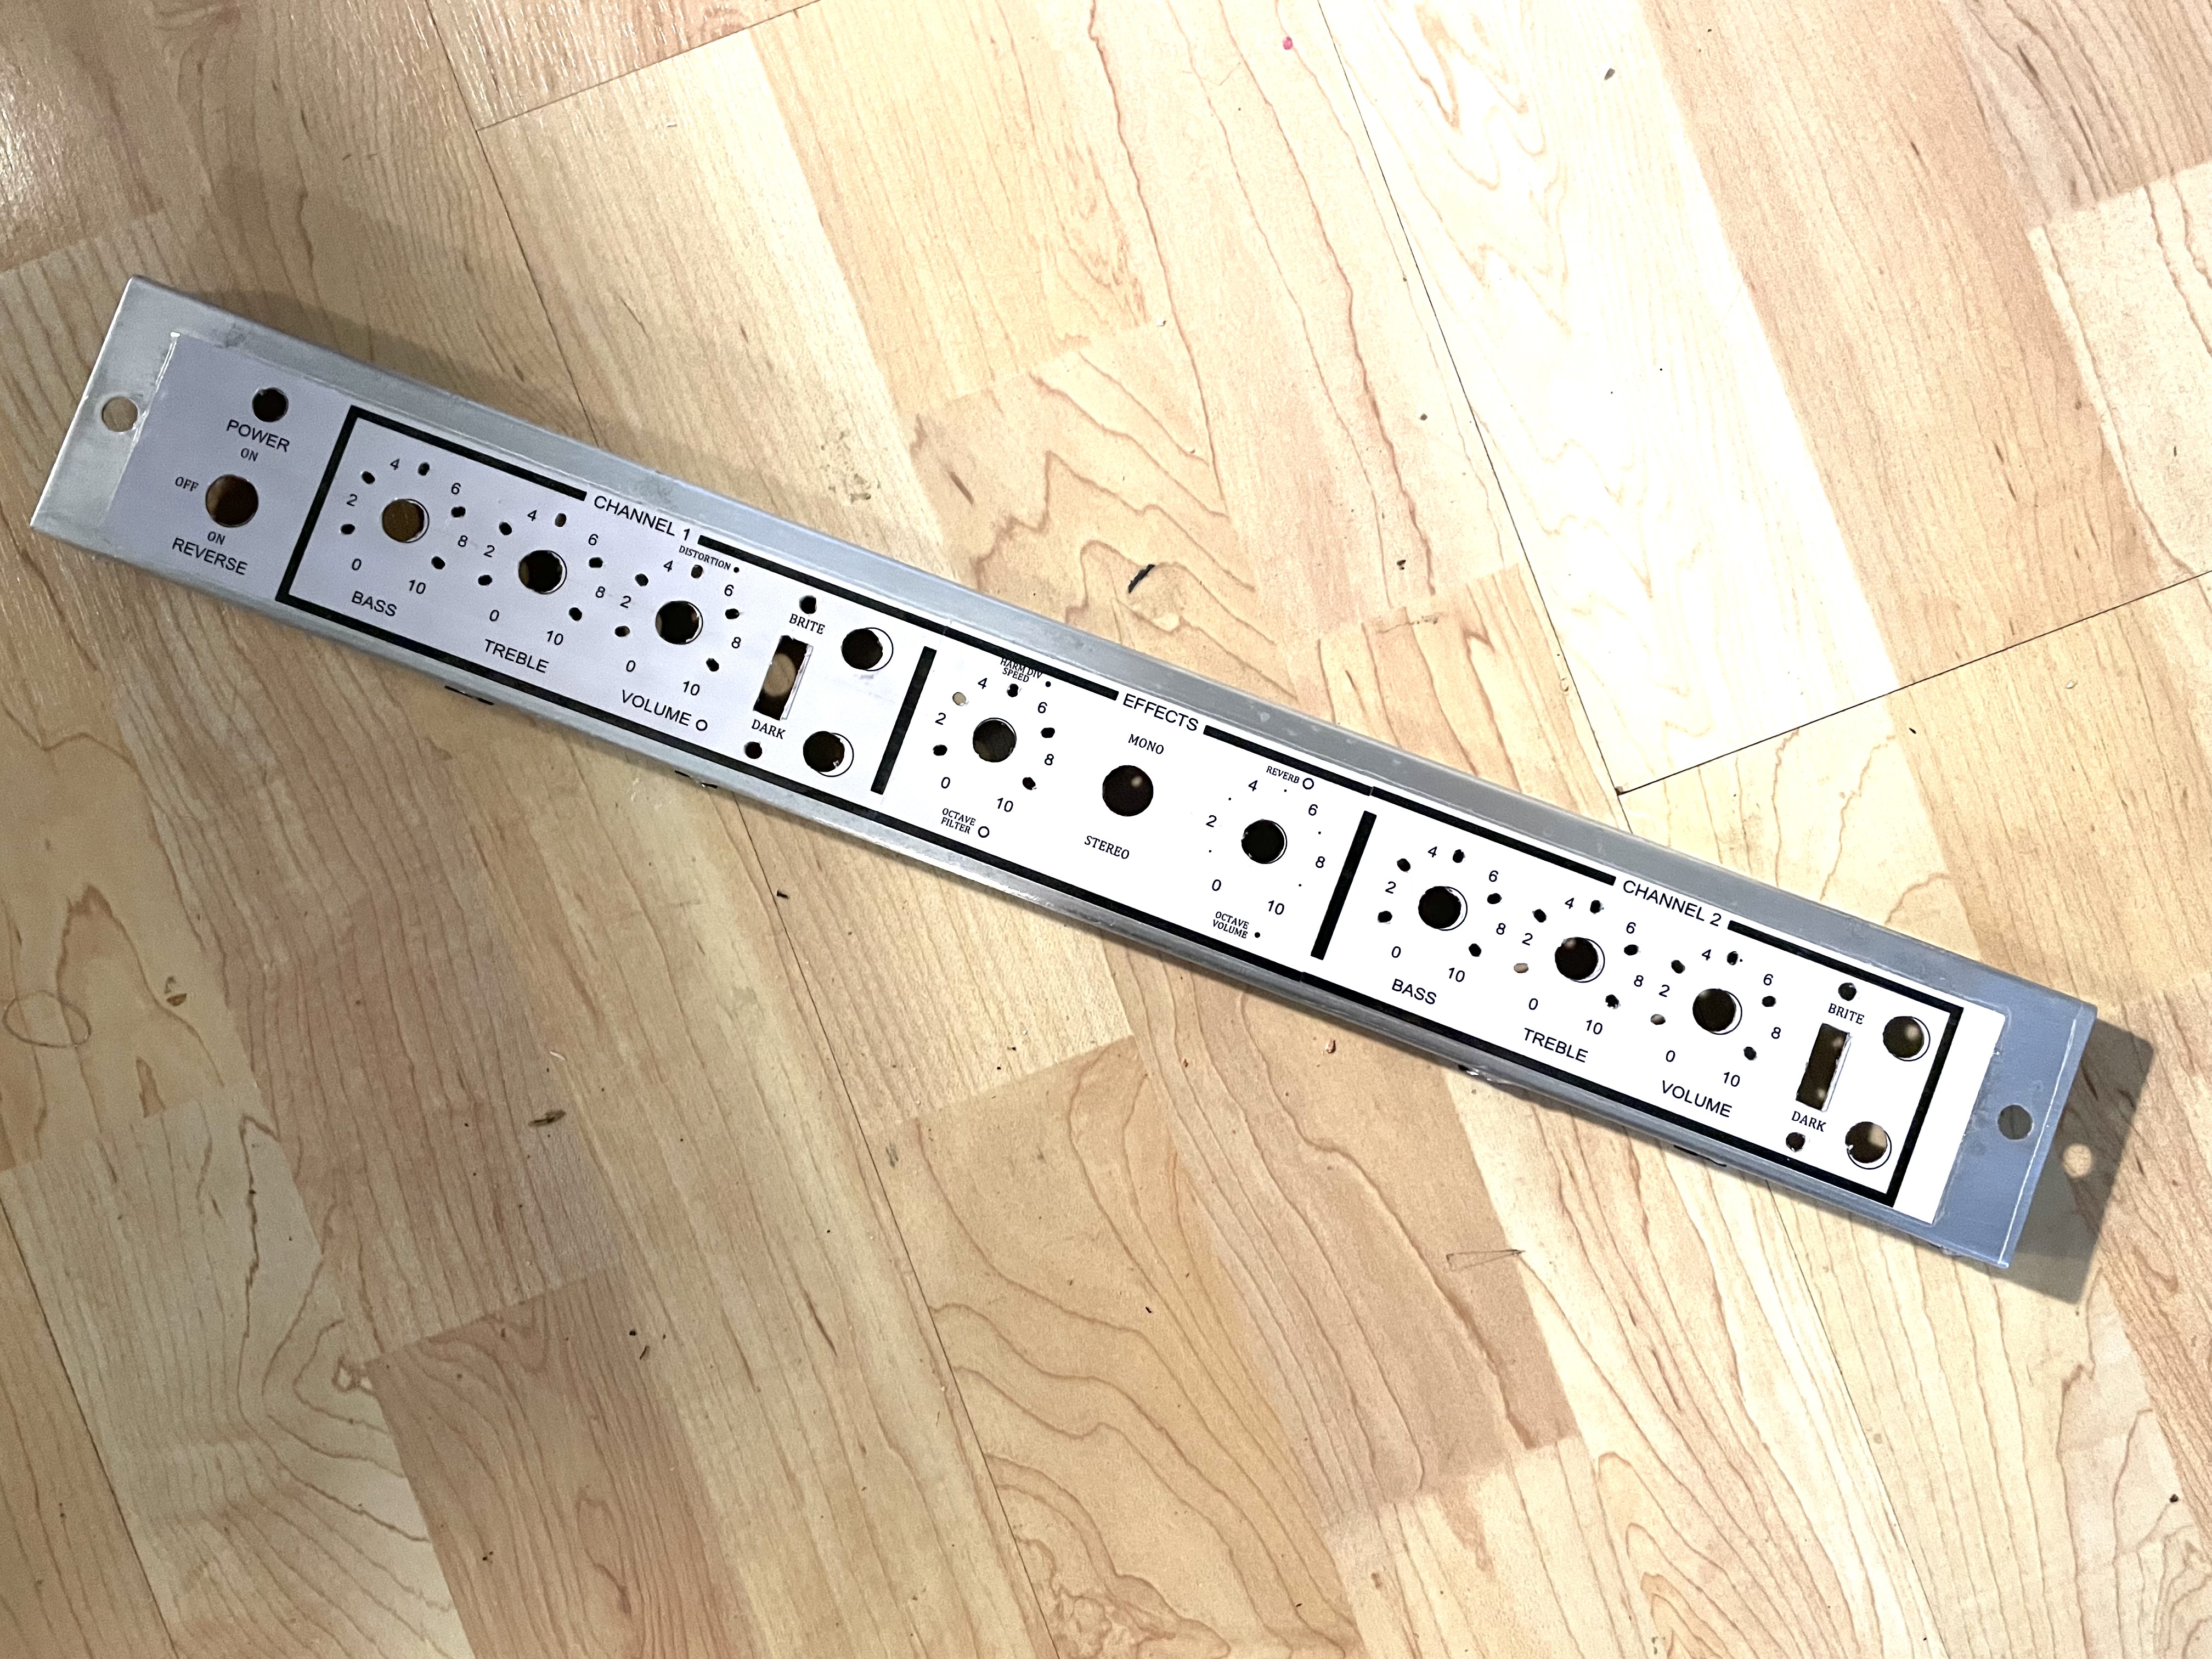 |
This is with the new graphics applied. I matched the original as best as I could. Pretty close to how it looked originally. |
 |
This is how it looks with the chassis reinstalled, after re-doing the graphics. |
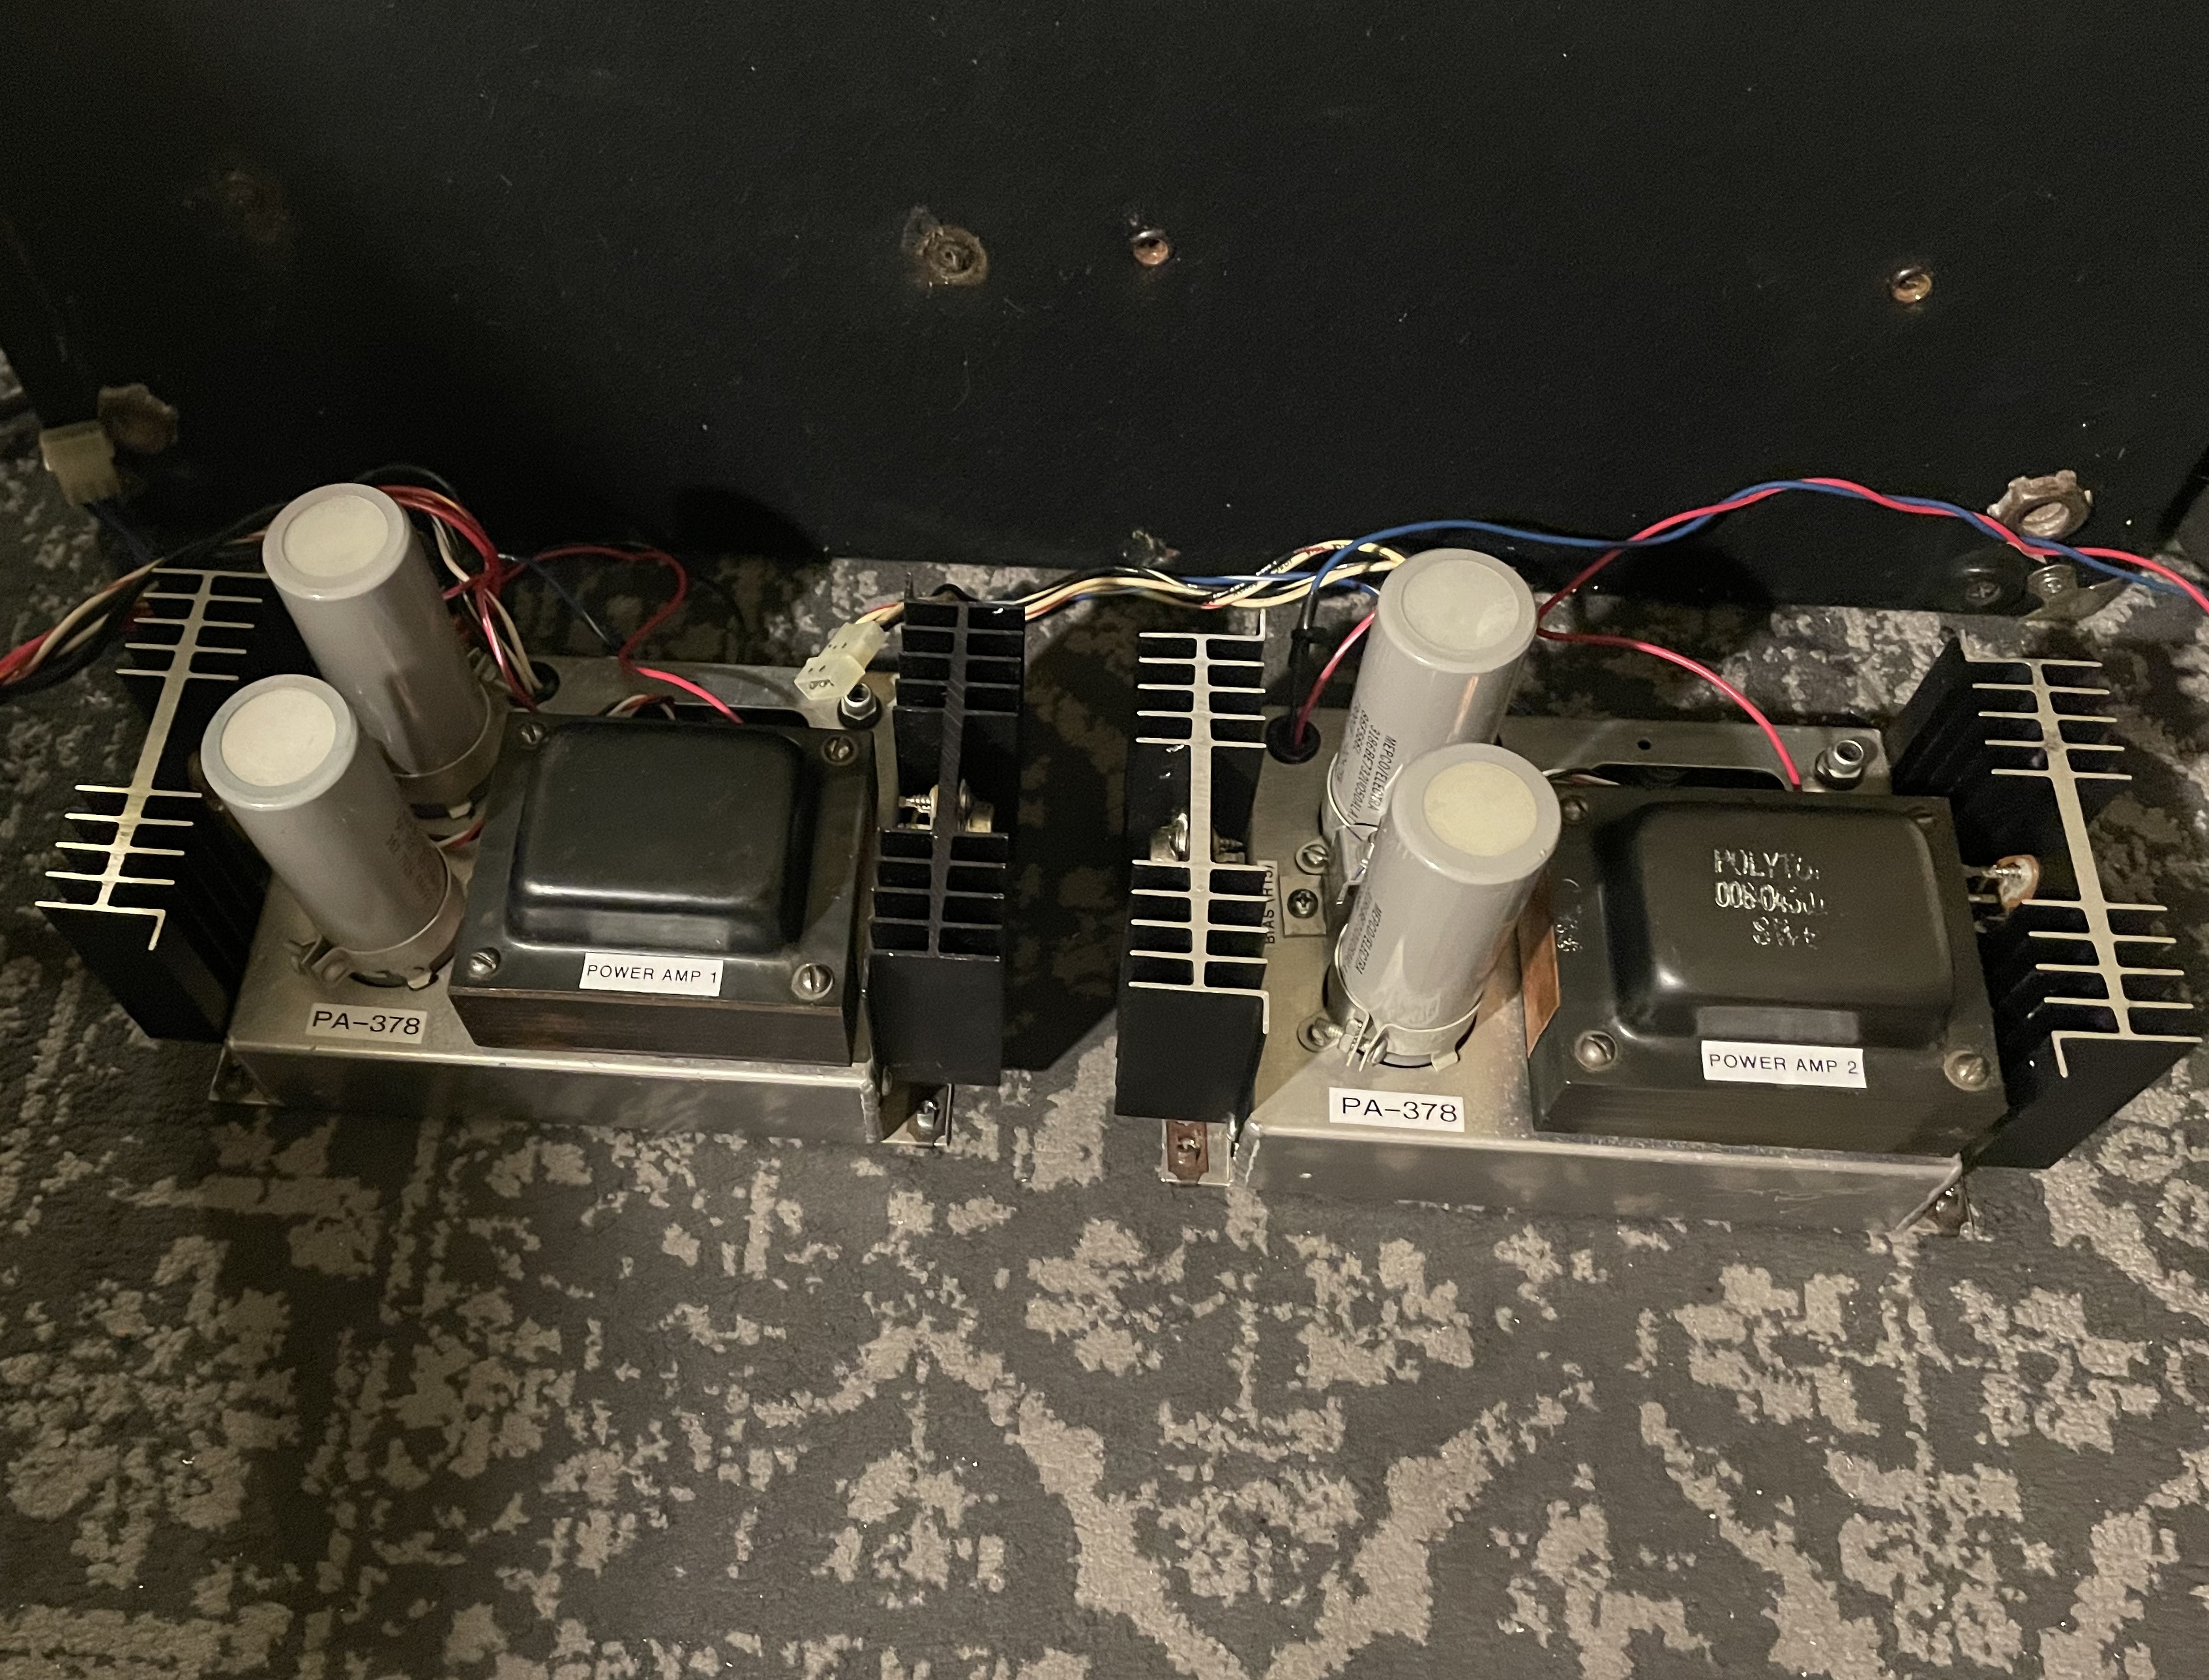 |
With most of the issues having to do with the chassis out of the way, I could concentrate on the power amps. I labeled them to conincide with what I called them on my copy of the schematics, and to identify what circuit they are. |
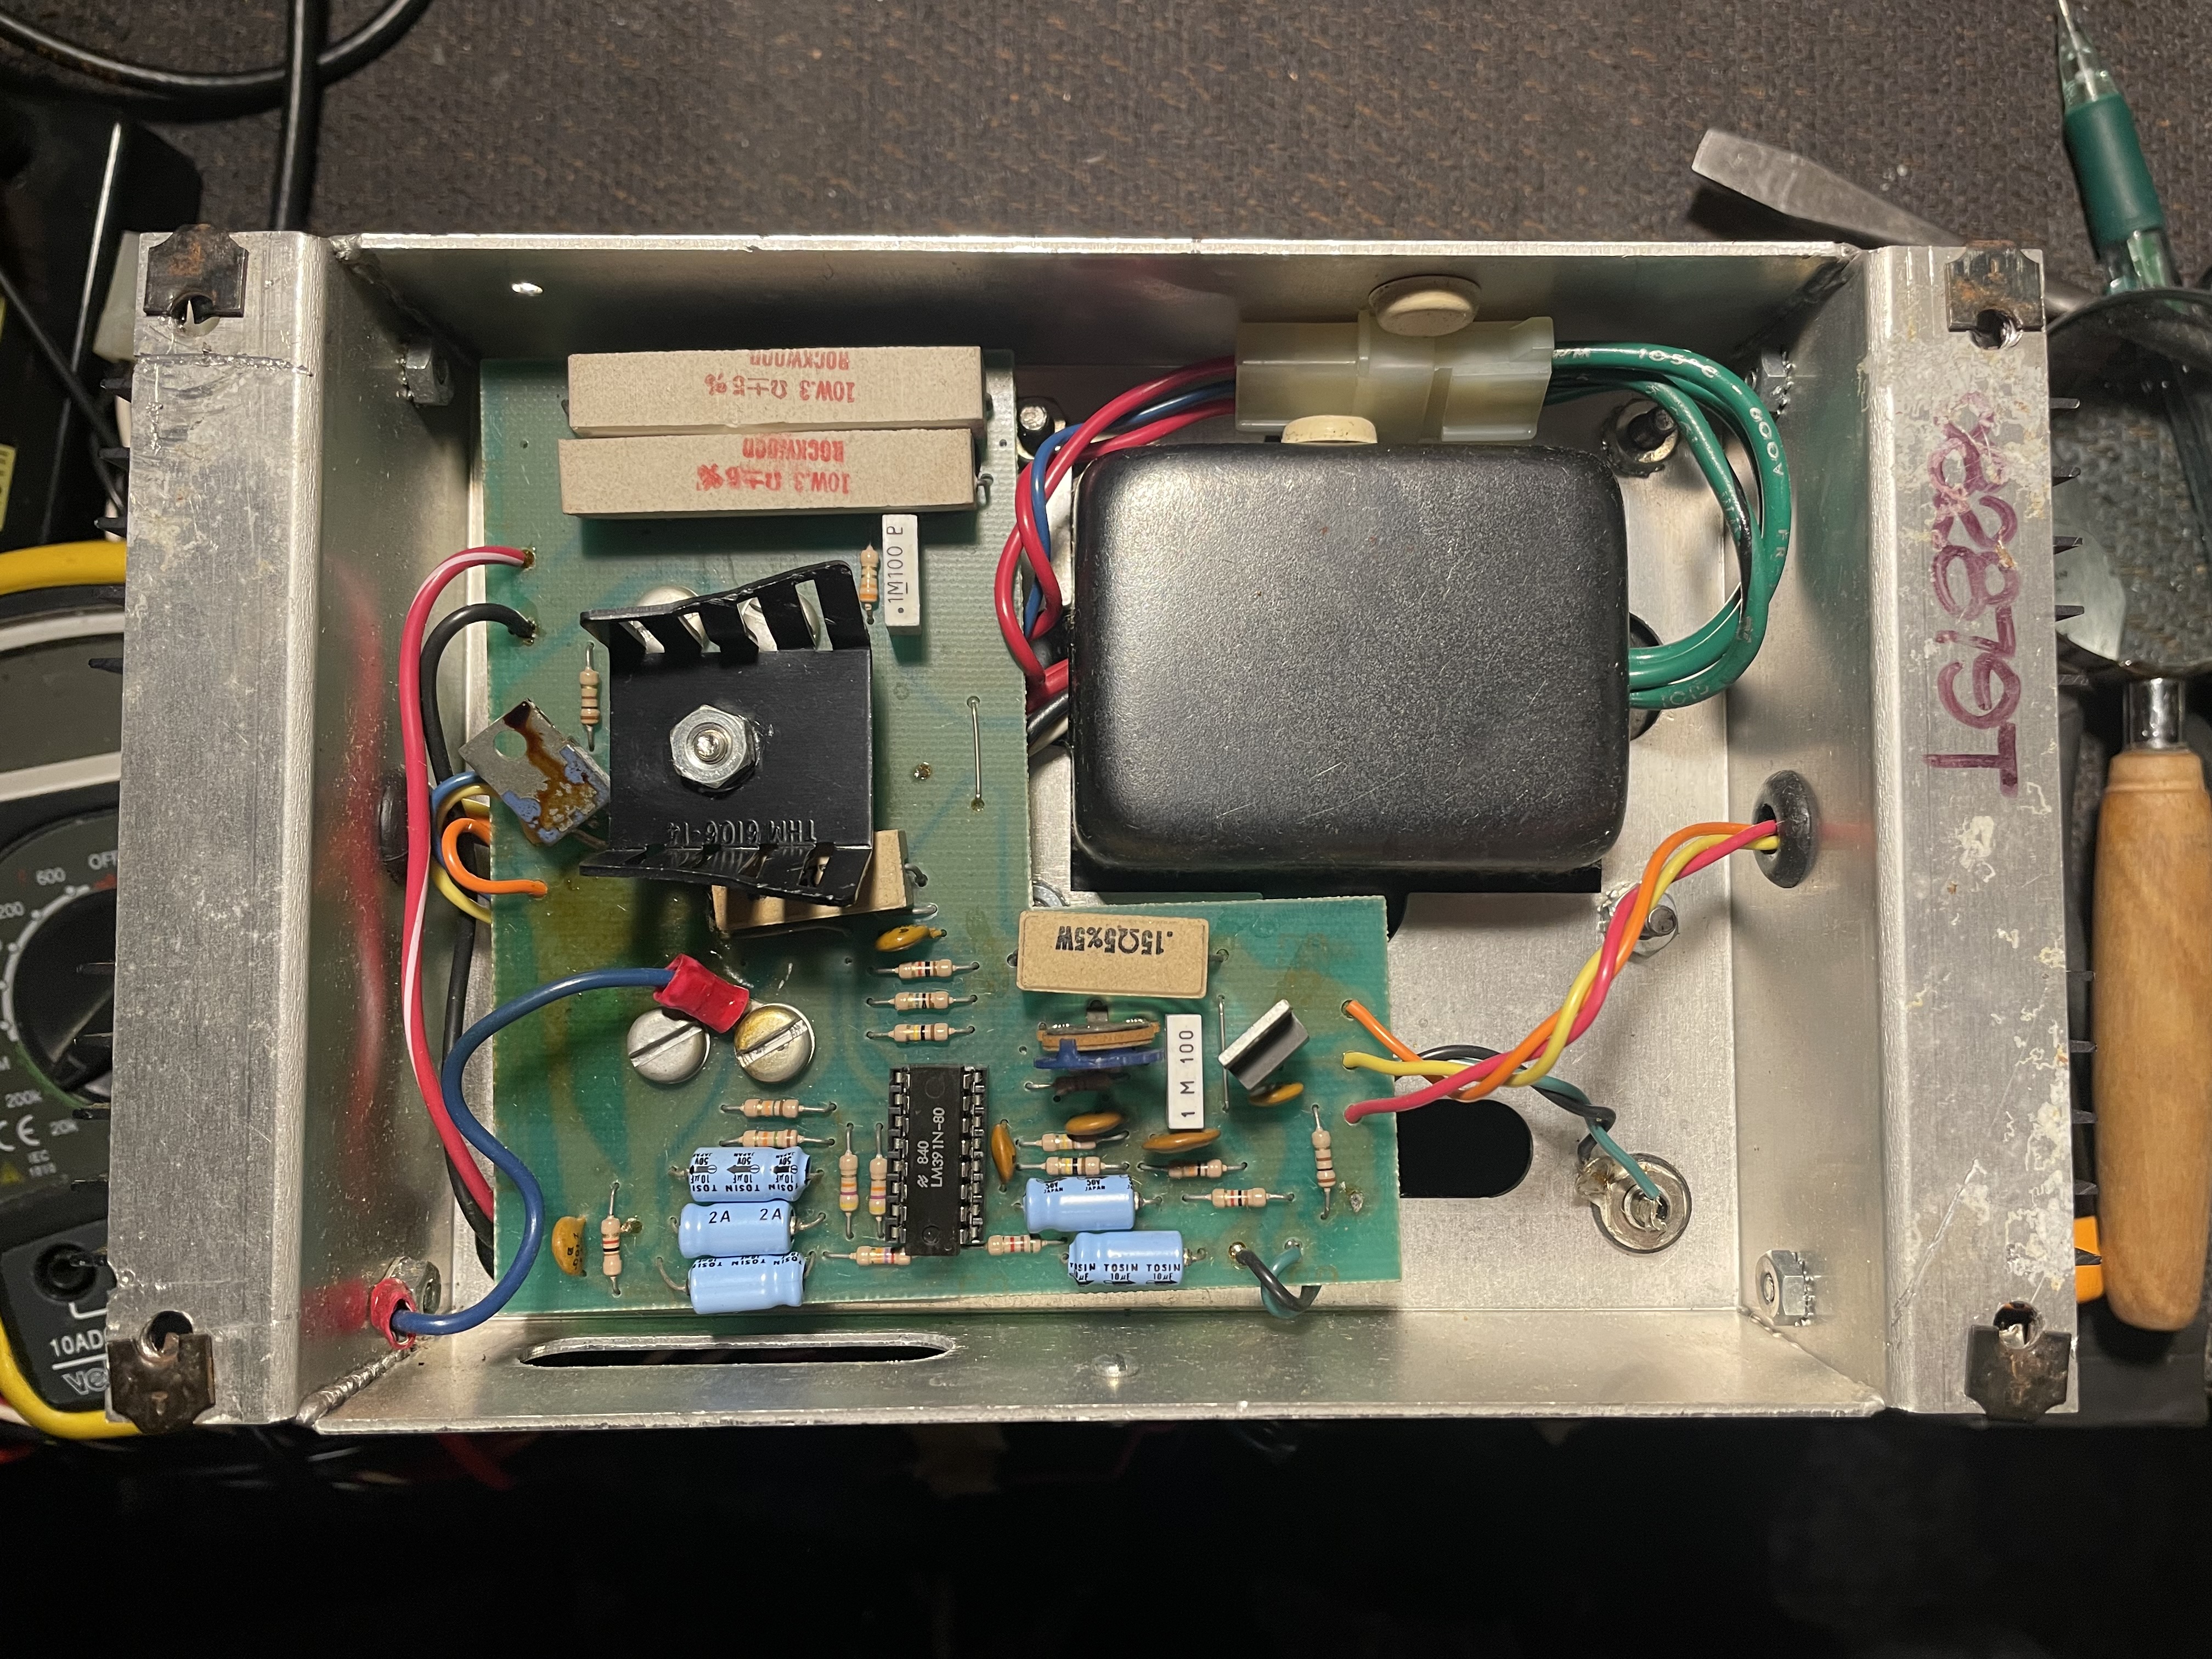 |
Here is the inside of the power amp. This is the first version of the PA378 circuit. It uses an LM391 IC chip. There were two other versions that followed: the PA378-A and PA378-B. The PA378-A also used the LM391 and the PA378-B deleted the LM391 IC chip. I had to replace all of the 10uF caps shown here, and on the other power amp too. |
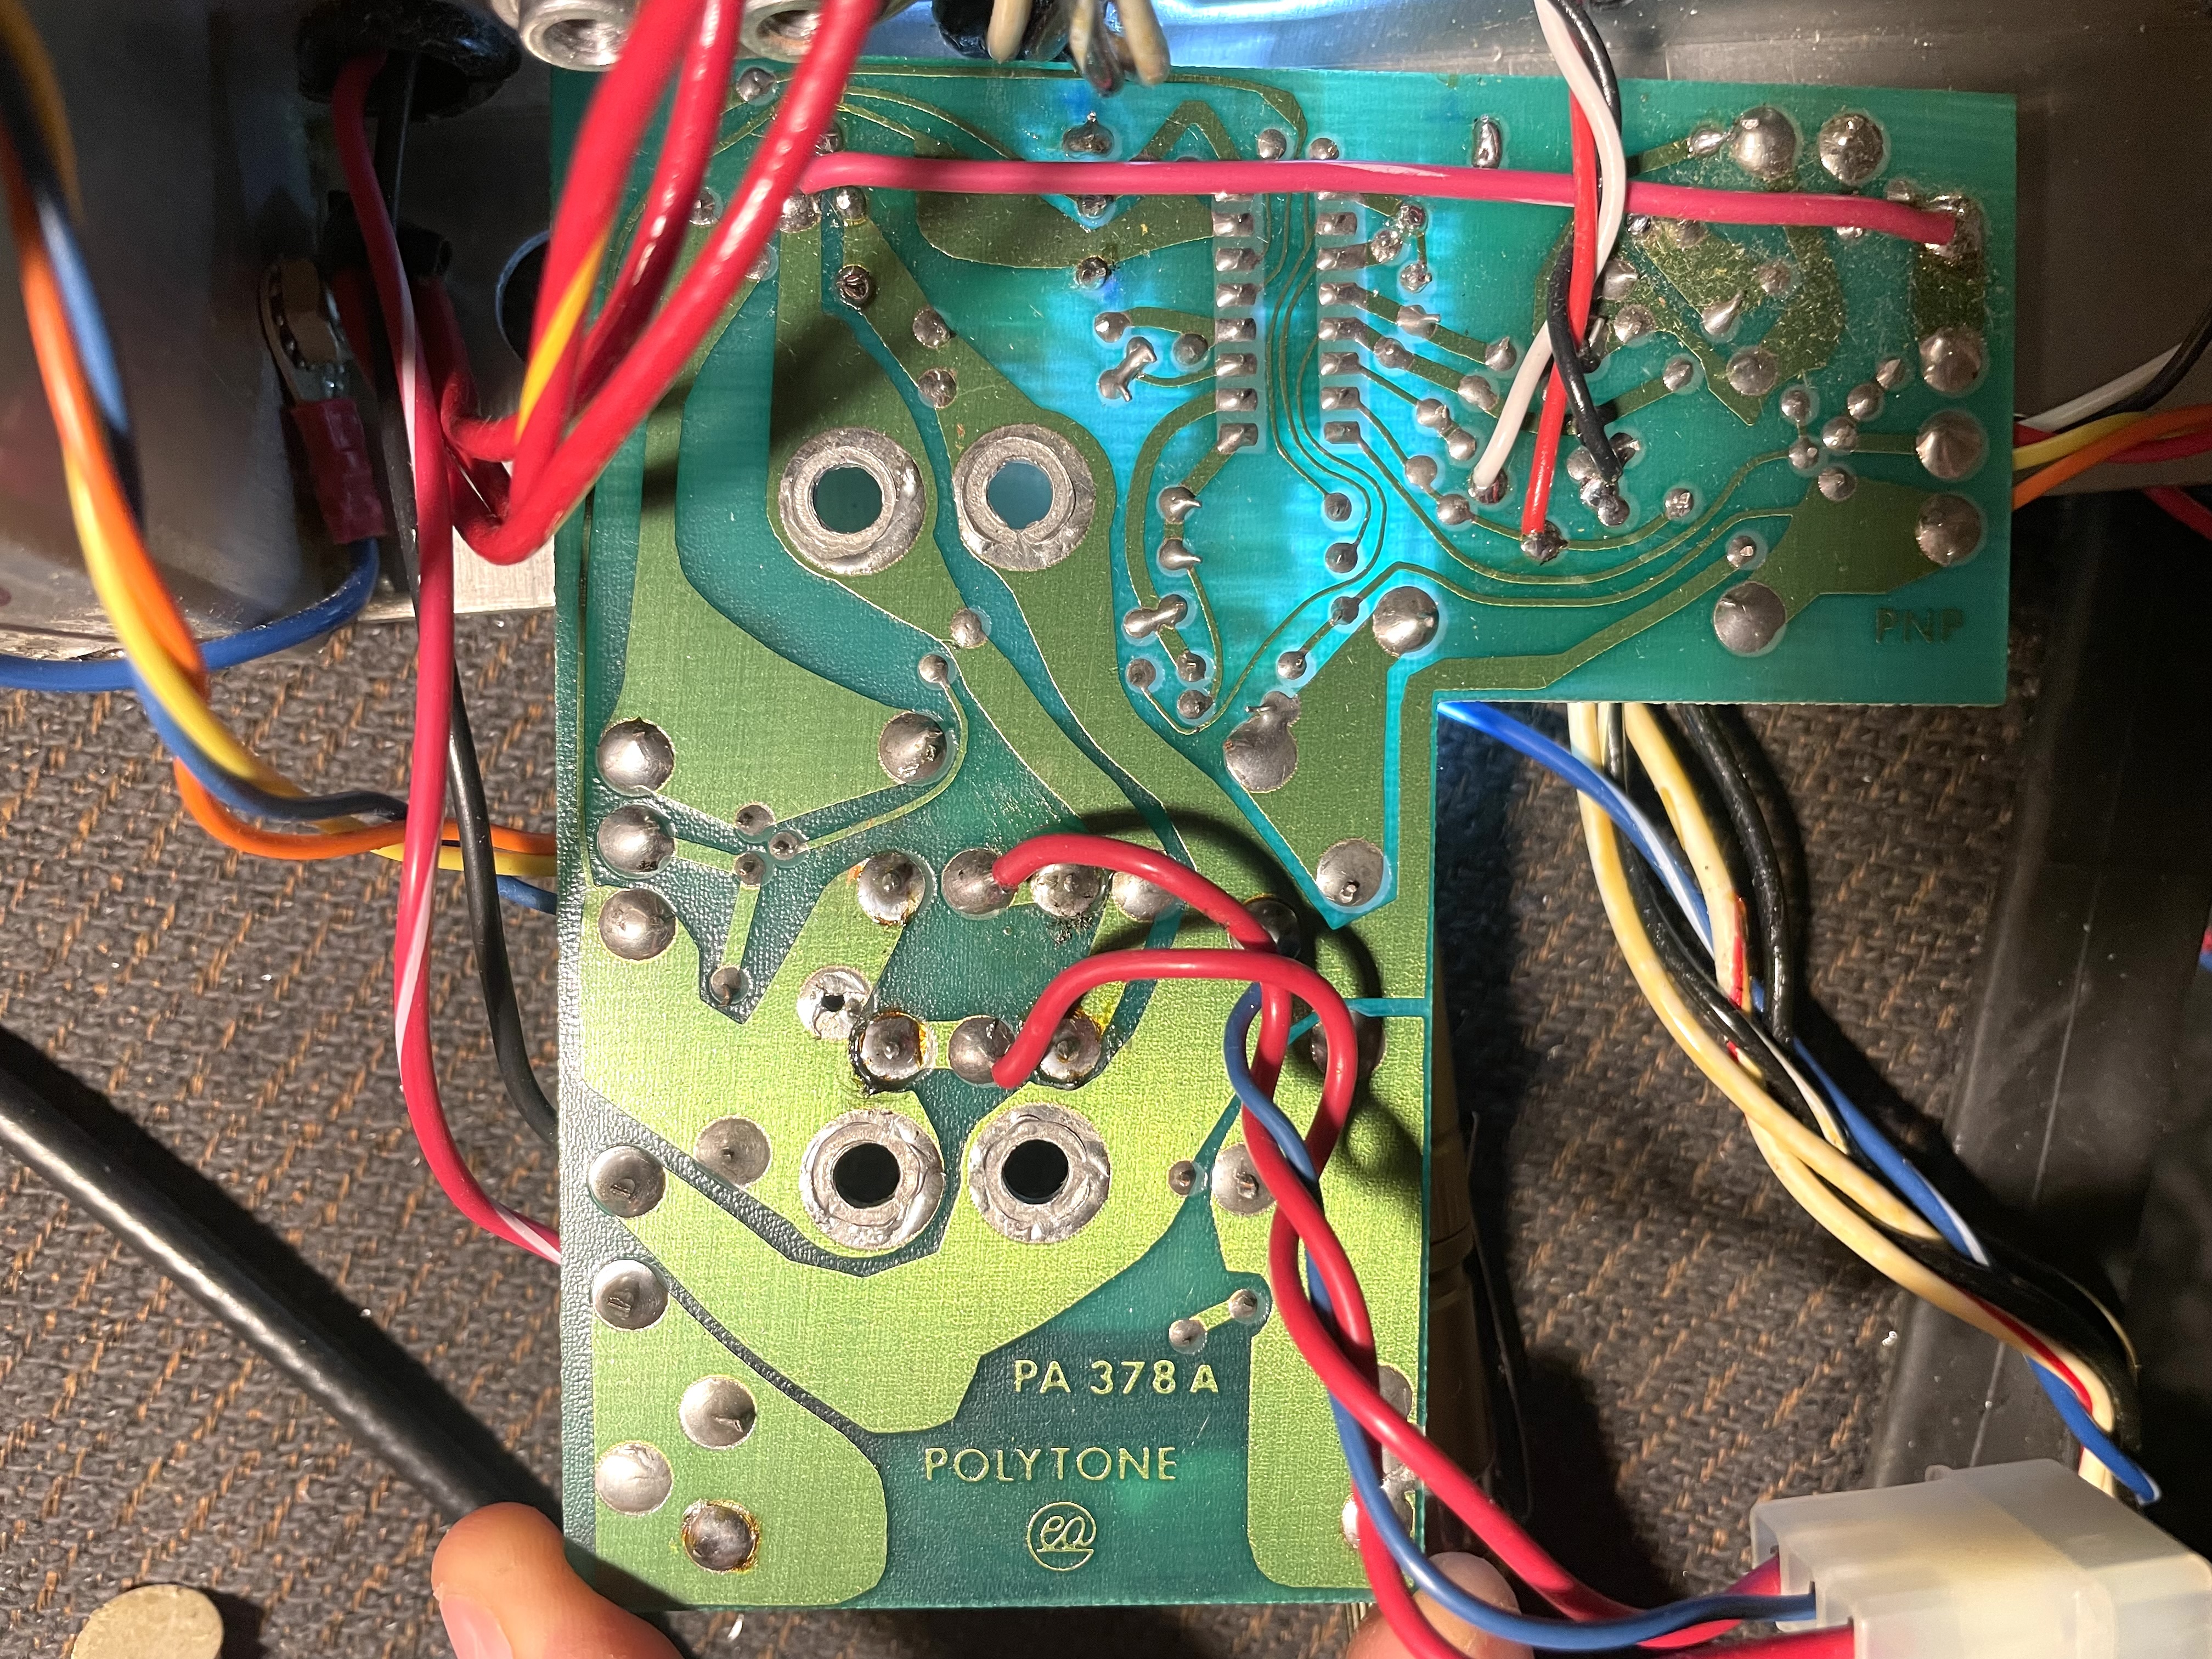 |
Note that this PCB is marked "PA378A" but follows exactly the PA378 pictoral provided by Polytone. |
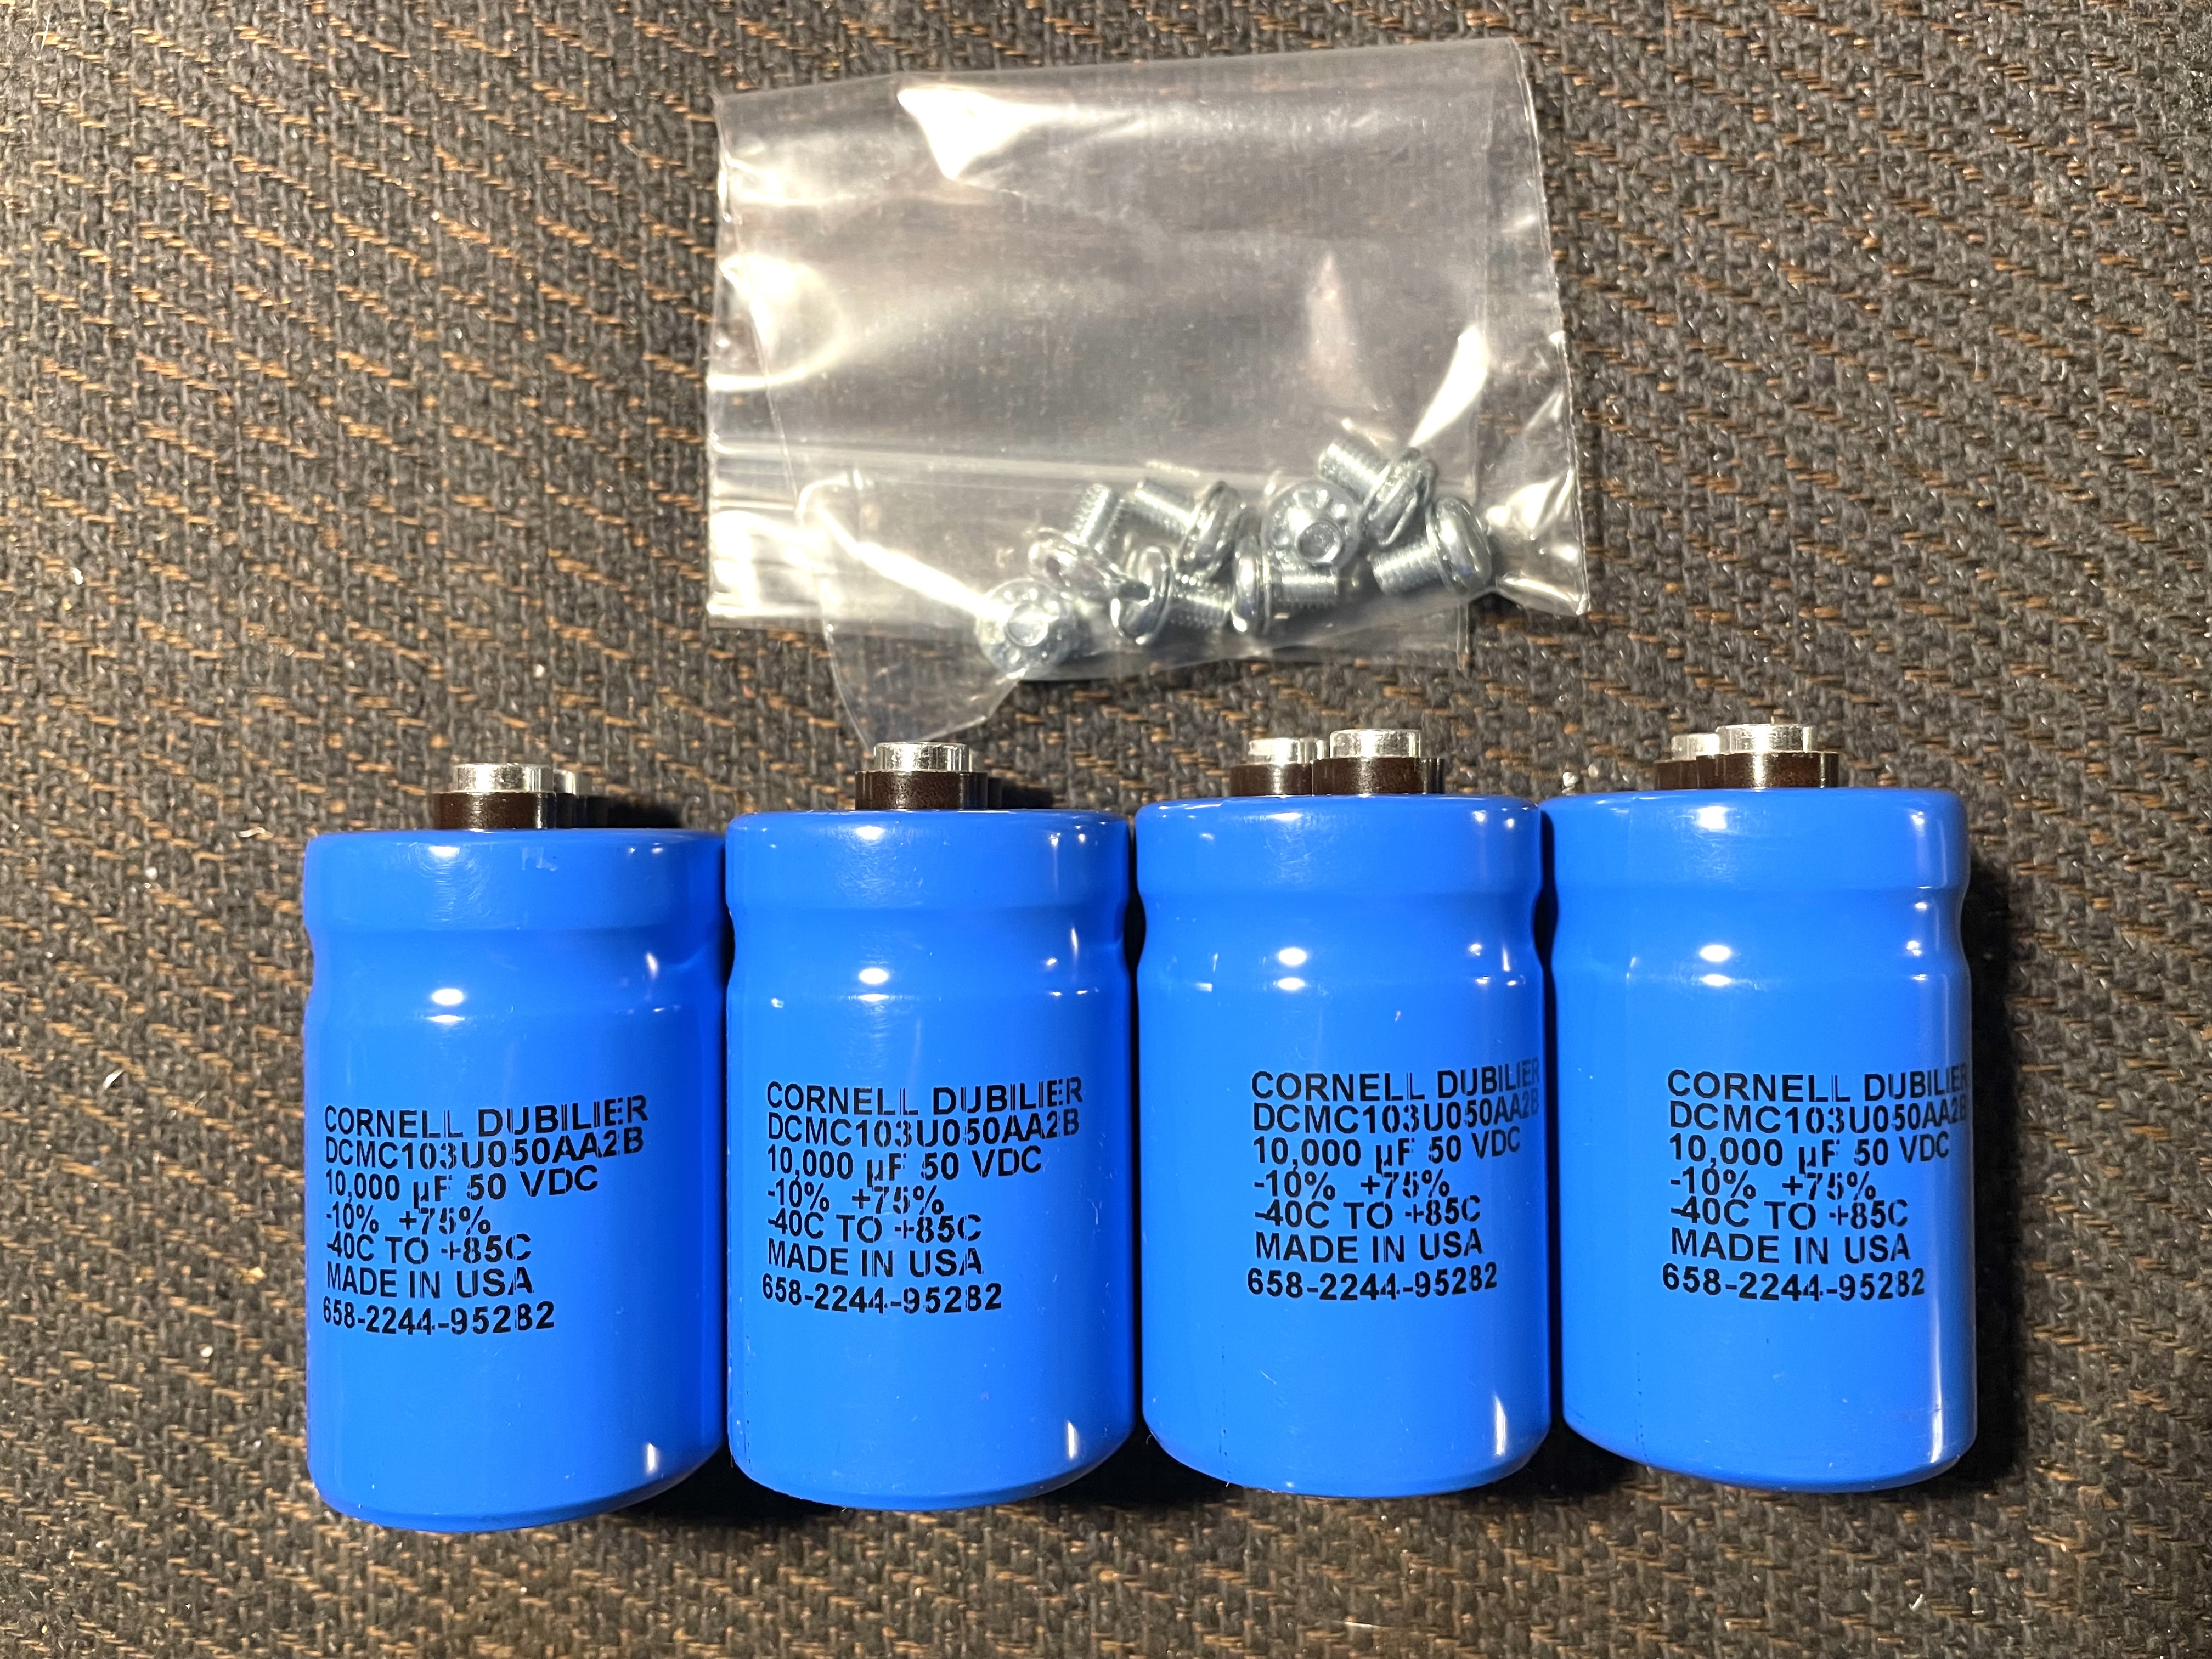 |
Replacements for the big 7300uF can type capacitors was a little challenging to find. I was able to find a suitable replacement at Mouser.com. These are 10,000uF Cornell Dubilier caps (Model # DCMC103U050AA2B). Replacement caps need to be 1.375" diameter to work with this power supply. 6,800uF caps are also available but I chose to go larger than a little smaller. Generally you want about 1,000uF per amp, and with a 6 amp fuse on the power supply, some 6,800uF caps probably would have been OK too. |
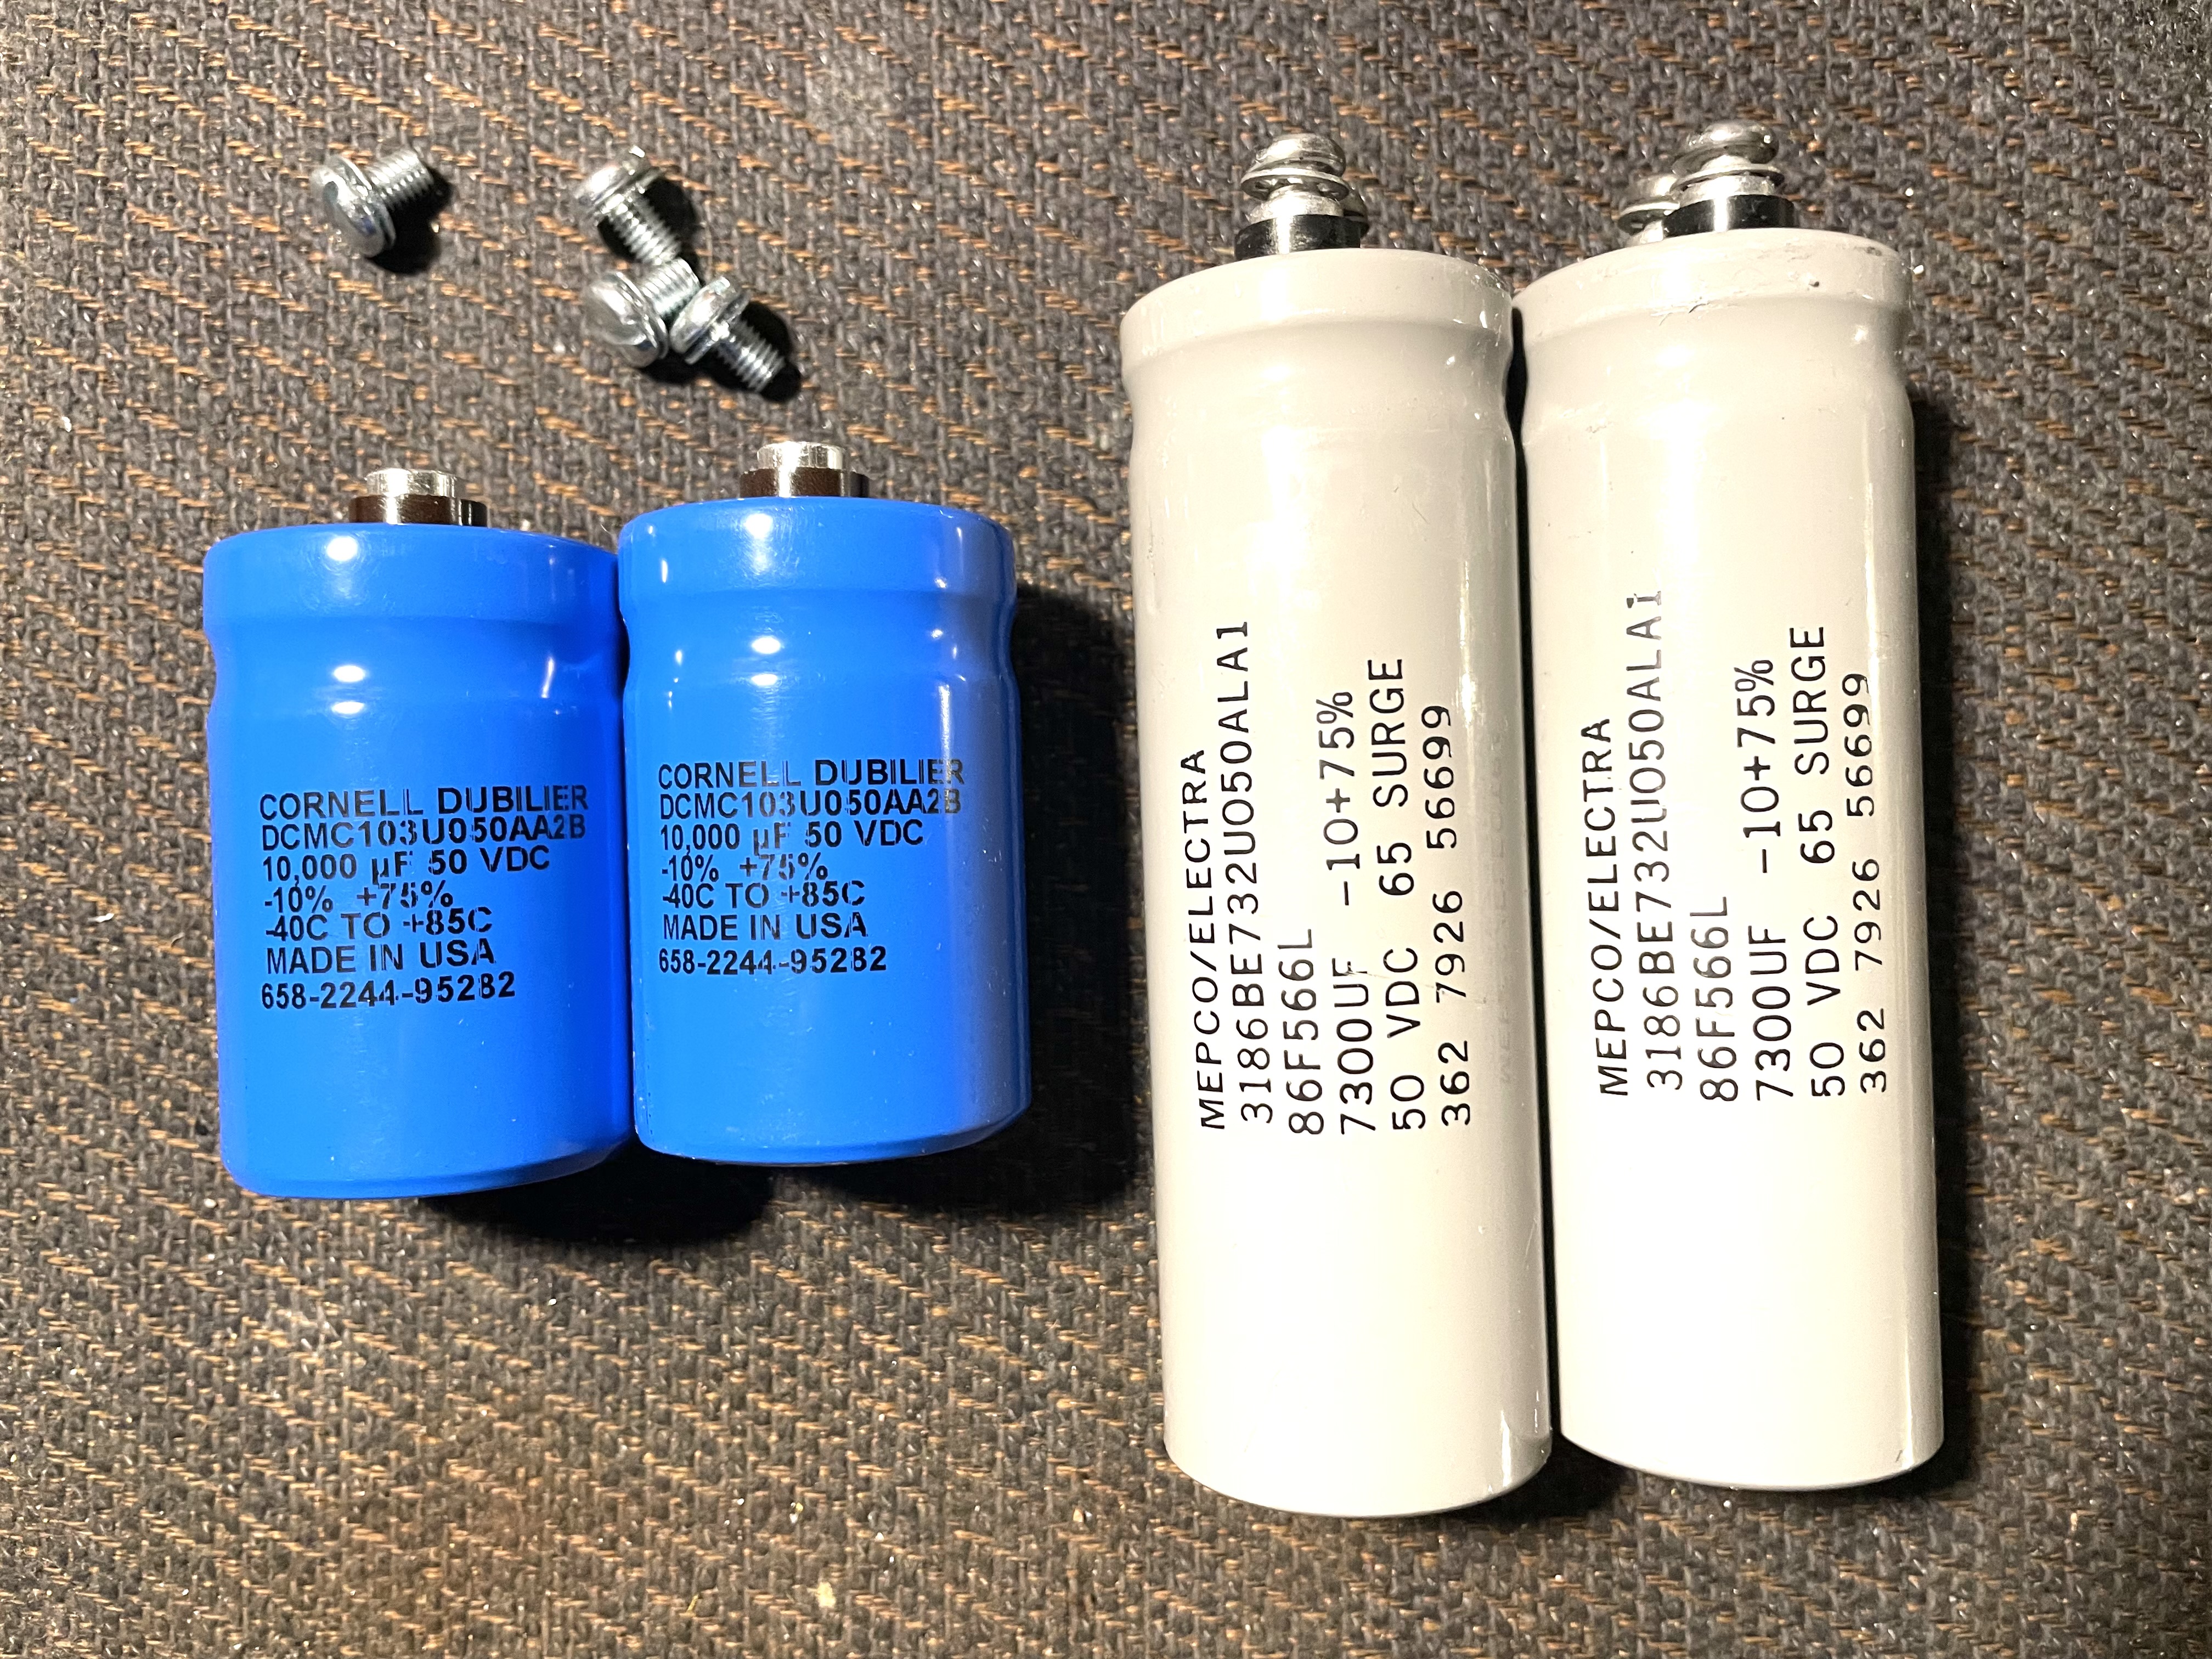 |
Side by side comparison, new and original caps made in 1979. Note how much smaller they are than the originals! |
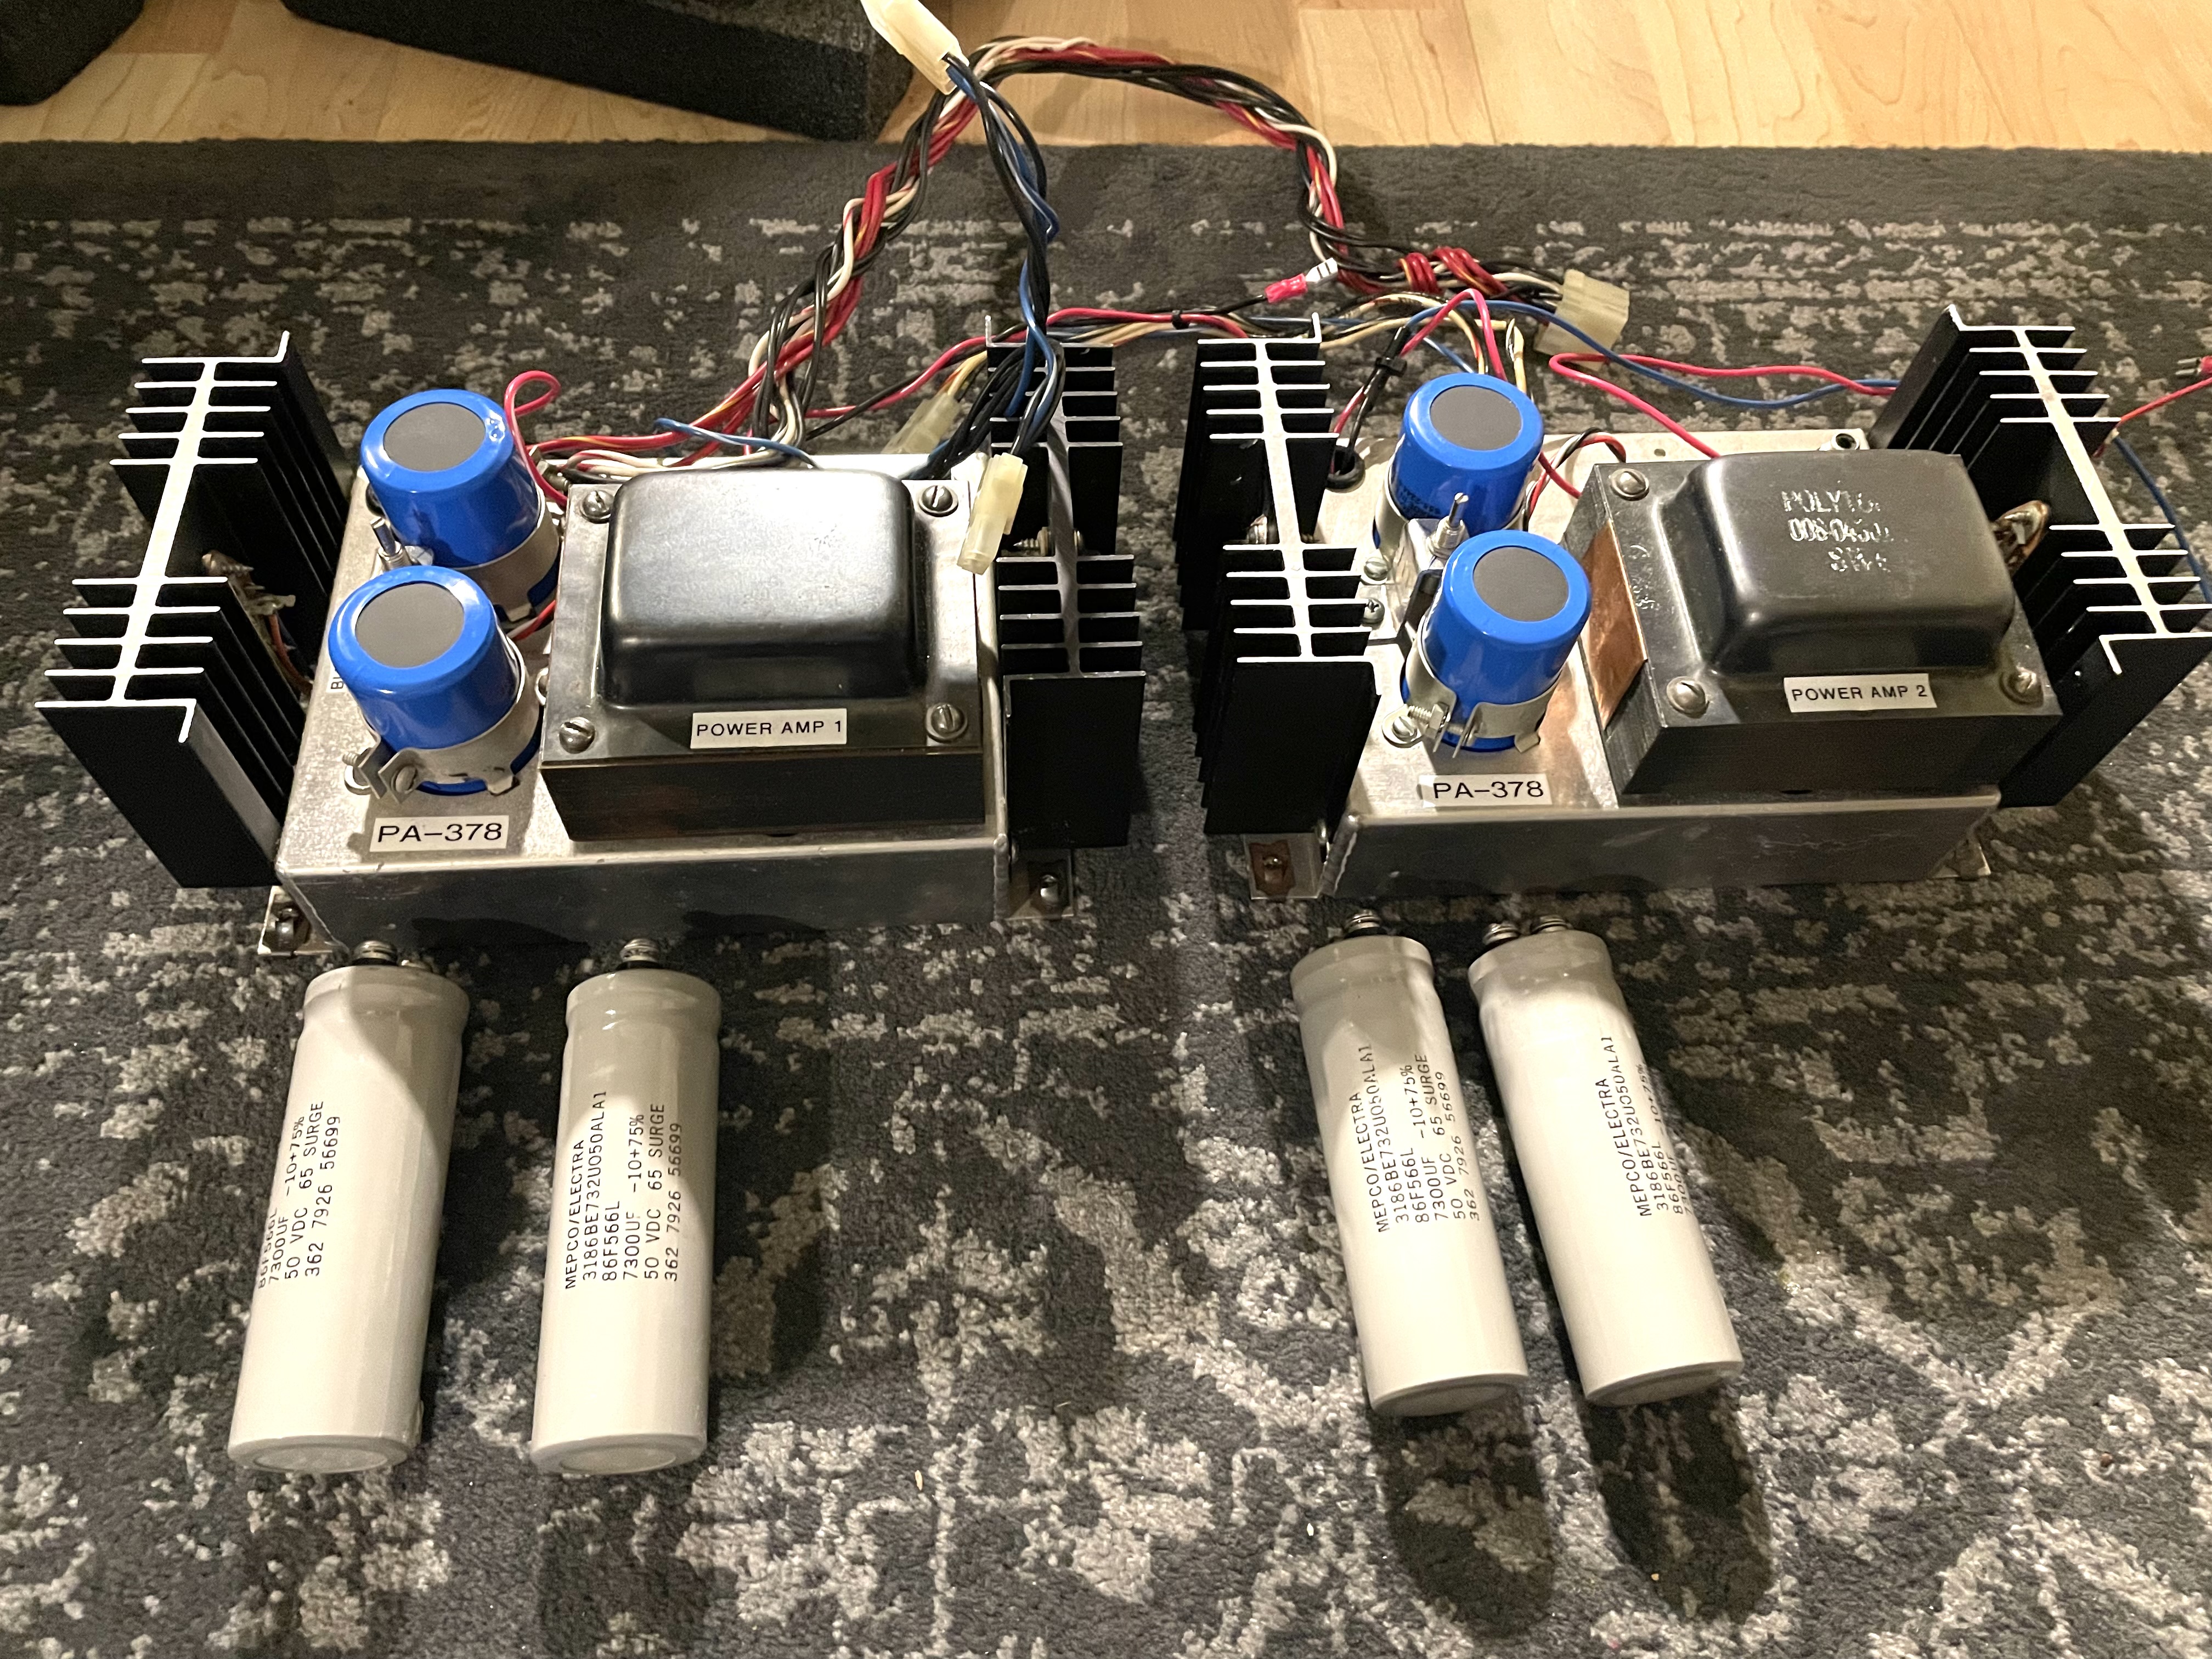 |
Here the two power supplies have been fully re-capped and are ready to go back in the cabinet. |
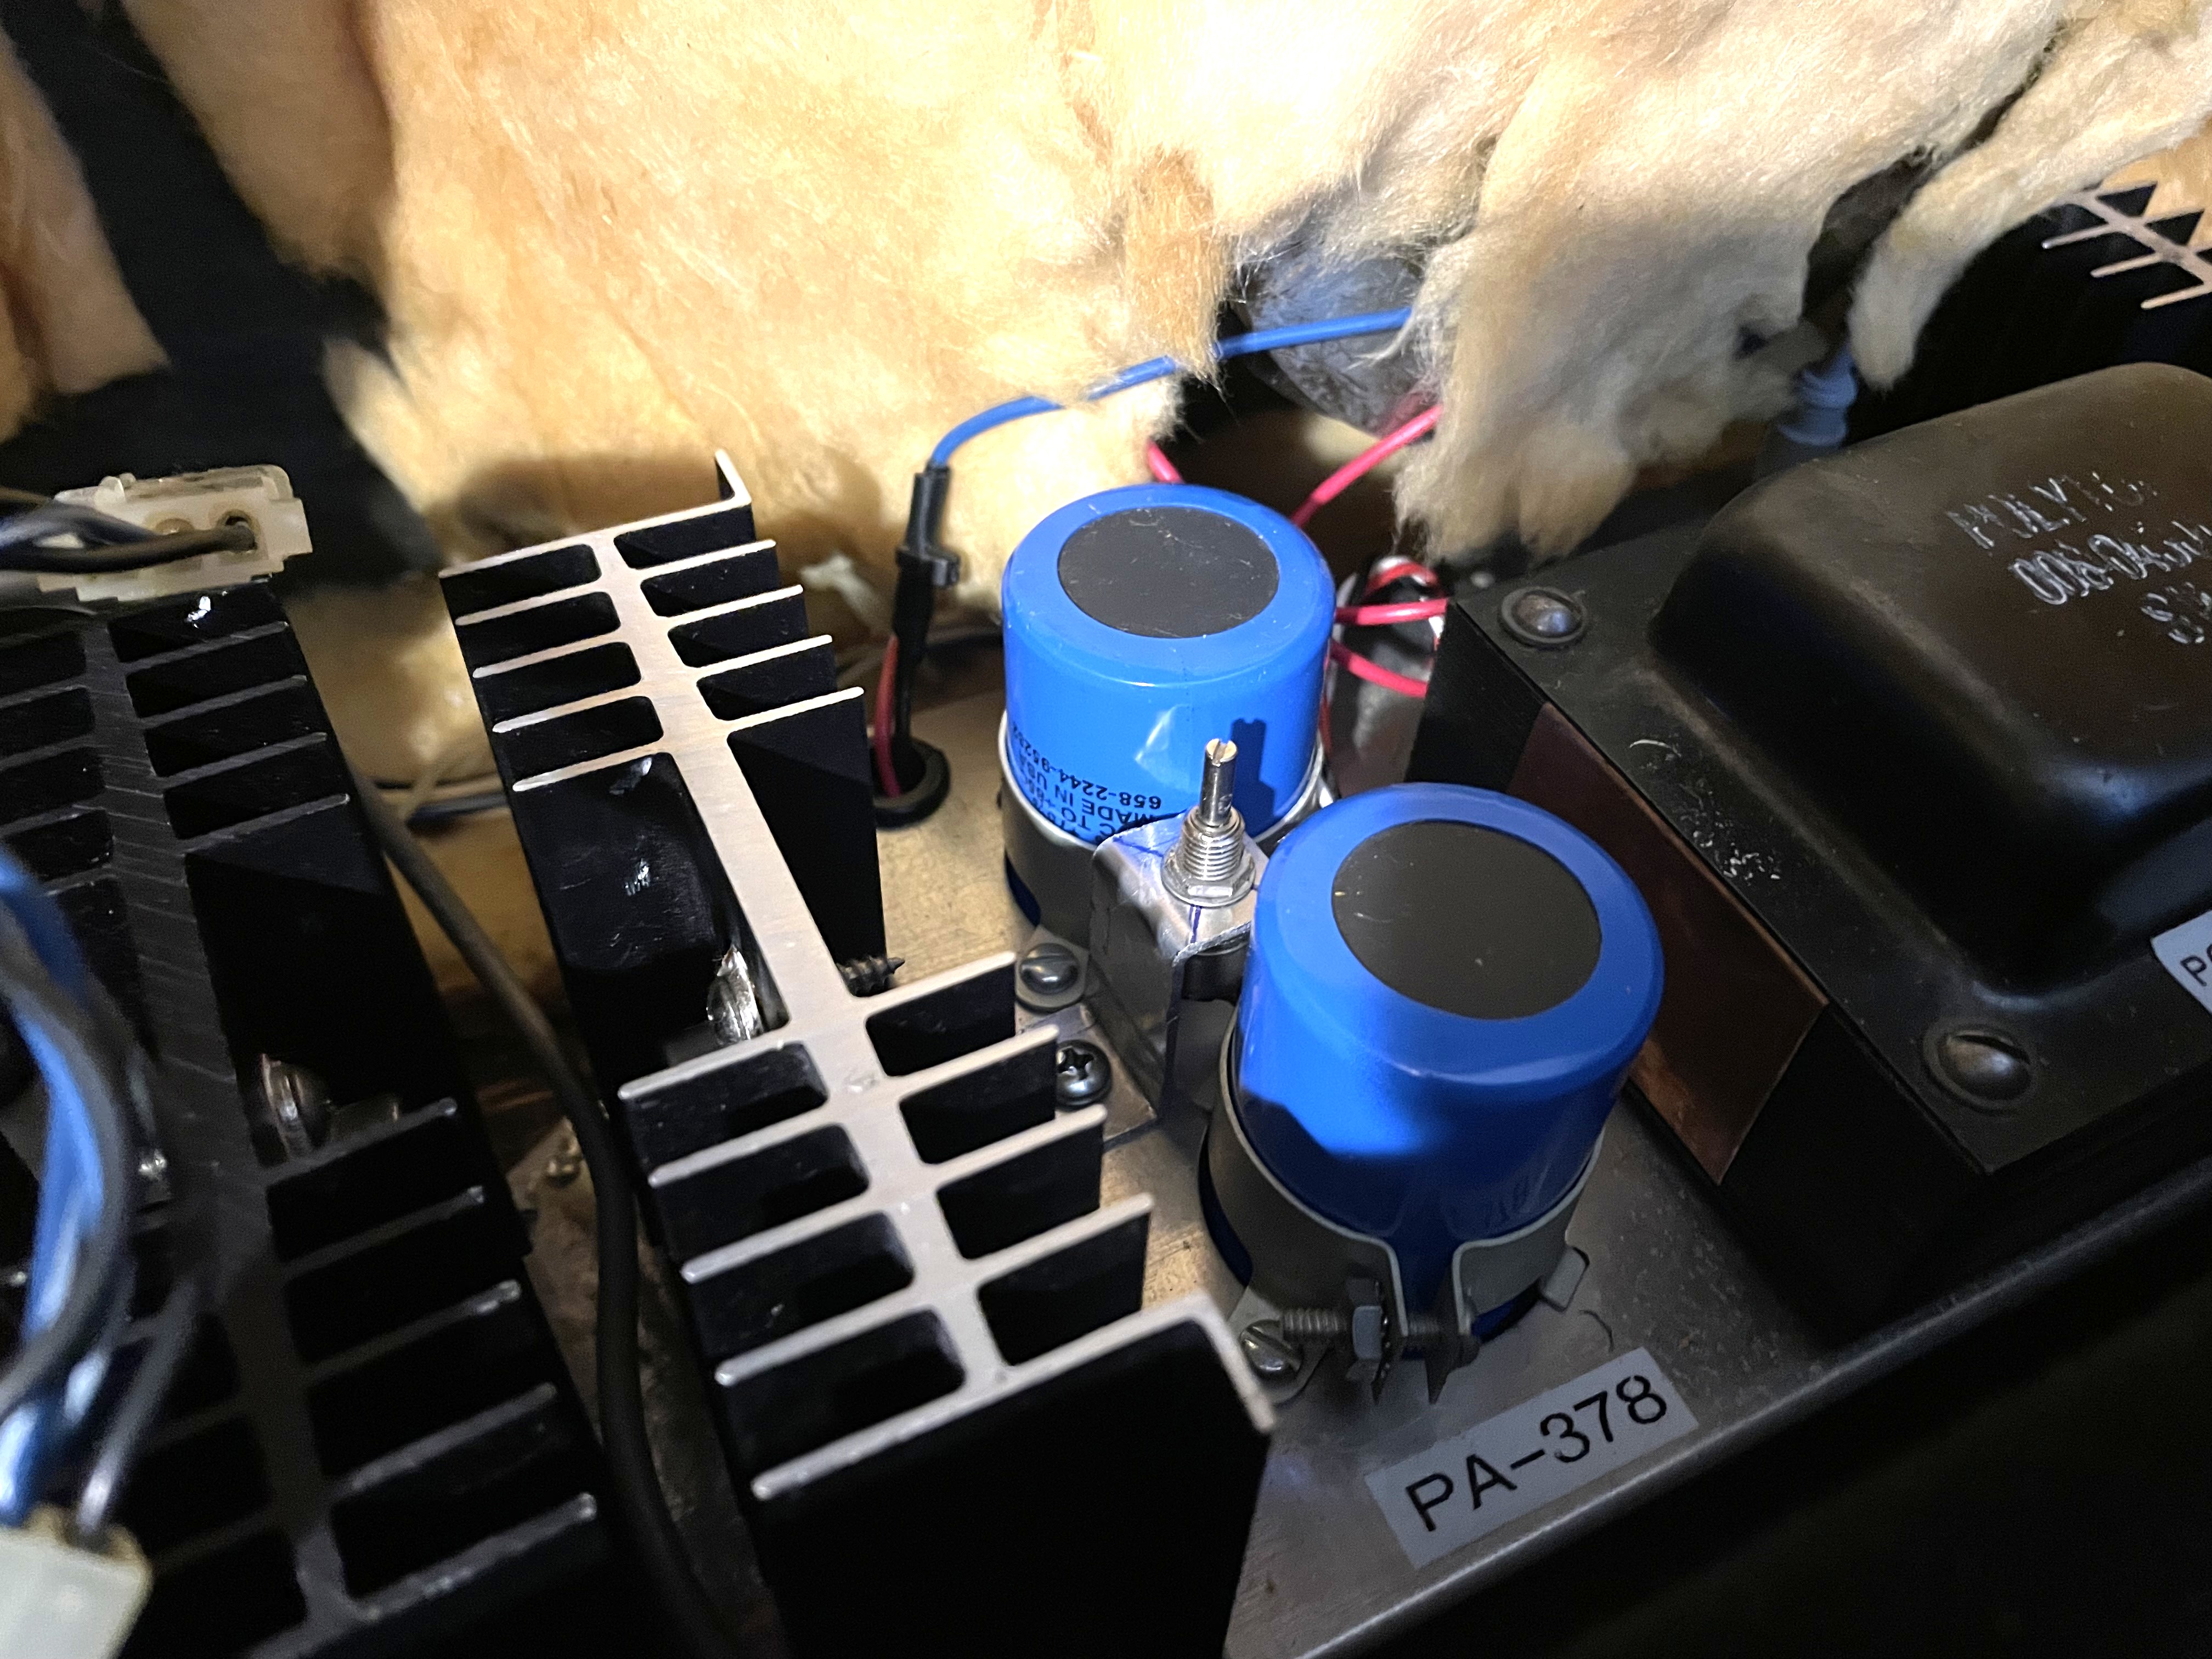 |
While I was at it, I moved the bias adjustment pot to the exterior of the power supply enclosure - where you can can actually get to it. Fortunately I had a pair of 2.5K mini pots that worked perfectly. Only had to fabricate a mounting bracket for them. You can see the pot in between the two blue caps. |
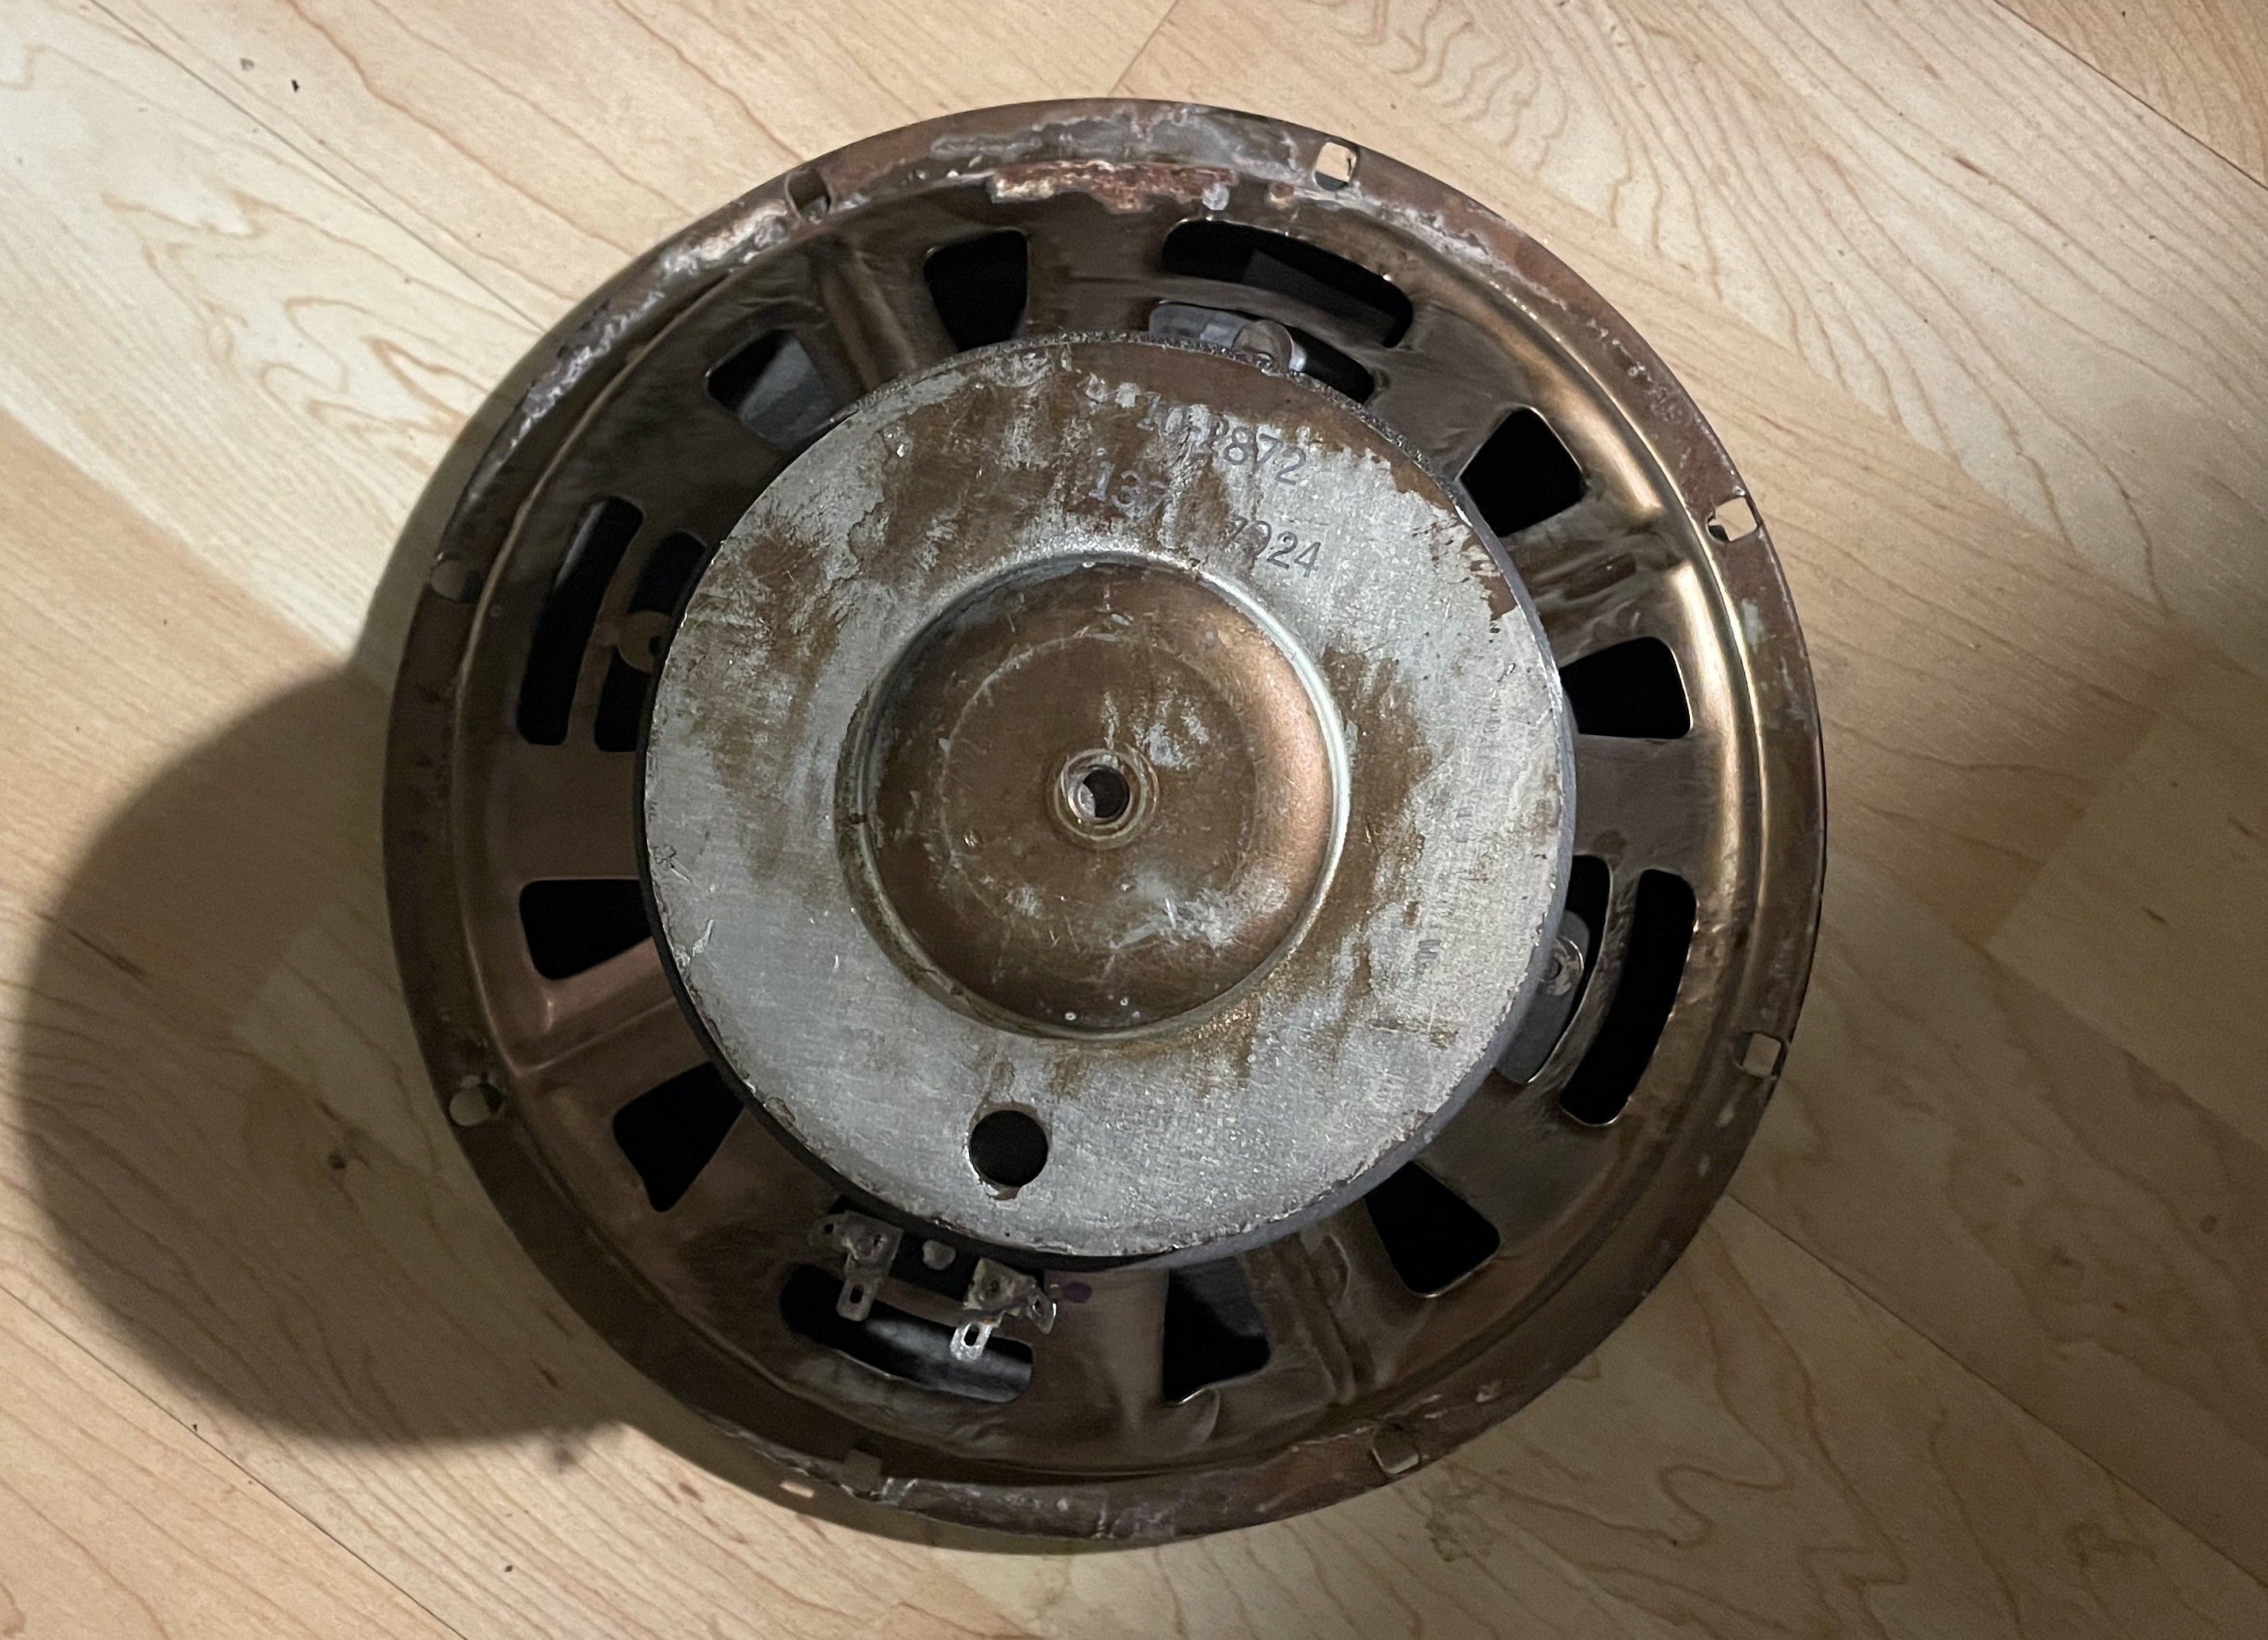 |
This is one of the speakers removed from the cabinet. To remove the power amps you pretty much have to remove the lower speaker(s). These were made by CTS in 1979 and I assume are rated for at least 50 watts. I'm not a speaker snob and these speakers sound pretty good to my ears. The 4x10 speaker configuration sounds good, nice bass response and the highs are quite sufficient. |
 |
Here you can see the markings which indicate that the speakers were made by CTS. There was even some corrosion on the inside of the speakers, where they mounted to the cabinet, which also required some attention. I measured them and they appear to be 8 ohm speakers which are wired in parallel for a 4 ohm load. |
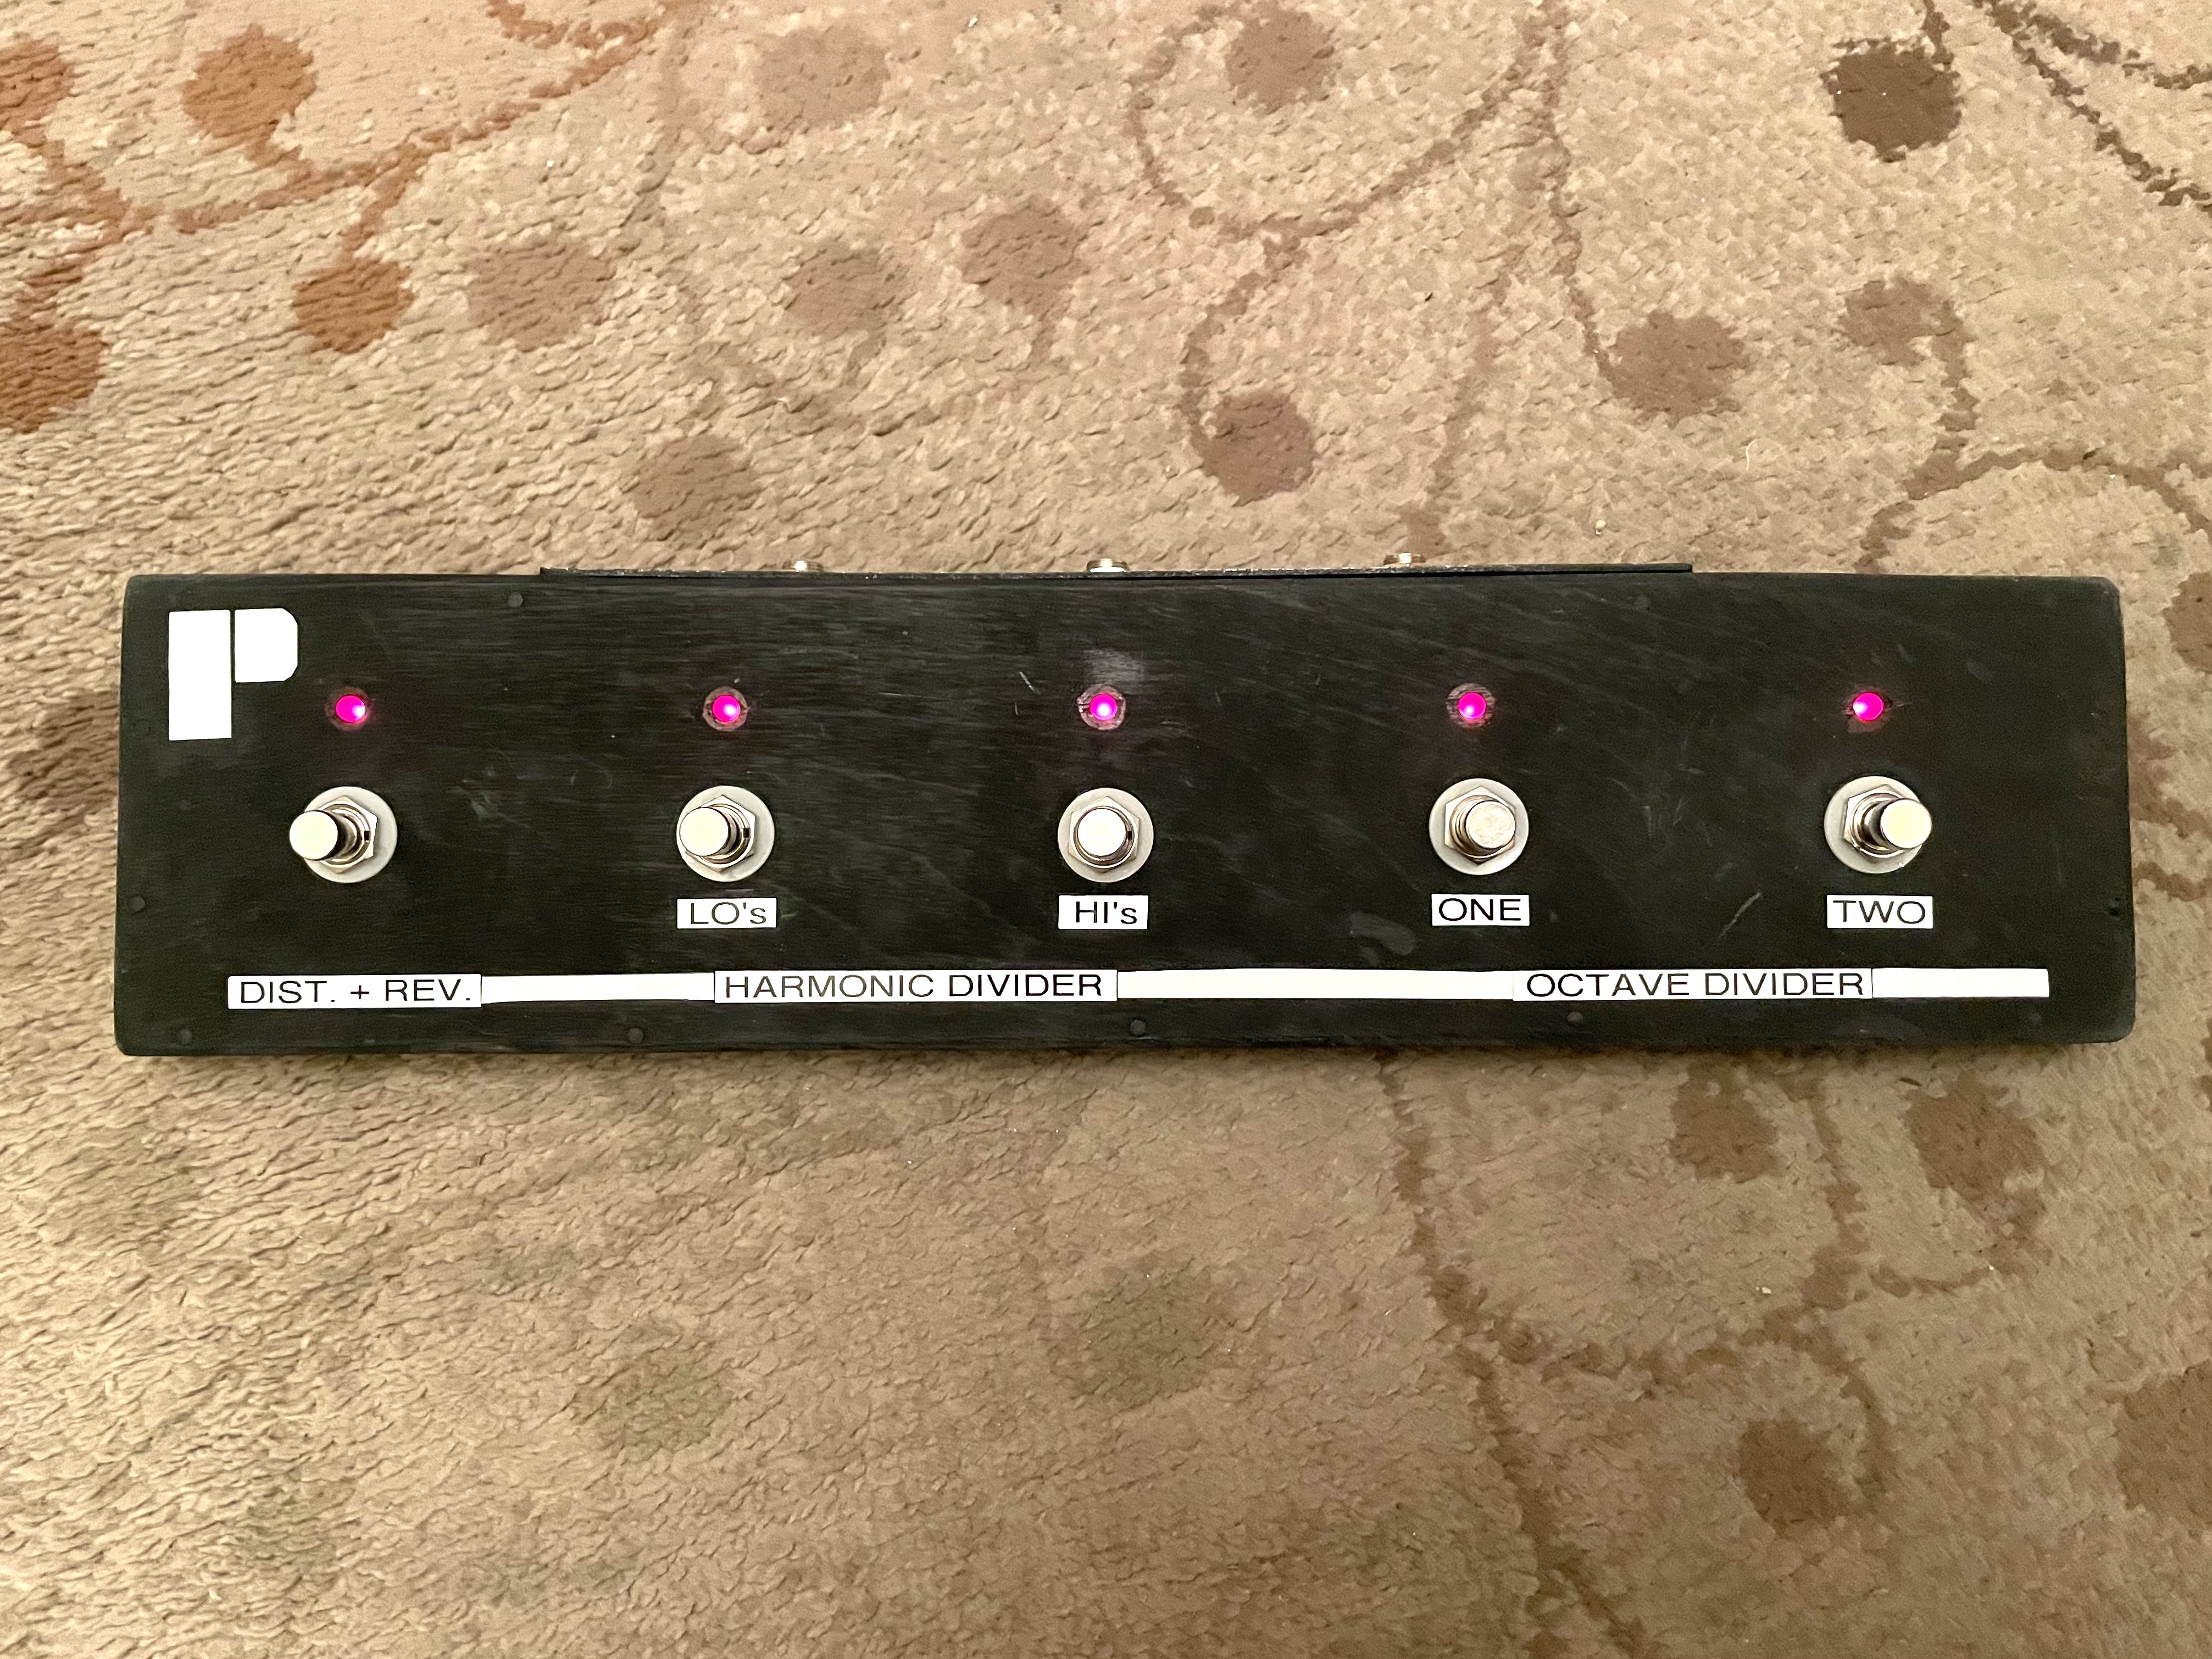 |
I made a footswitch which allowed me to access all of the features of the amp. Basically, without the footswitch you are unable to fully access four features of the amplifier, and it especially makes the Harmonic Divider a little more versatile. A link to how I made mine is at the bottom of this page. My version is MUCH more compact than the original footswitch made by Polytone. Those footswitches seem to be ten times rarer than this Maxi-Brute amp is, and they are big and bulky, so I am happy with this DIY version. You can see what the original one looks like HERE . You can see that it has the cables permanently attached. My version allows you to use whatever cables you want. |
I hope this webpage helps others who have a Polytone amp that is in need of repair, or just want to know more about. Polytones seem to
be known online as being "notoriously difficult to repair". I would say out of all my guitar amps, this one is actually the easiest one
to work on with the exception of the awkward arrangement of the power supplies. You just can't get to the bias adjustment pot or anything
else in the power amp due to the speakers being in very close proximity of the power amps and the back not being fully removable where all of
those jacks are mounted. Also how the AC power connects to the power amps just doesn't allow you to have them outside of the cabinet for
measuring and/or adjusting things. That is why I moved those bias adjustment pots. So yes, in that regard, that is a real pain in the rear.
Anyway, as far as I can tell, the three versions of the power amps were used in many of the amps produced by Polytone. It was a challenge
to repair my Maxi-Brute as it had about half a dozen issues going on simultaneously. Some of them were just age related issues that you would expect,
such as dried out electrolytic caps but a few dead IC chips is not something I would typically encounter. Strange but happy to have it fixed!
This is actually the first "vintage" solid state guitar amp I have owned or worked on, so it was all something of a learning experience.
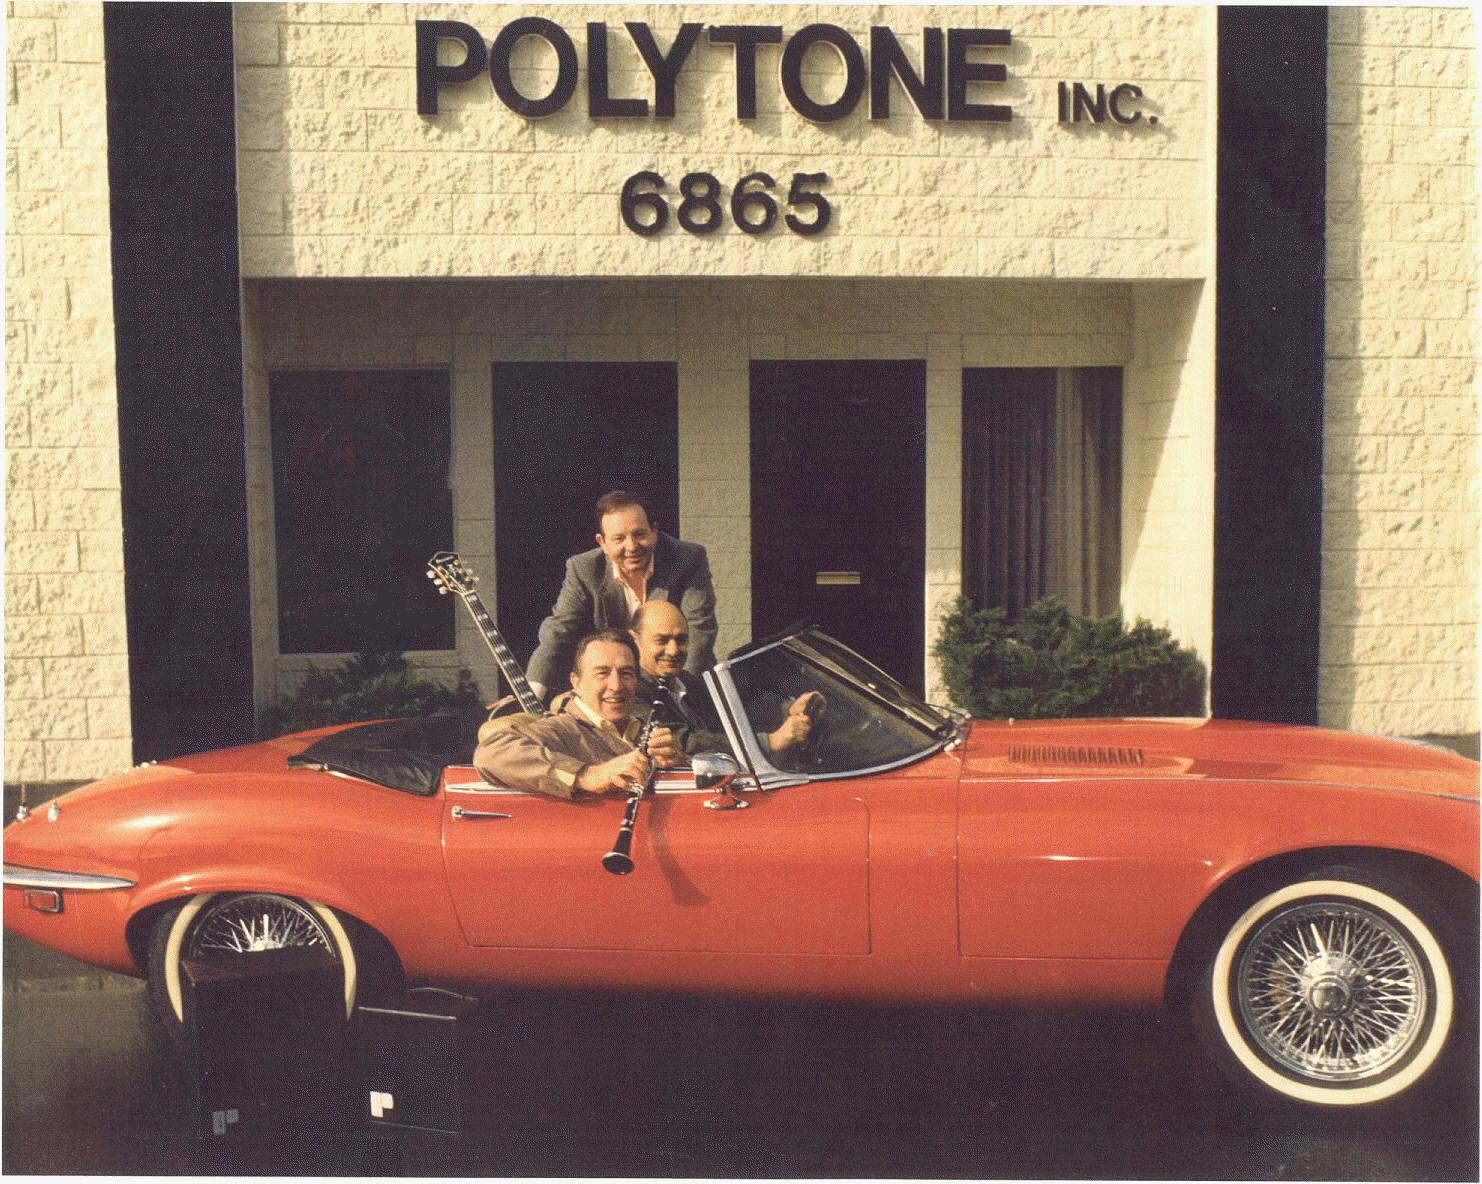
The president of Polytone, Tommy Gumina, shown below in front of his North Hollywood office with Joe Pass; date unknown. Joe Pass was the very first guitarist to play and
endorse POLYTONE amplifiers and Ray Brown,
the first bass player to play and endorse Tommy Gumina's first bass amp # 101. This association continued for decades until
Joe's death in 1994 and Ray's in 2002. Polytone was founded in 1968. Tommy died in 2013 and the Polytone brand passed on with him.
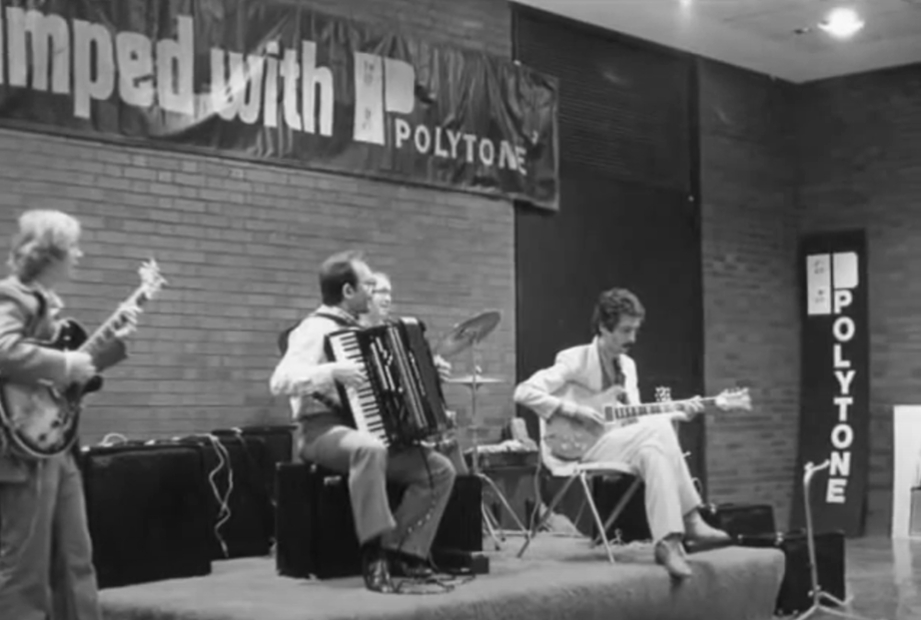
In this undated photo, there was apparently an event which was promoting Polytone. Tommy Gumina (accordian) is playing with Pat Martino (right) and Ron Eschete (left). For a time Pat Martino played Polytone guitars exclusively. Polytone guitars seem to be rather rare birds with their own interesting story.
Polytone Maxi-Brute Model 104 PCB Layout