DIY Polytone Footswitch
Last updated 1/2/2025
By Paul Marossy
I wouldn't normally build a footswitch for a guitar amp if they are readily available, but in the case of Polytone
guitar amps, there's about three different types and all of them seem to be rather rare birds. In the case of my Model 104
"Maxi-Brute", you can not fully access all of the features of the amp without the footswitch, which is the only reason
I made one. While I was at it, I figured I could make one much smaller and sleeker than an original Polytone footswitch,
which is big and bulky. Making my own also allows me to do basically whatever I want.
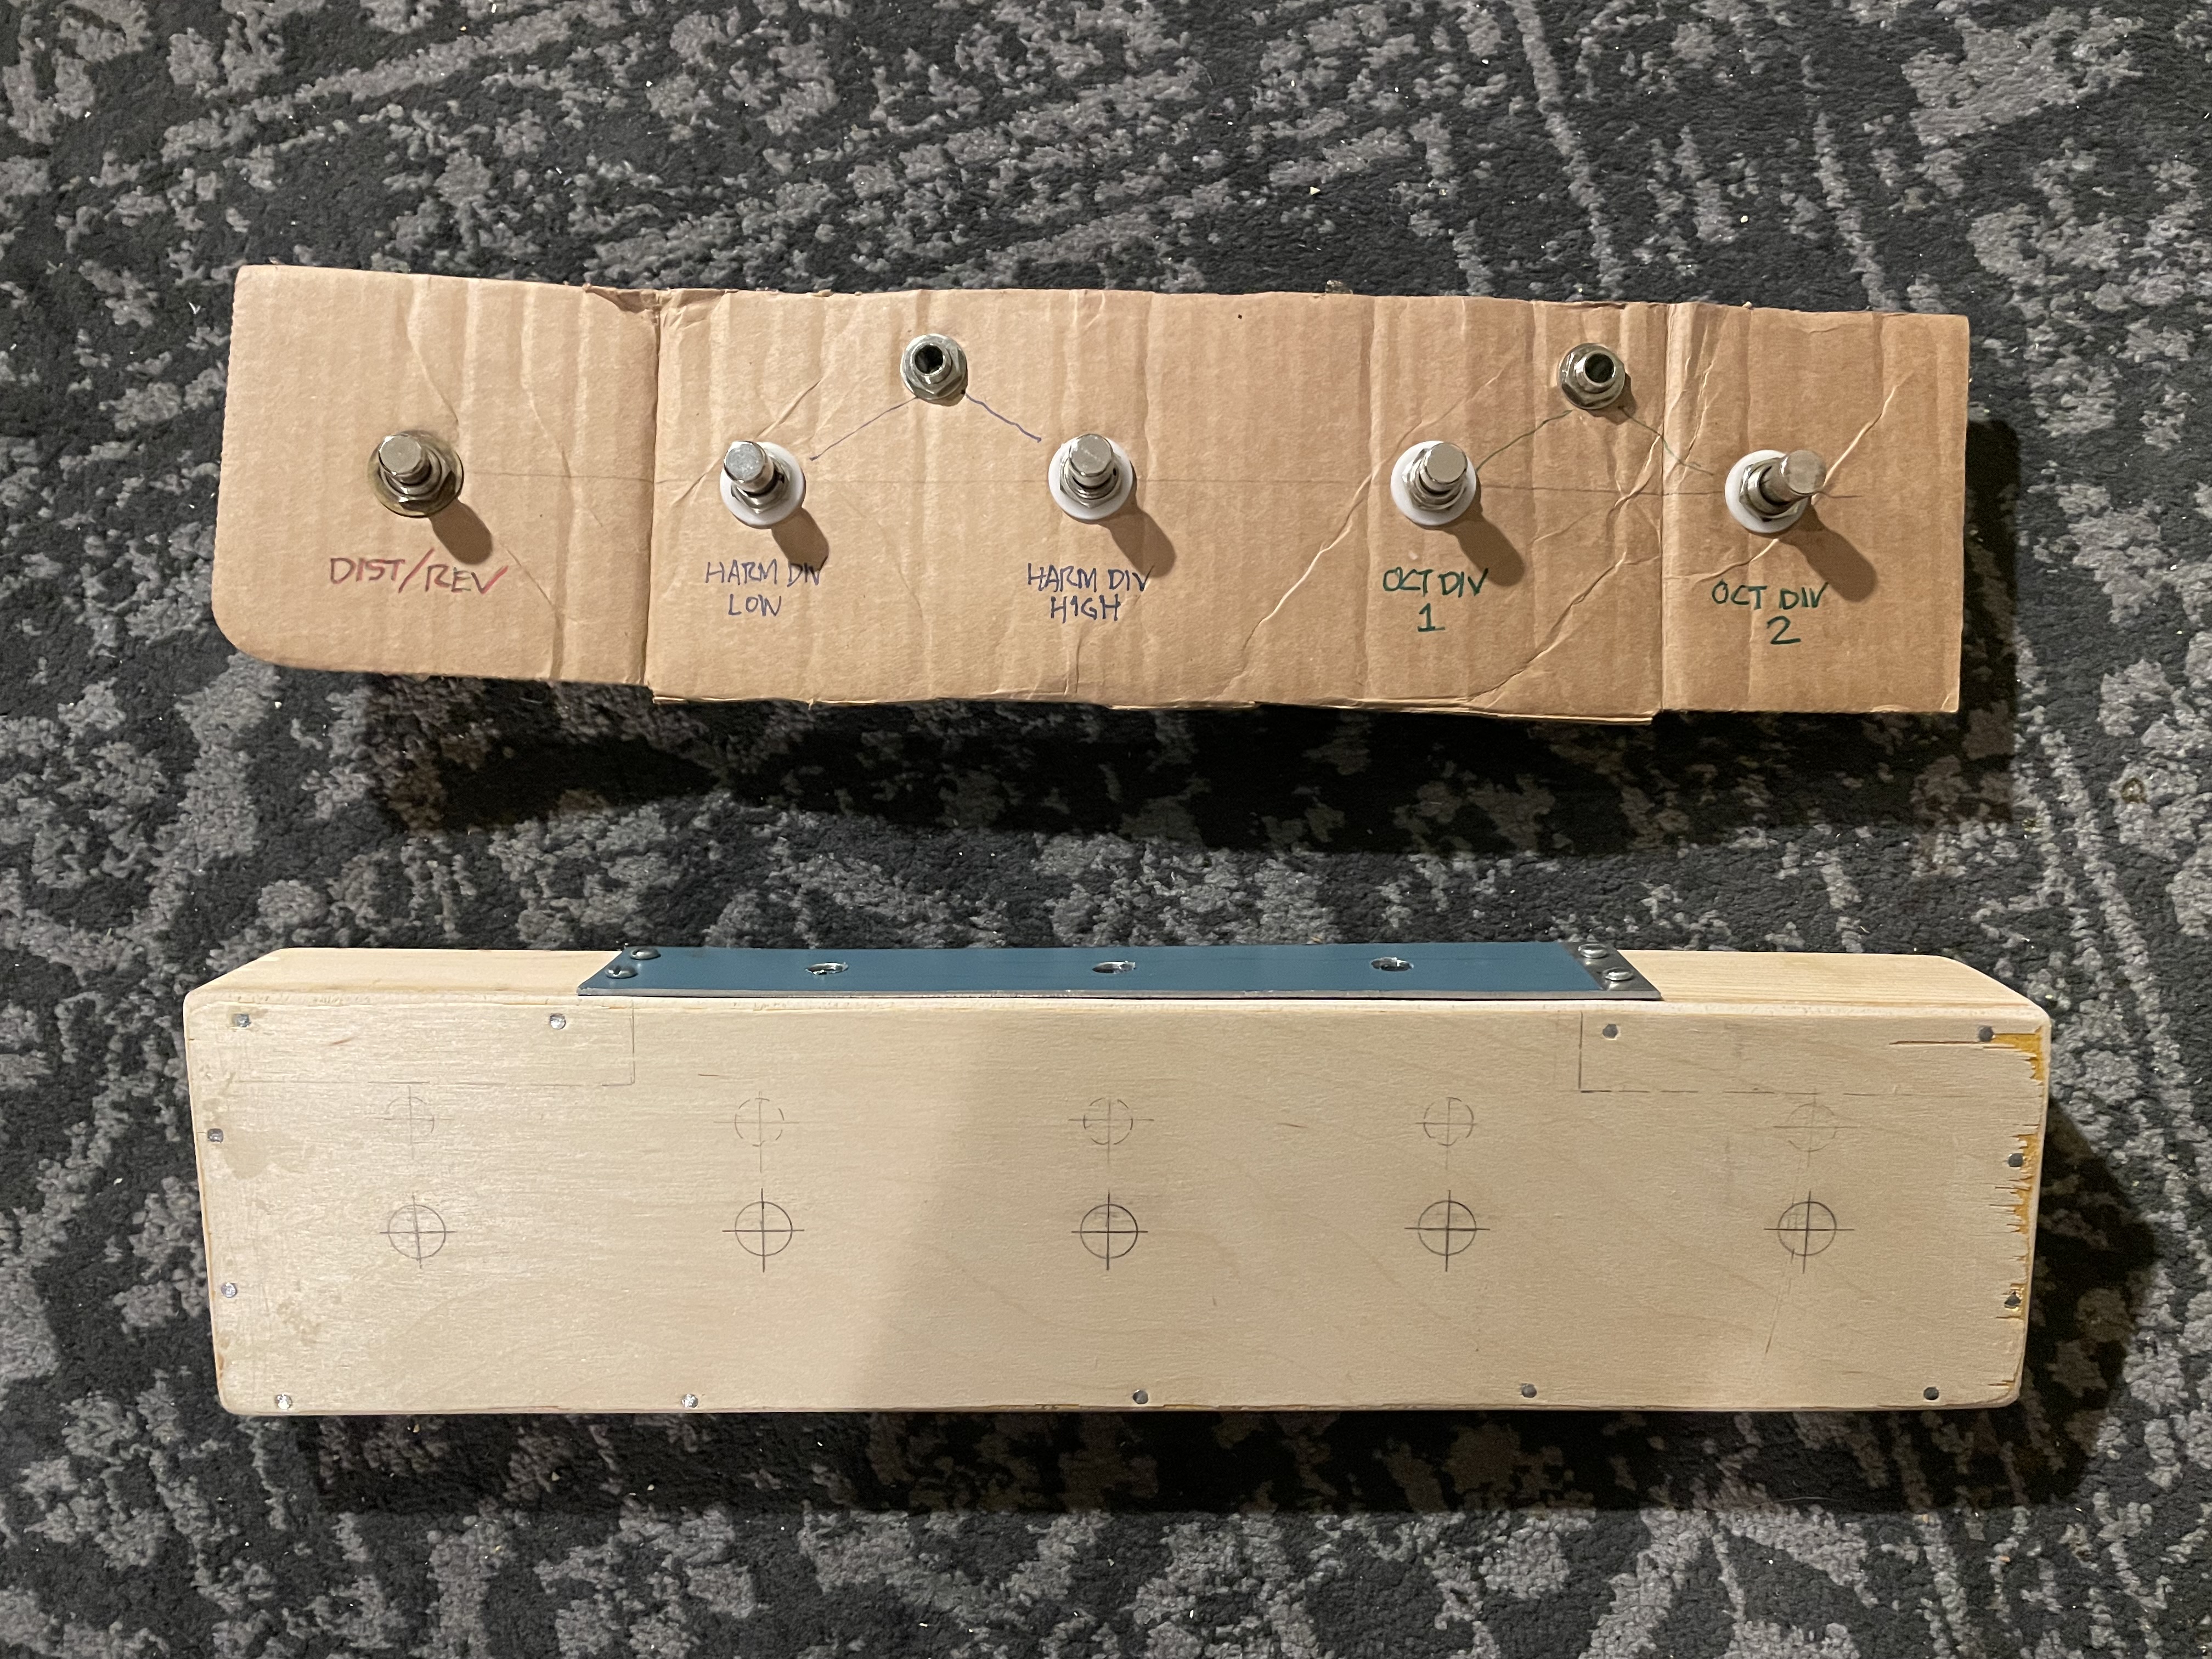 |
It started out with a series of switches and jacks on a piece of cardboard cut to about the size I wanted. I did this mainly to test the functionality of the amp and after I heard all of the features available on my Model 104 Maxi-Brute, I simply had to make an actual permanent footswitch for it. |
 |
I made this literally from scraps of wood I had lying around in the garage. It measures 16" long x 4" wide. The side view is wedge shaped, about 3/4" tall in the front and about 1-3/4" tall in the back. The top is 1/4" plywood. It's plenty strong considering that it's made from wood. Hey, if it's good enough for Pete Cornish's custom rigs, that's good enough for me! I've actually made several things with wood enclosures, and they have all been fine. I'm not a big guy, so I'll never smash anything that I've made. |
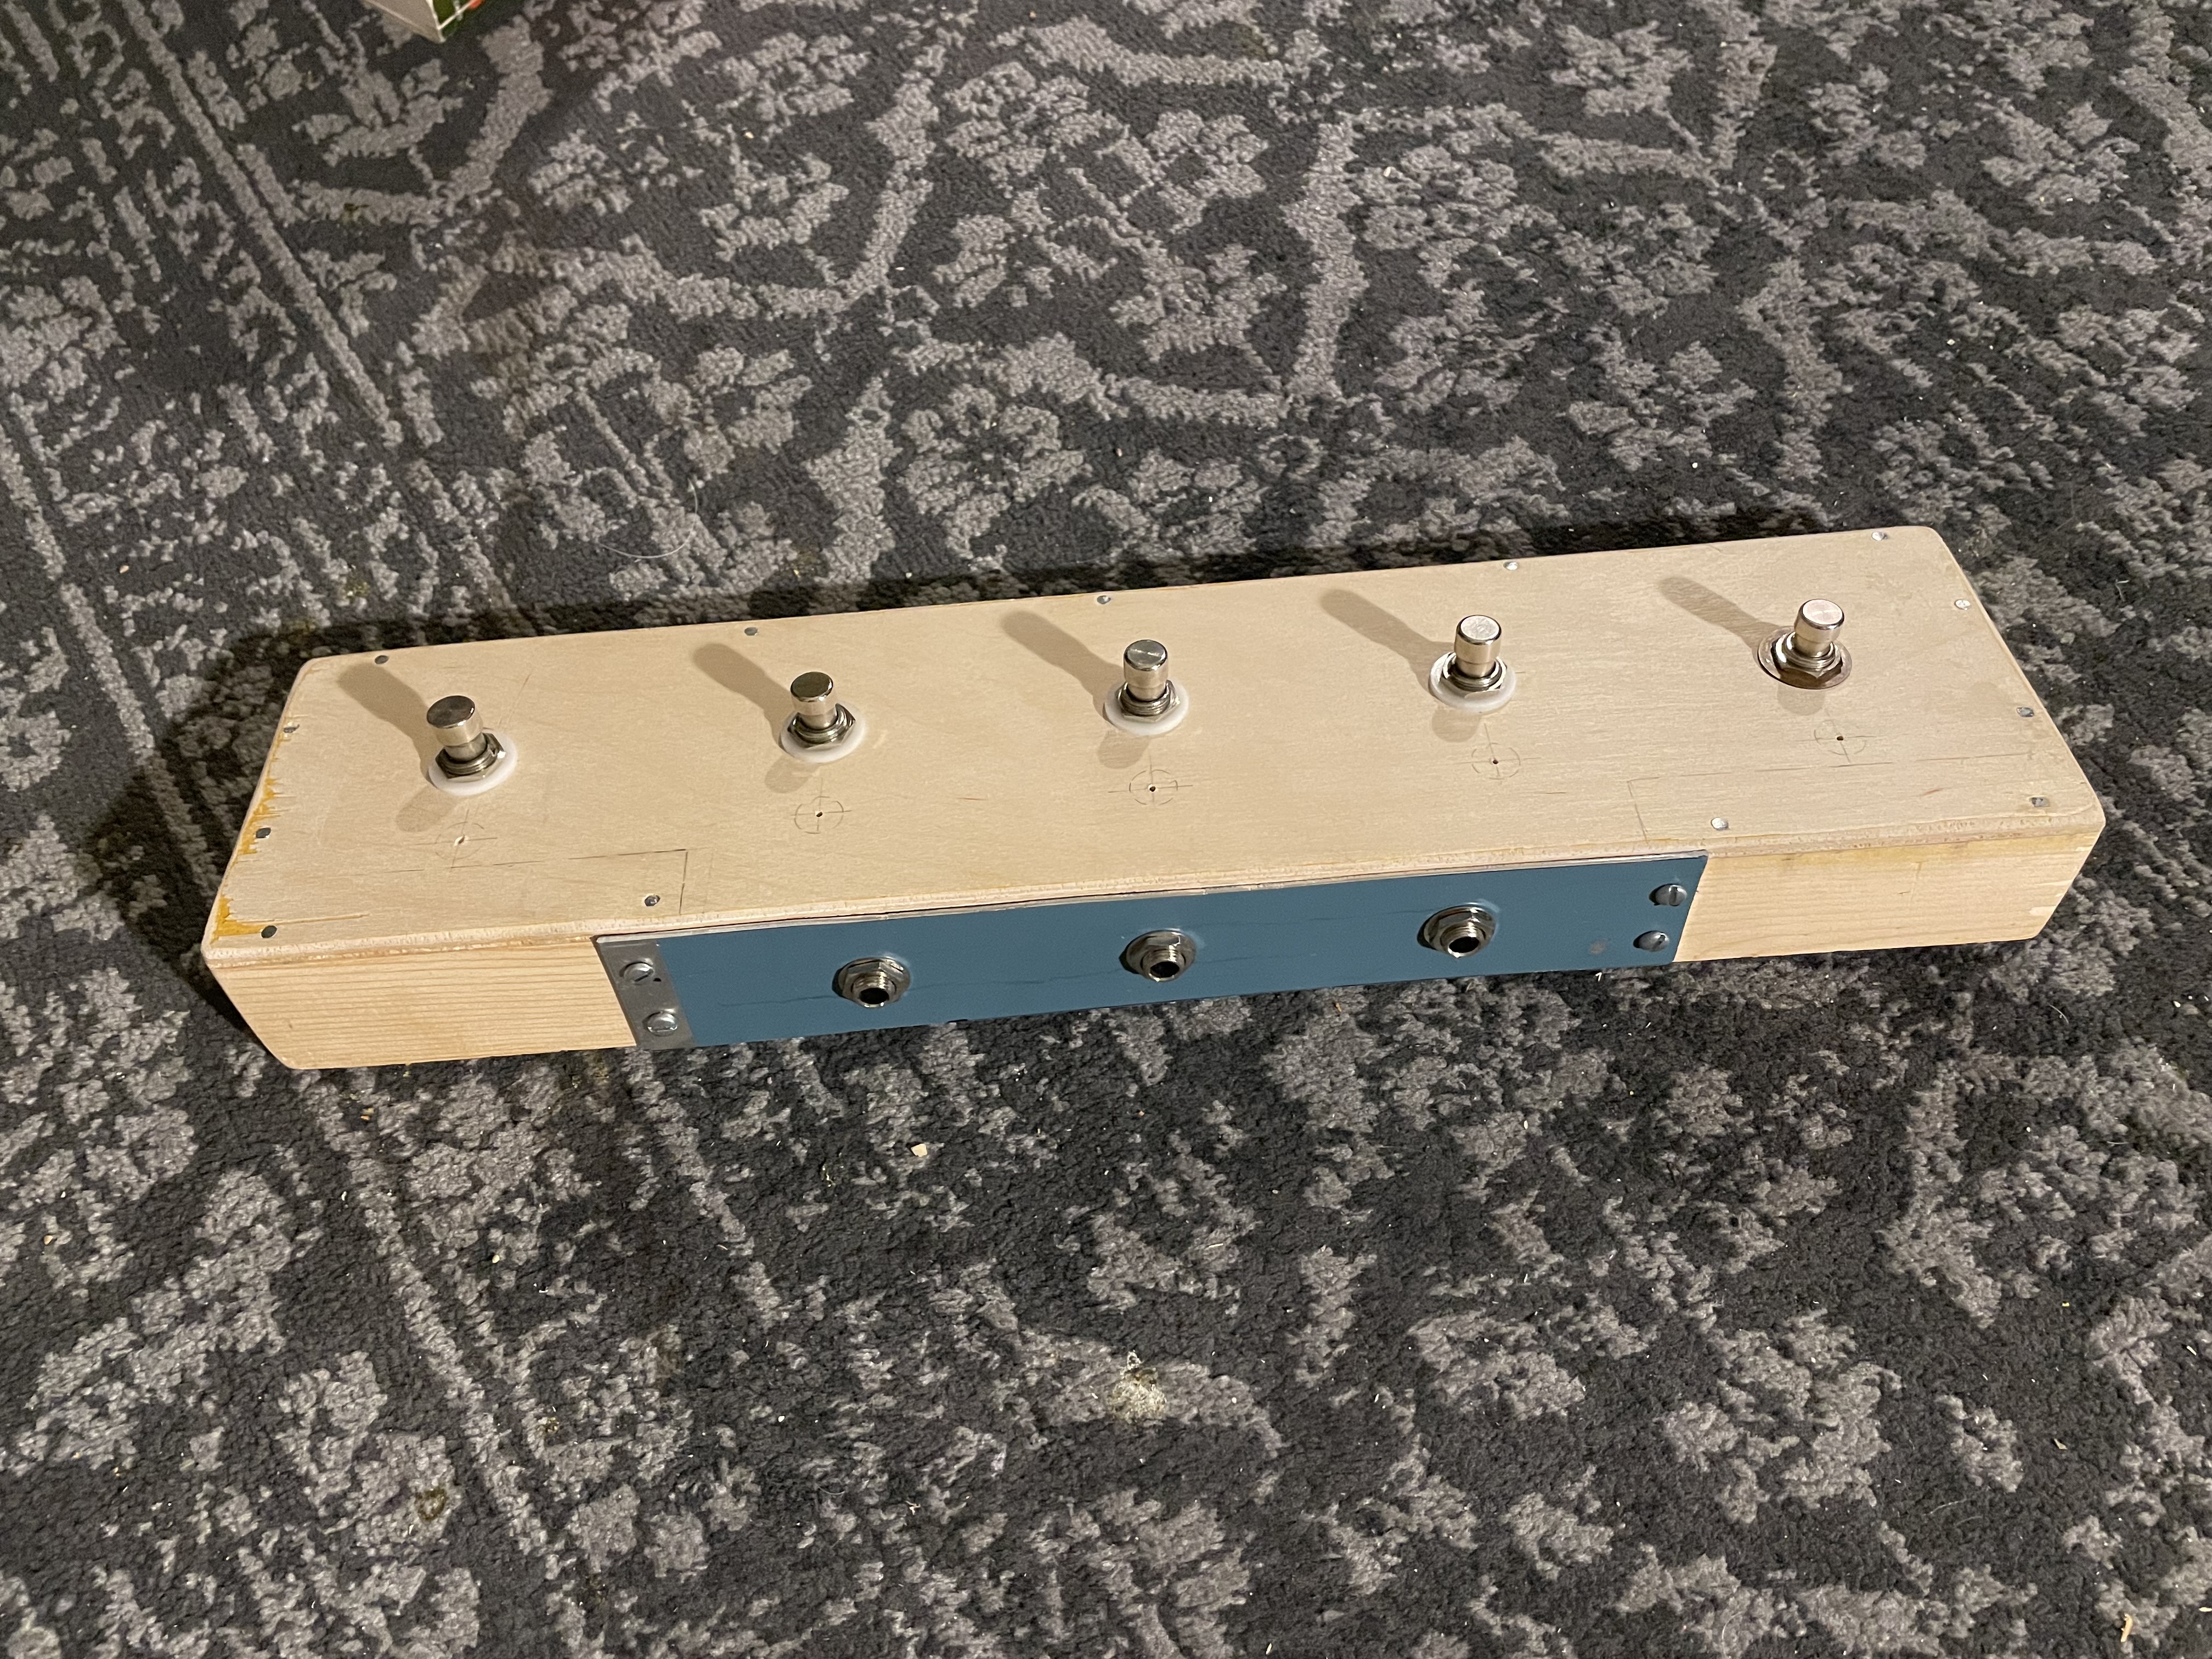 |
For the area where the jacks are, I repurposed a piece of thick aluminum and fastened that to the enclosure using four wood screws. |
 |
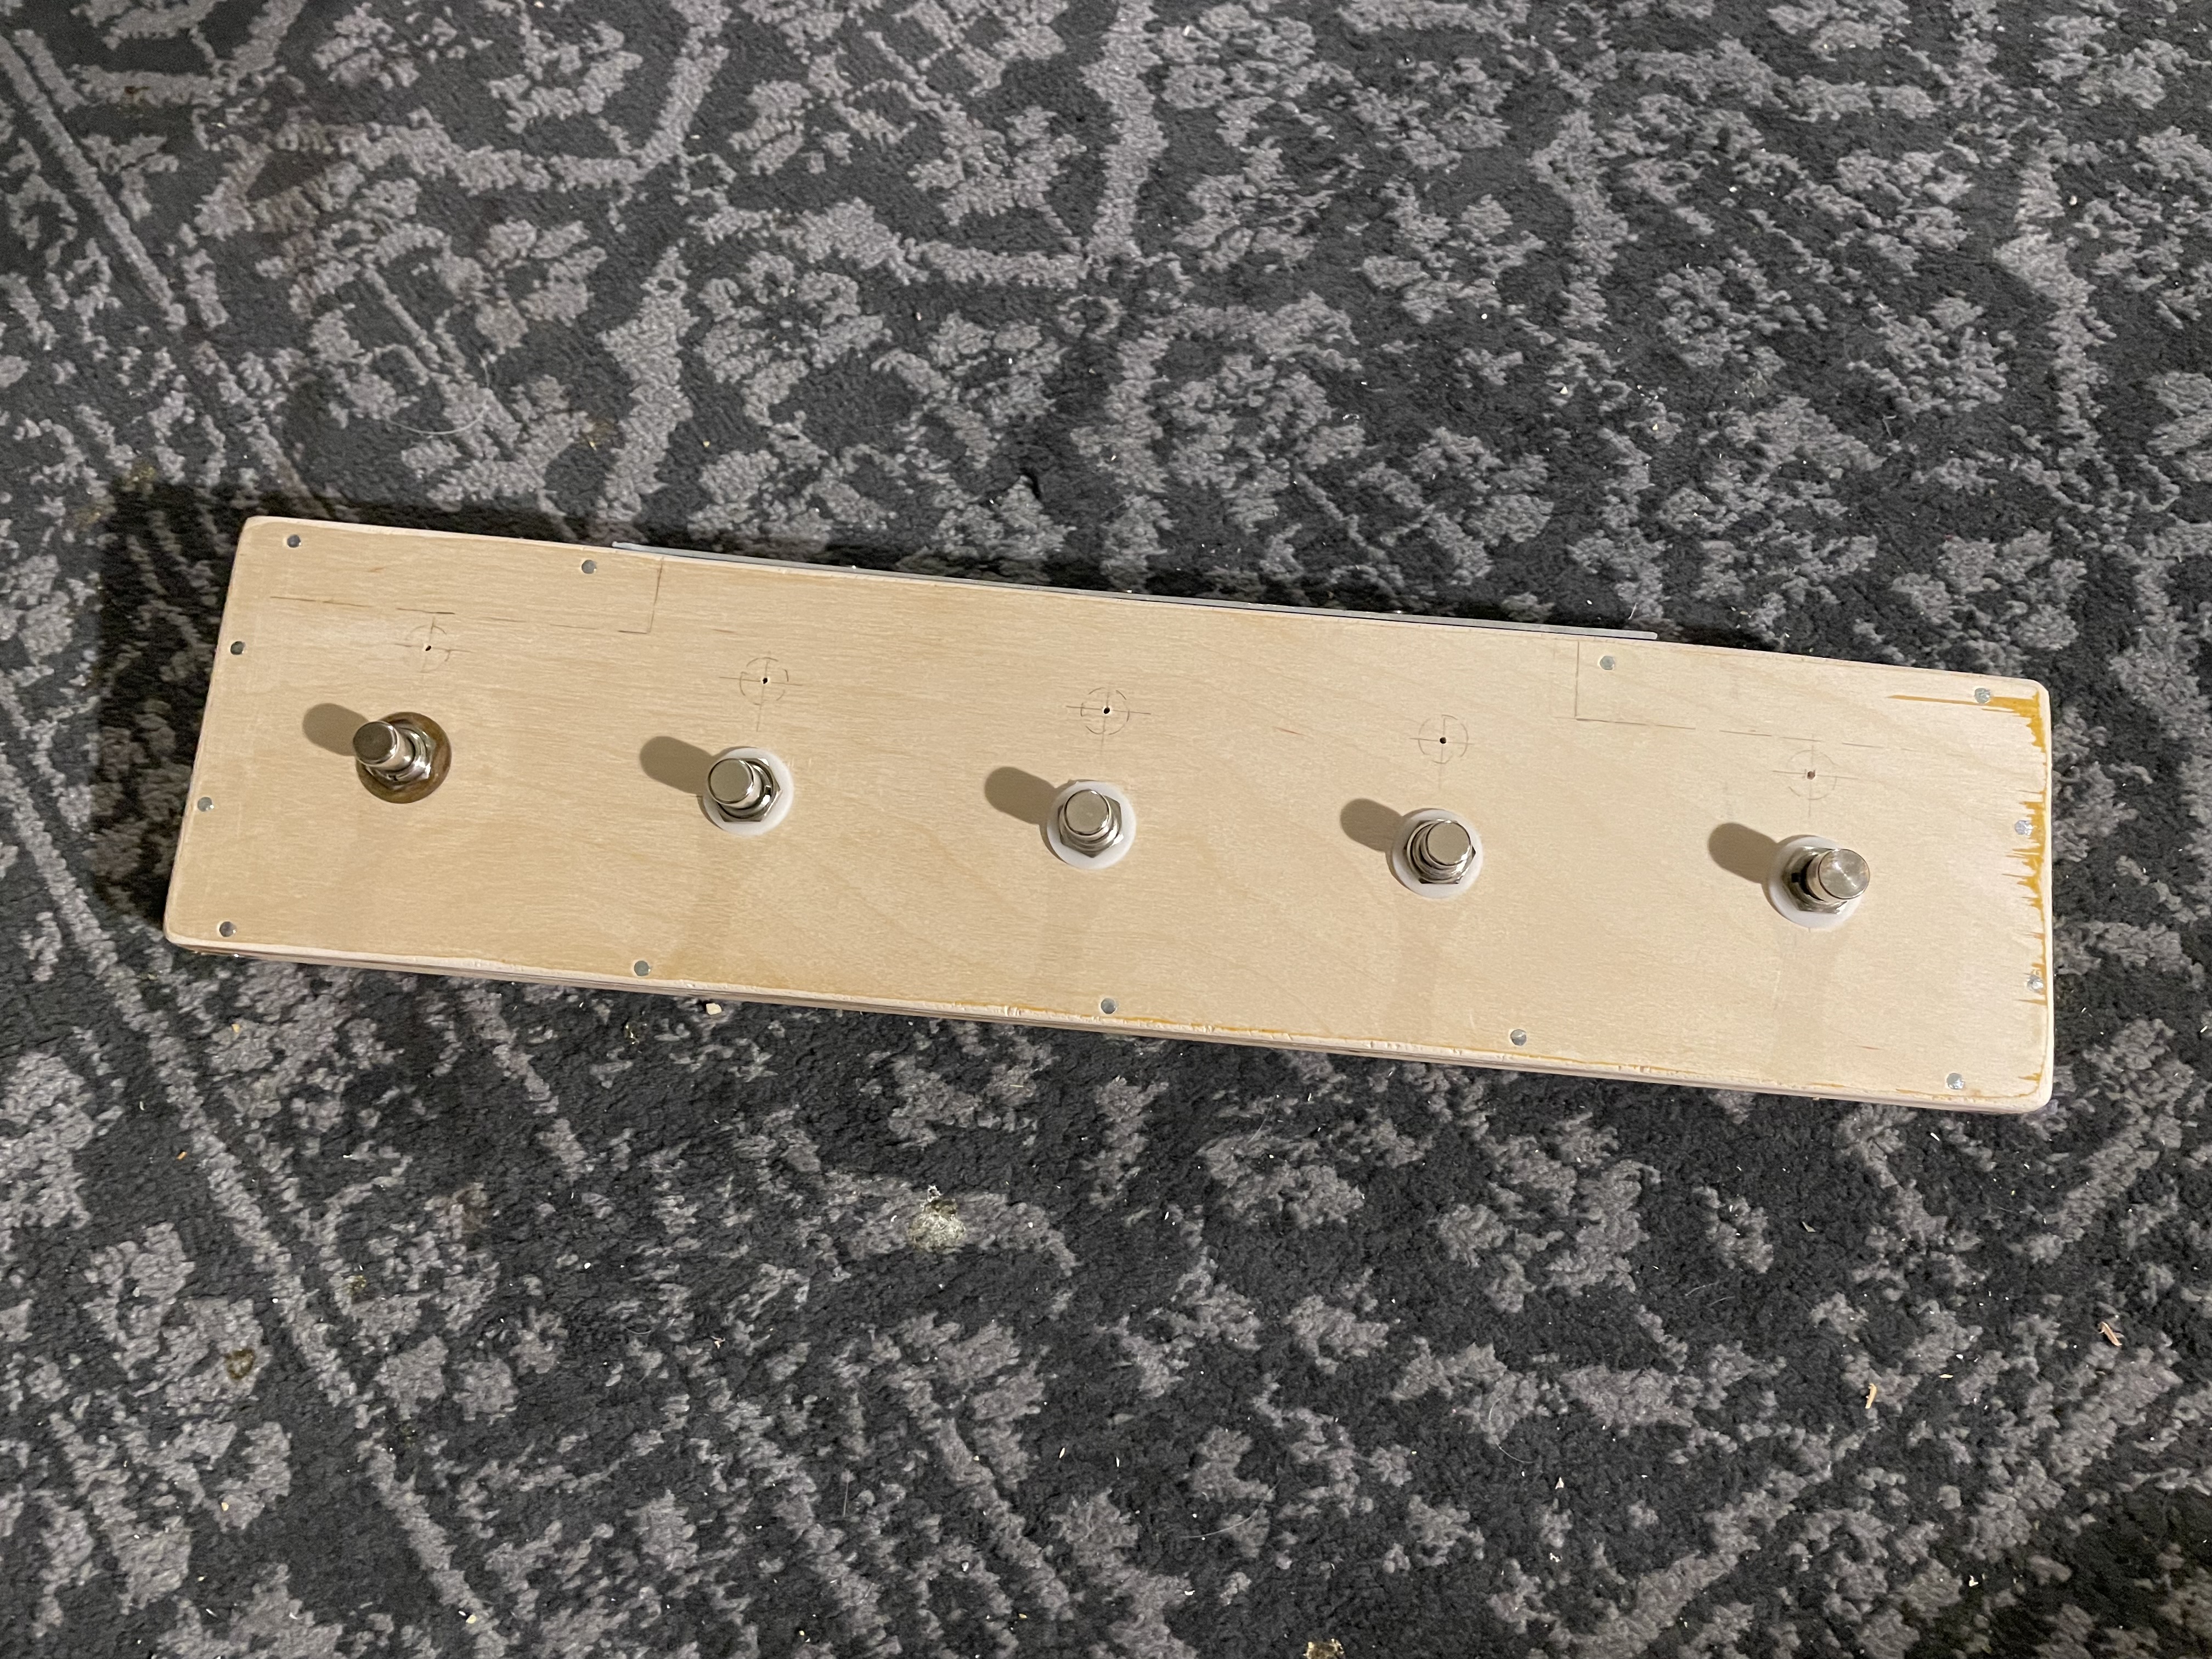
Here I have temporarily installed everything to test fit stuff and make sure it all worked OK. I was just making it up as I went along. So far all is good. |
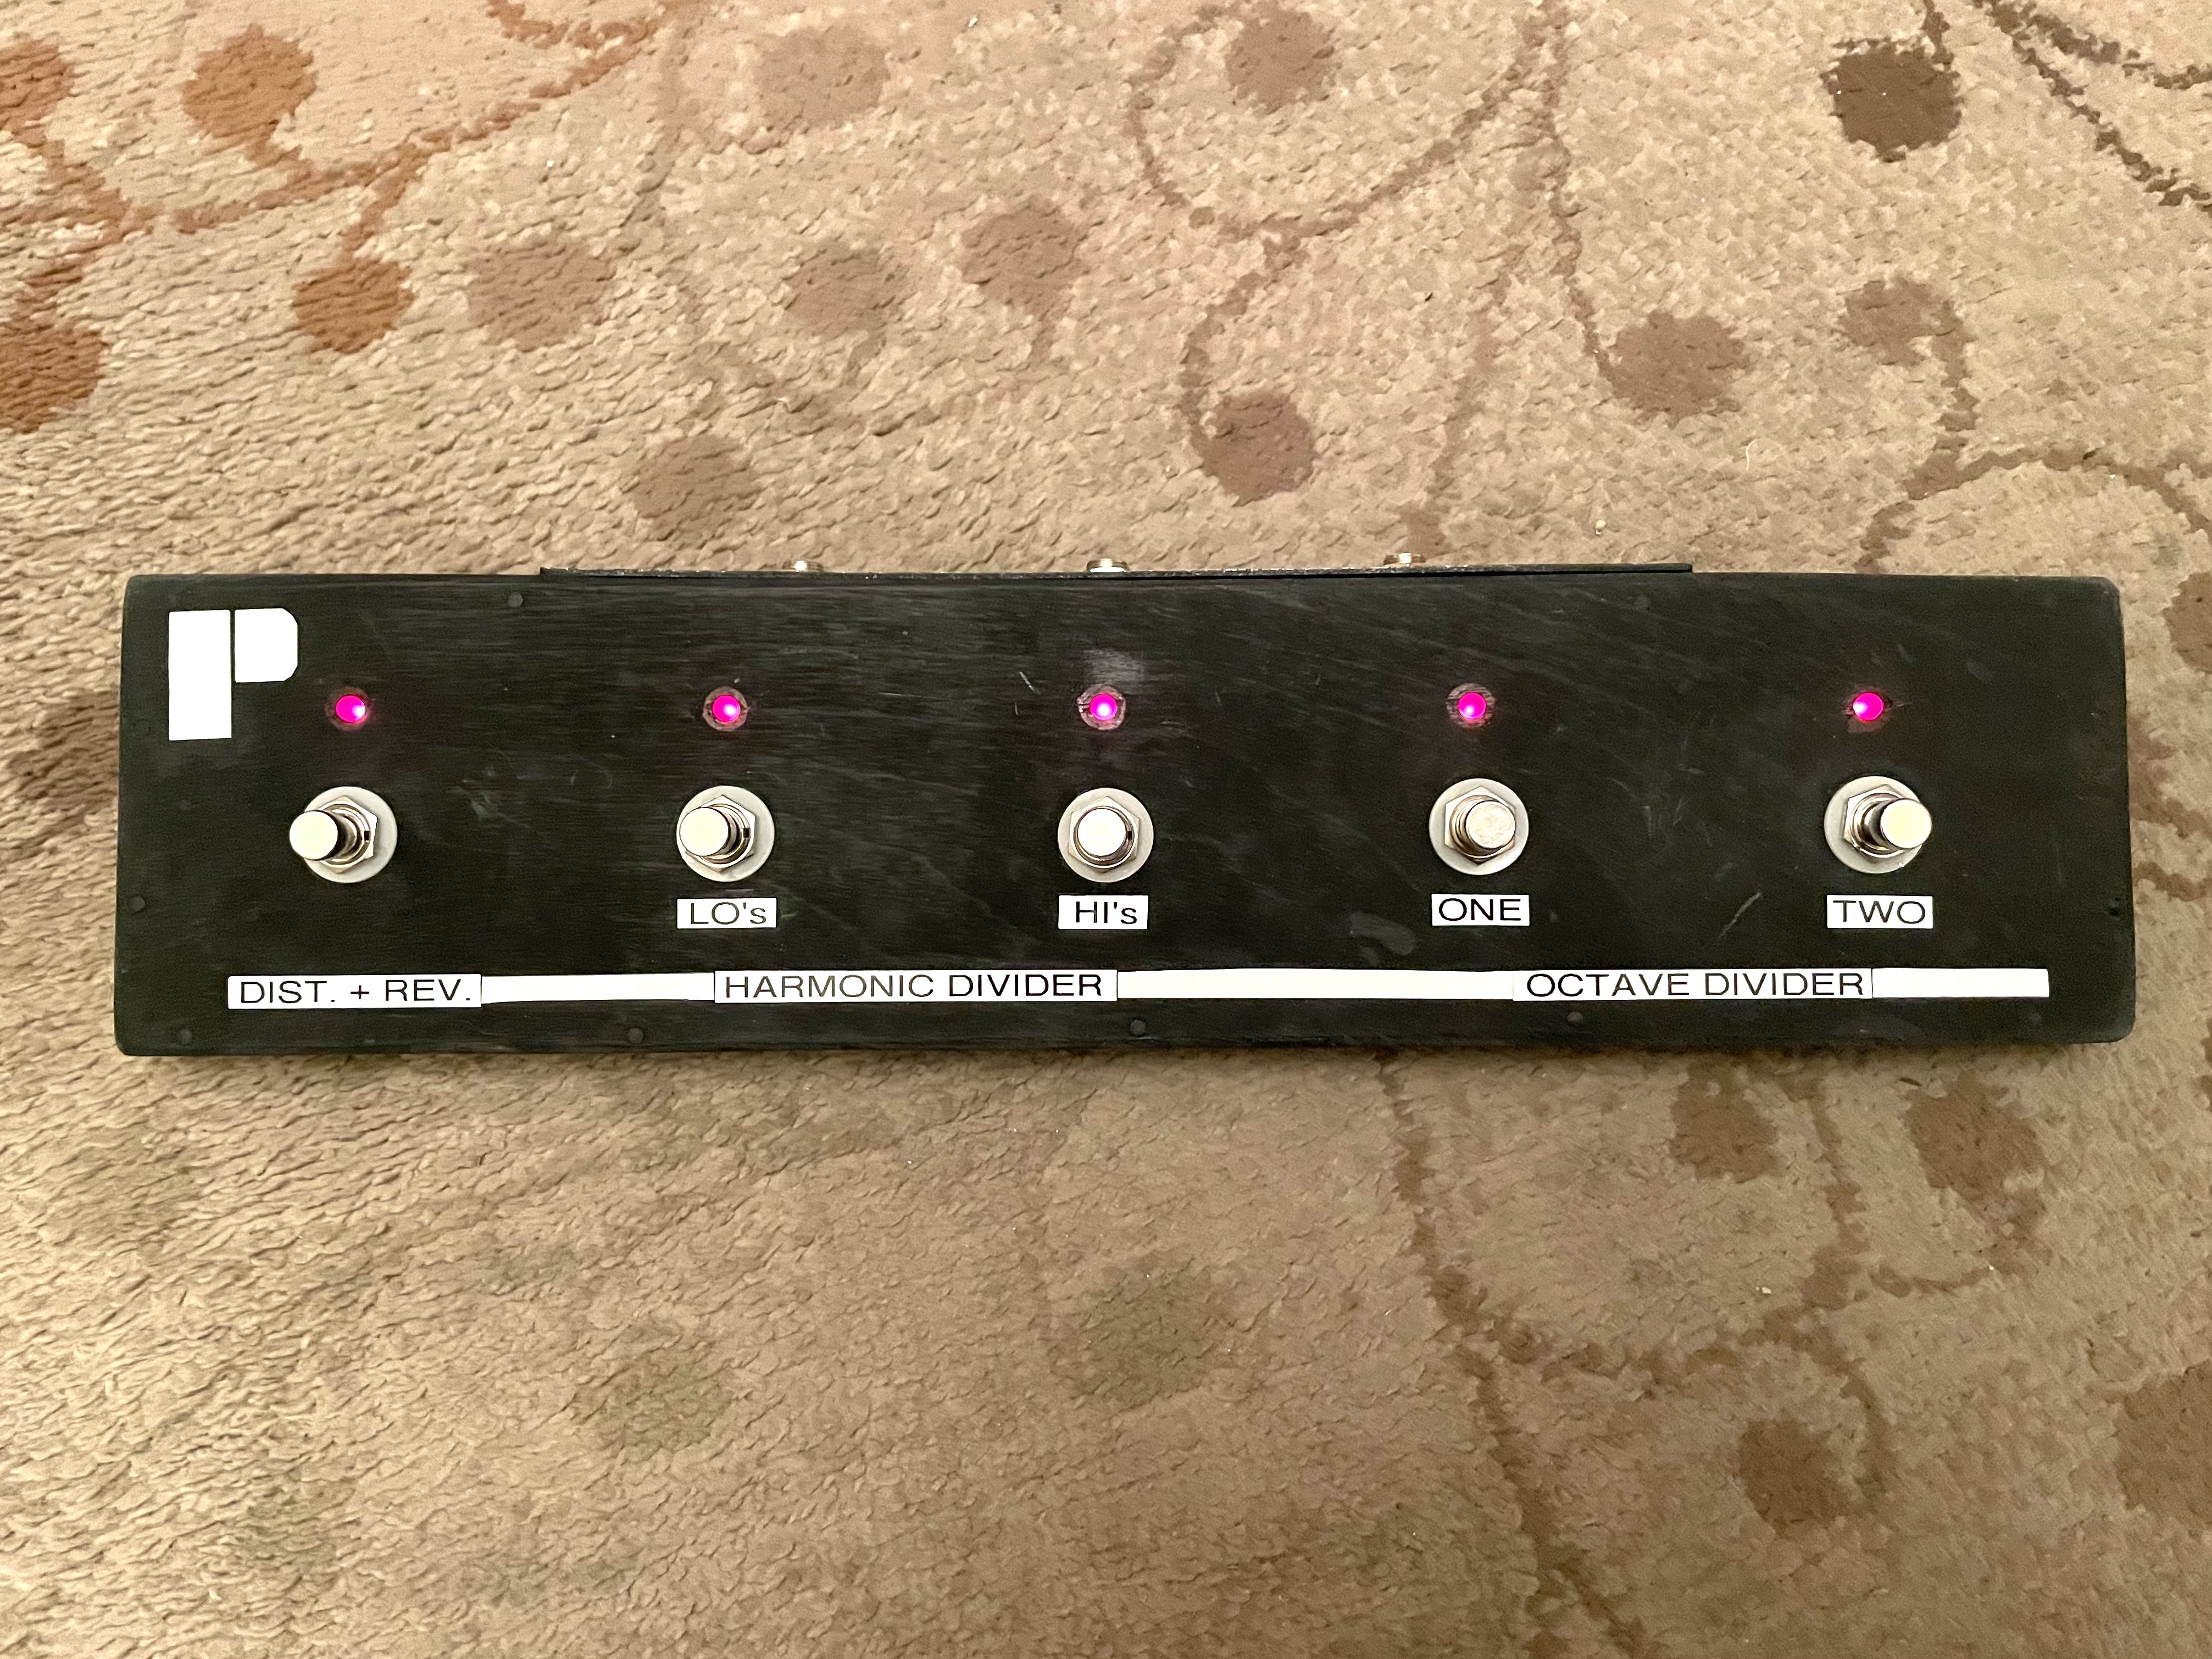 |
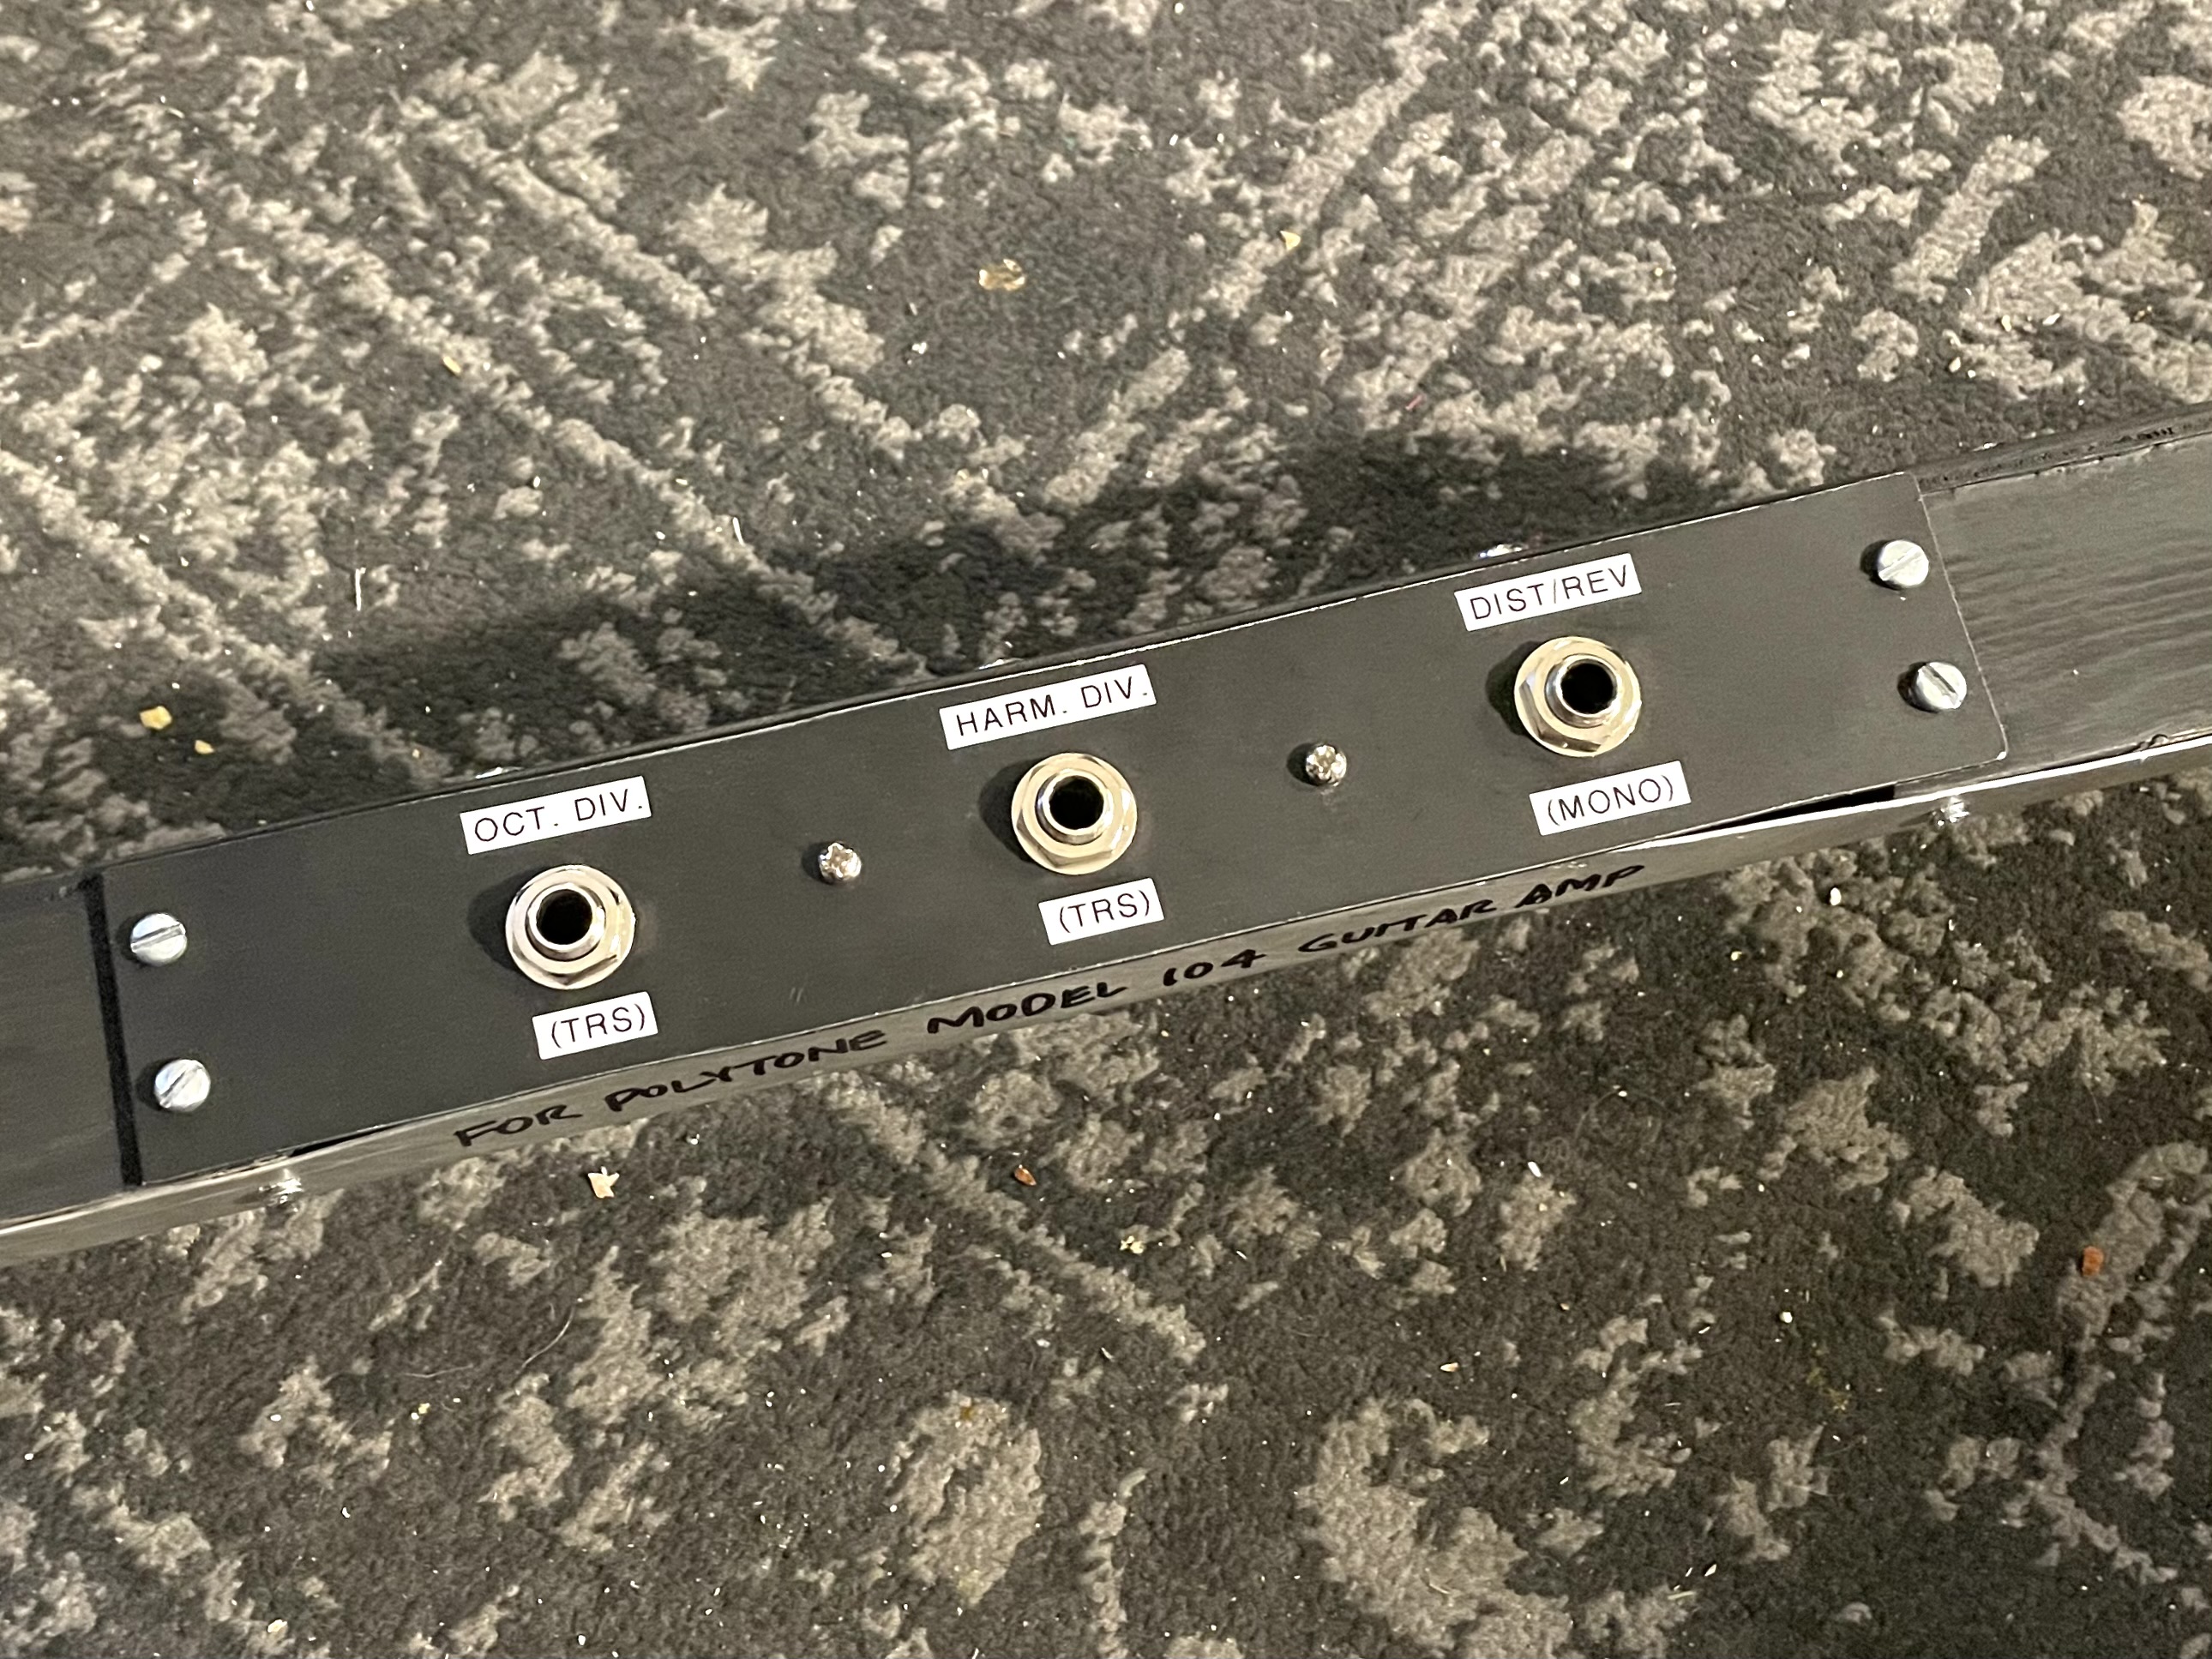
The next step was to paint it and apply some sort of labeling to it. I used a label maker and tried to make it look good. Turns out the Polytone logo was very easy to make using blank strips of label. |
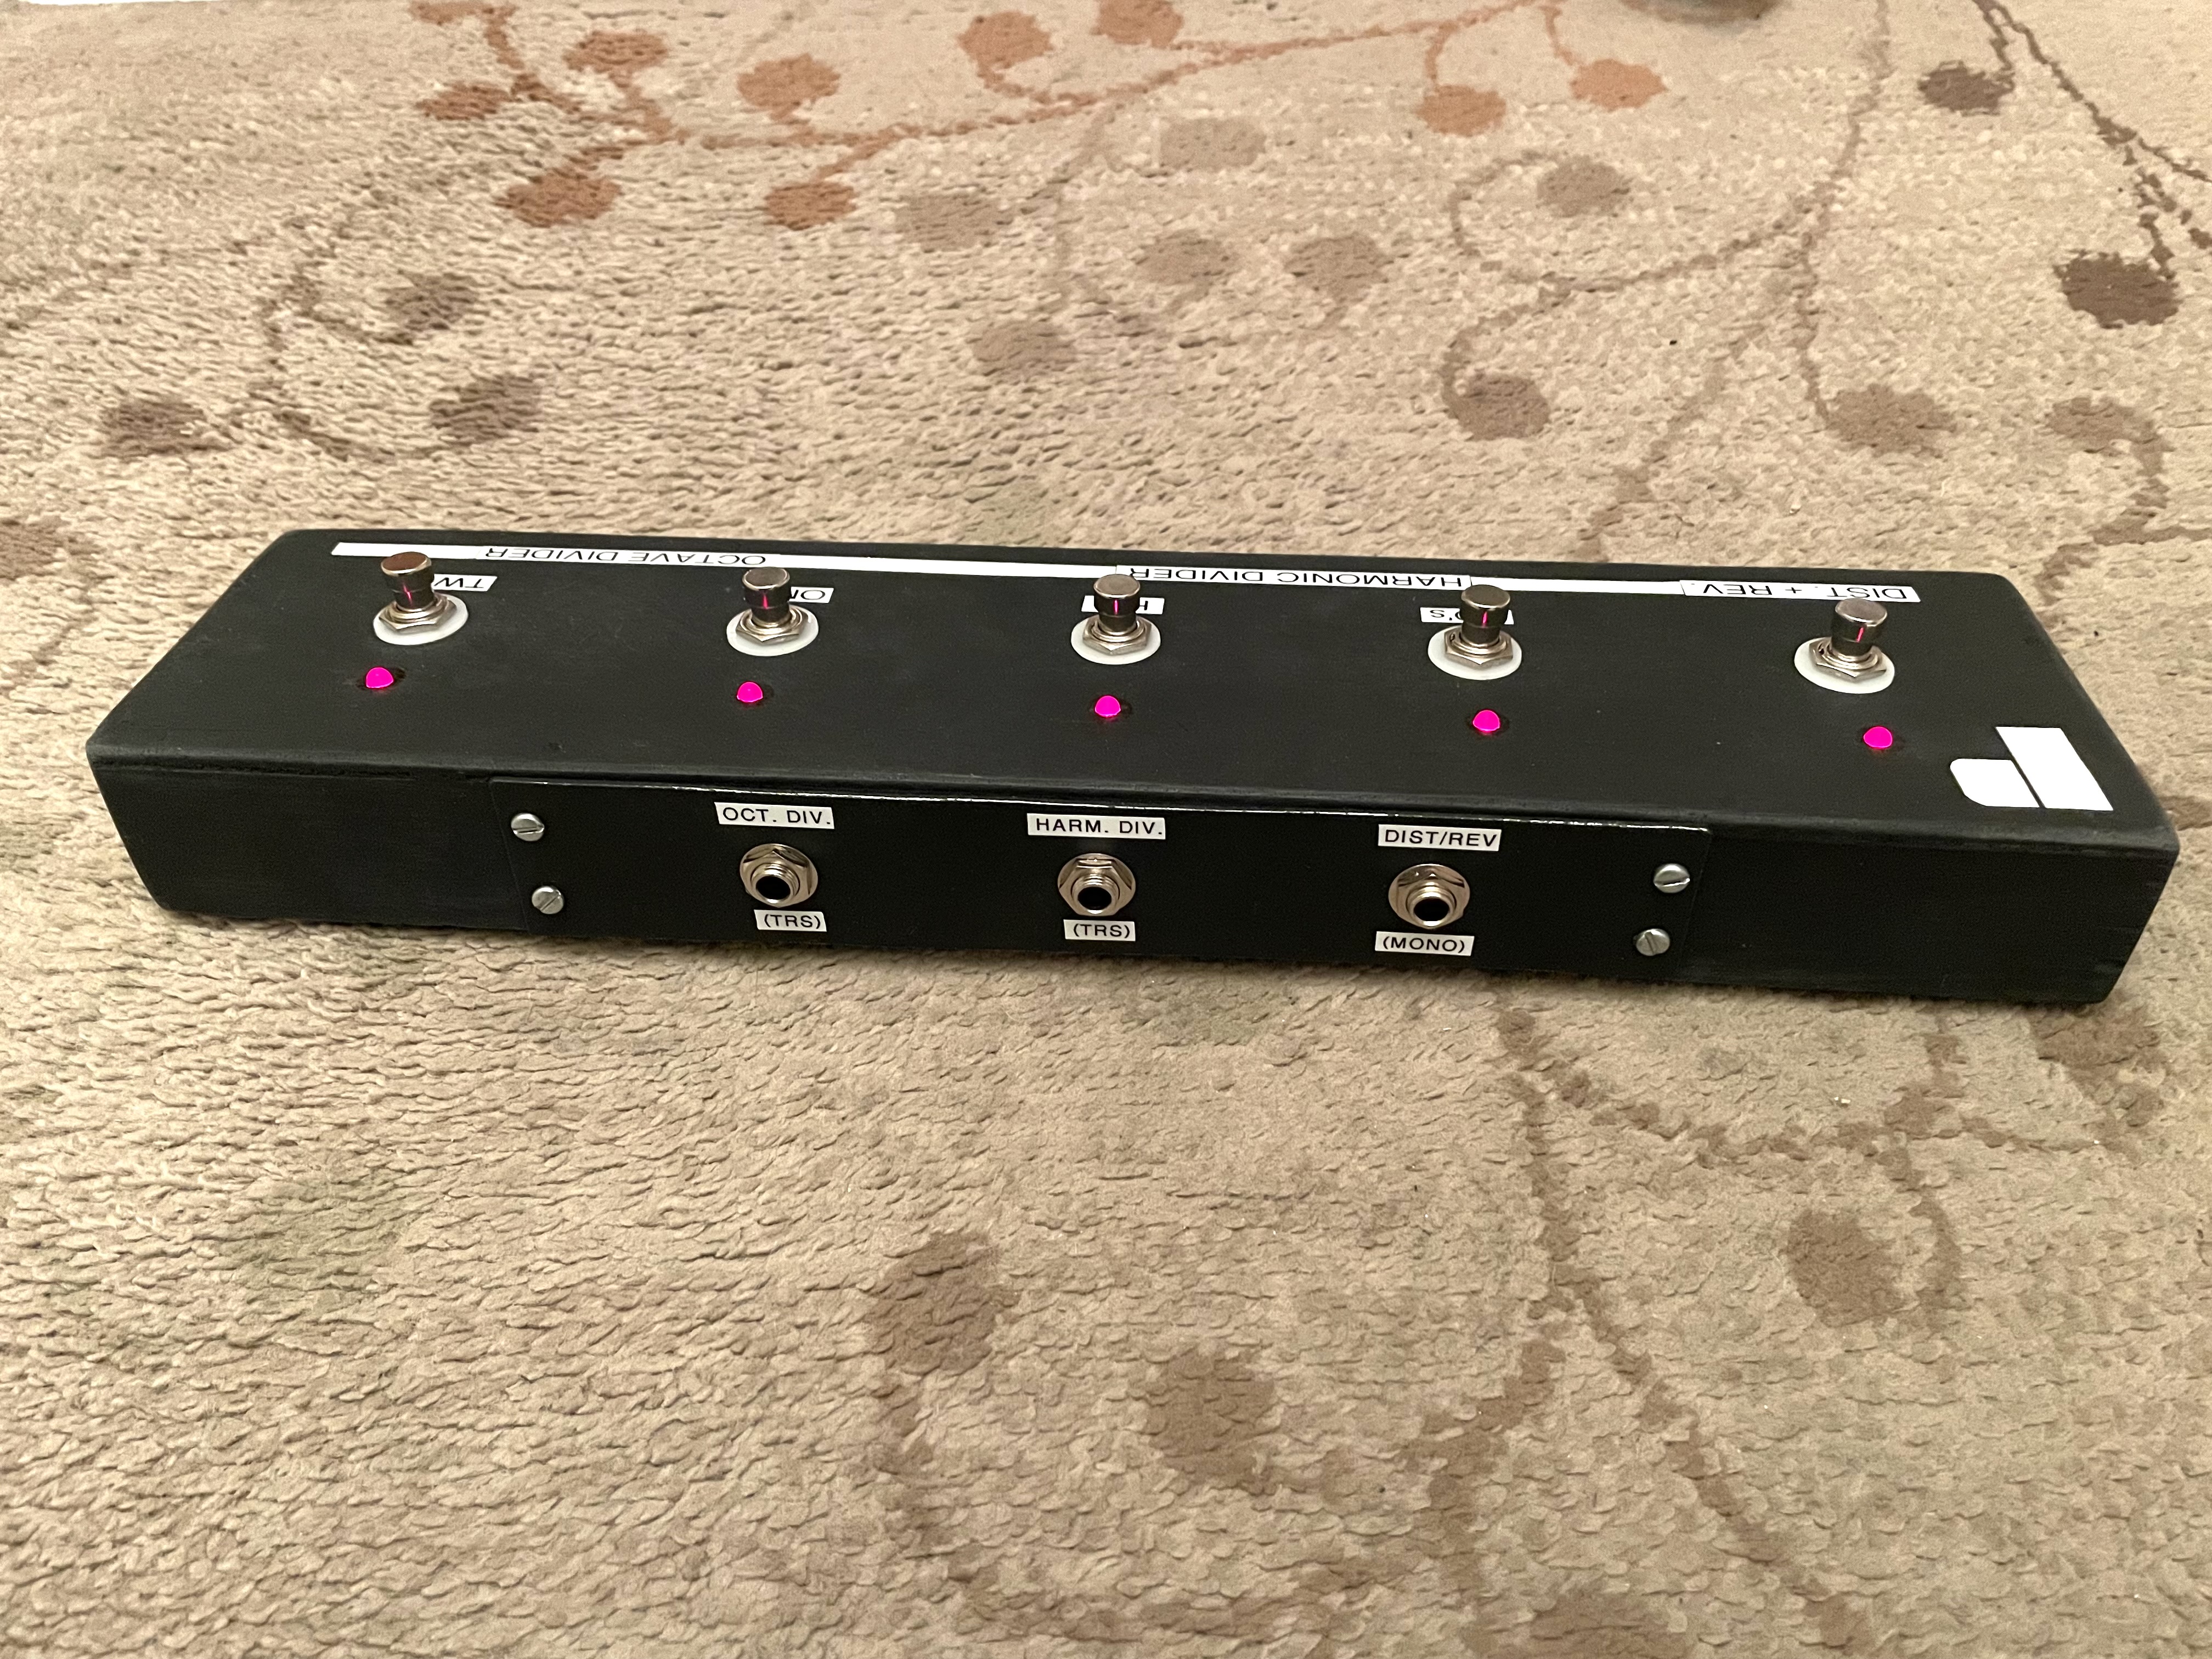 |
All of the jacks are labeled. Two of them use a 1/4" TRS cable and instead of a Distortion AND a Reverb switch, I made that a single switch which adds the distortion to the reverb. I don't think the distortion sounds that bad, but if I was ever going to use it, it would be to just add a little bit of dirt to the clean sound. Works perfectly for my purposes. To do this, I just used a 1/4" mono jack here. Also saves a little bit on the size of the enclosure. |
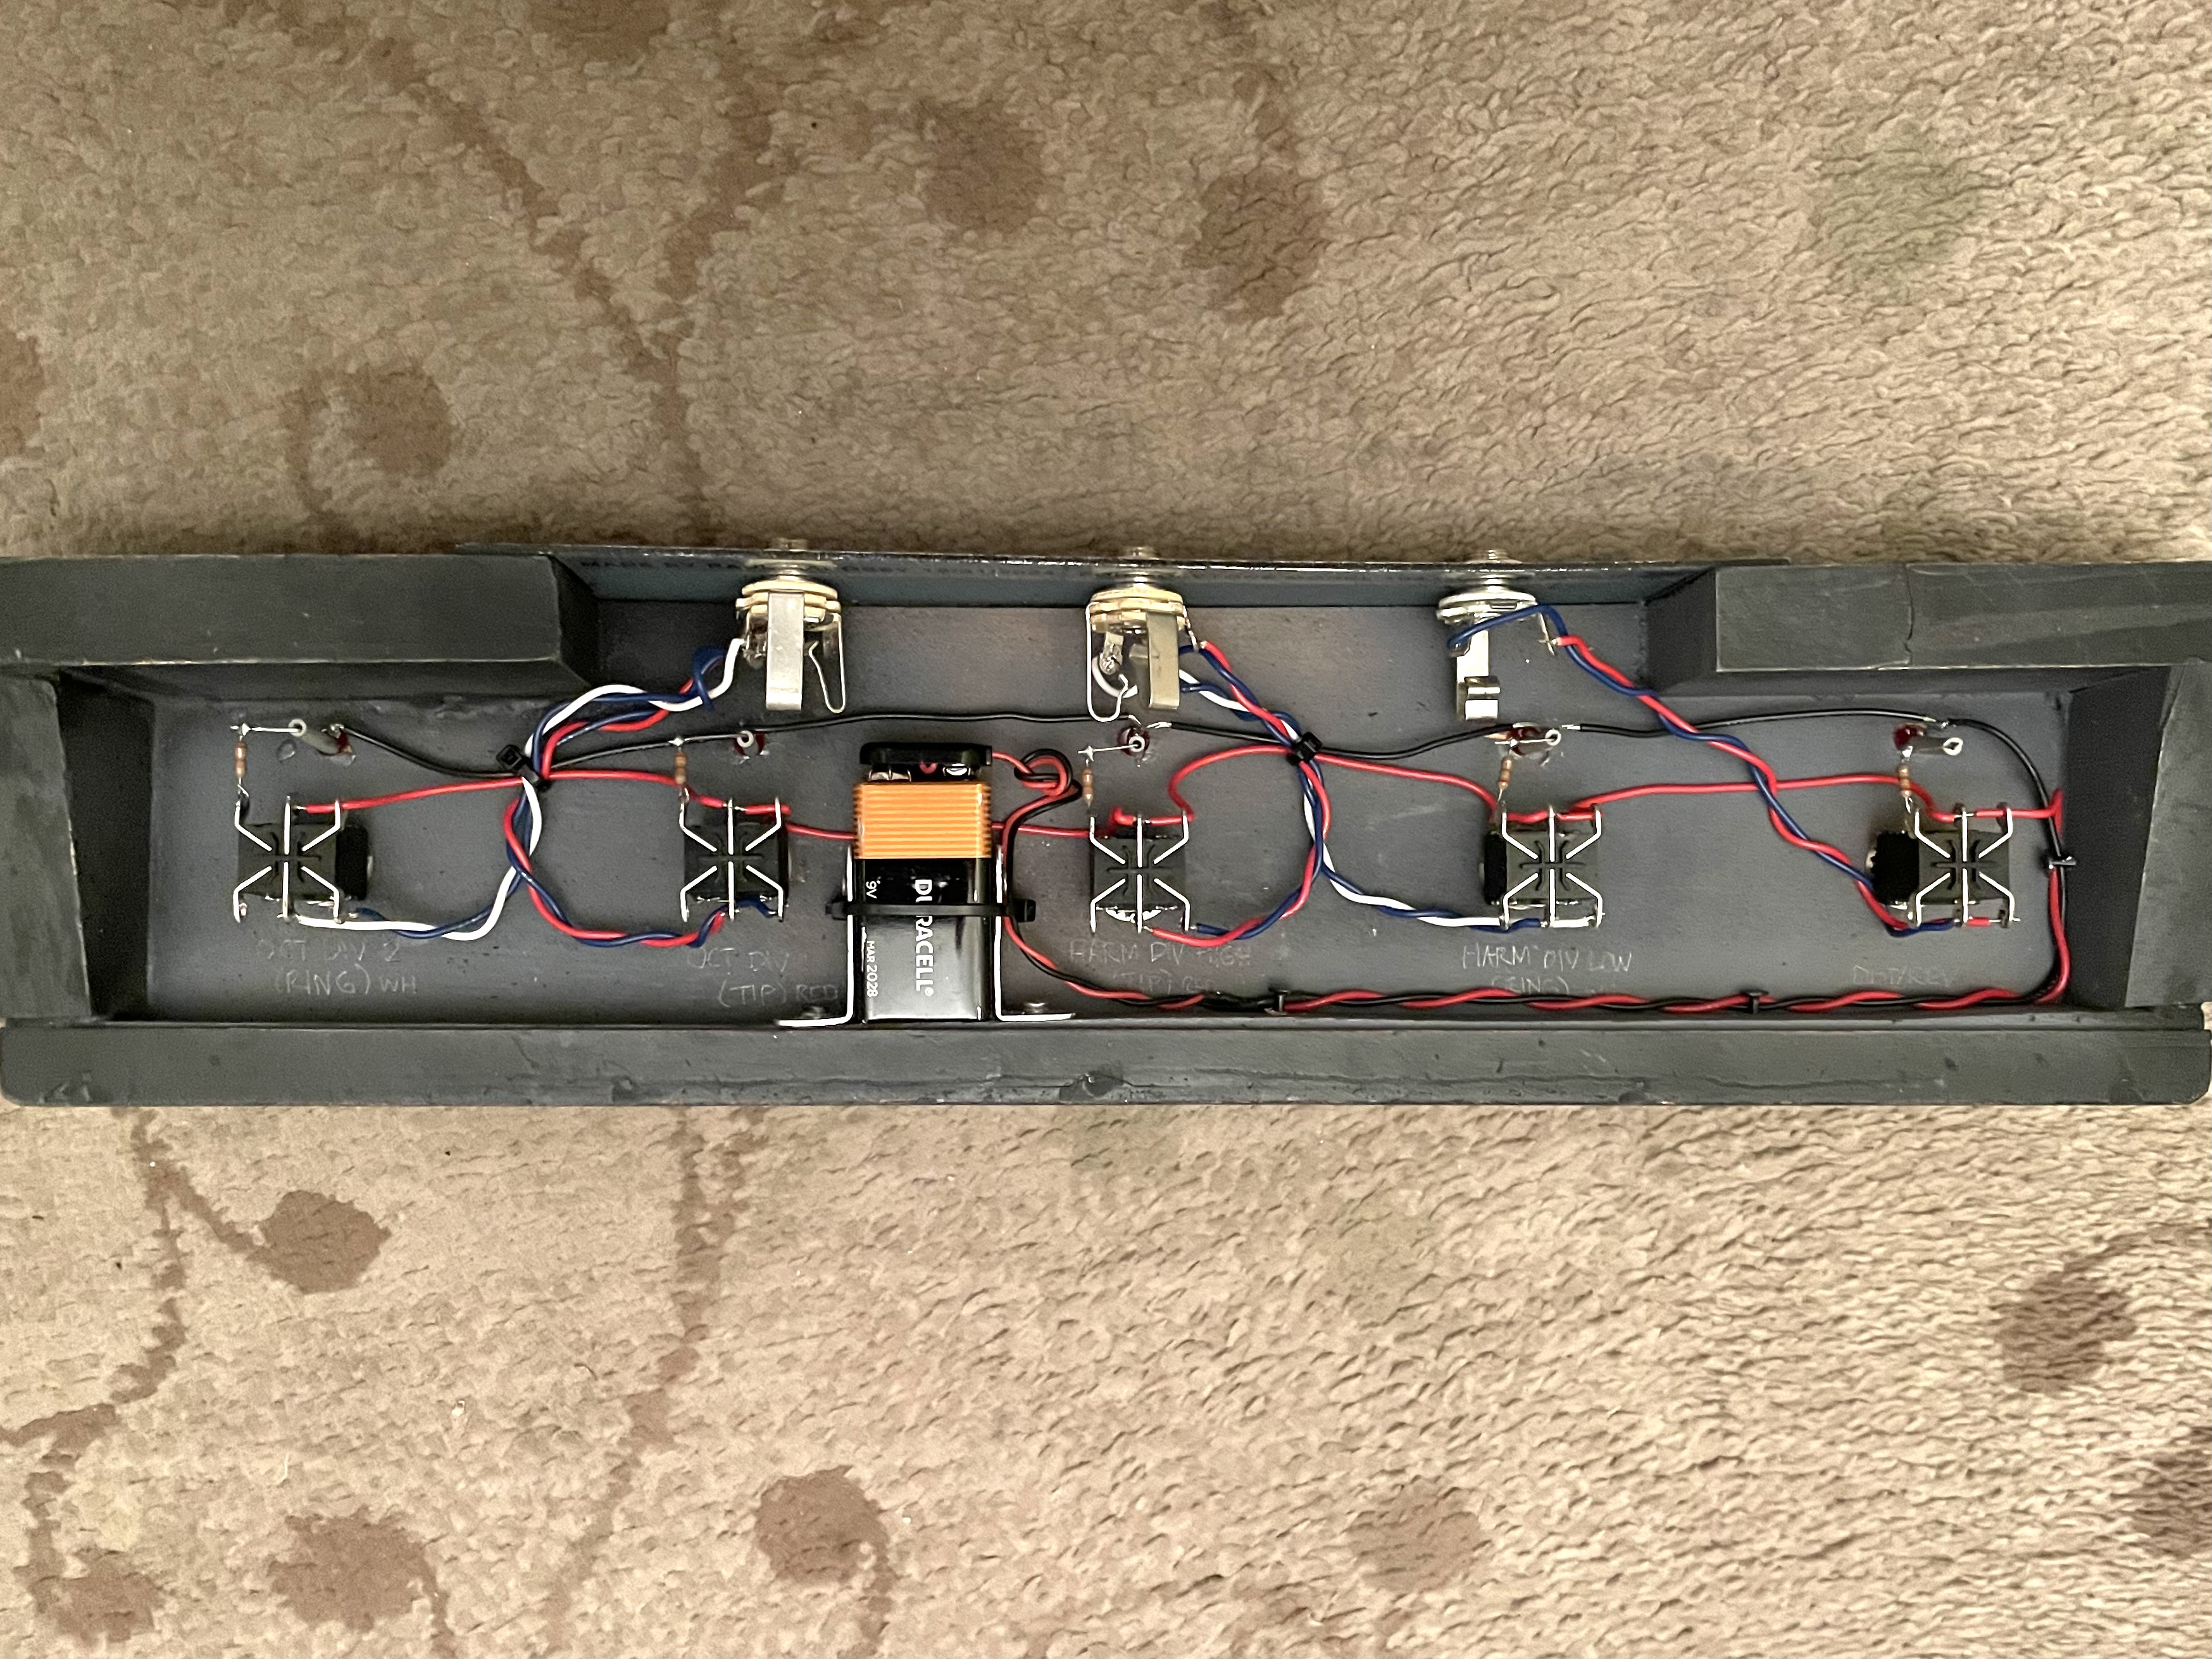 |
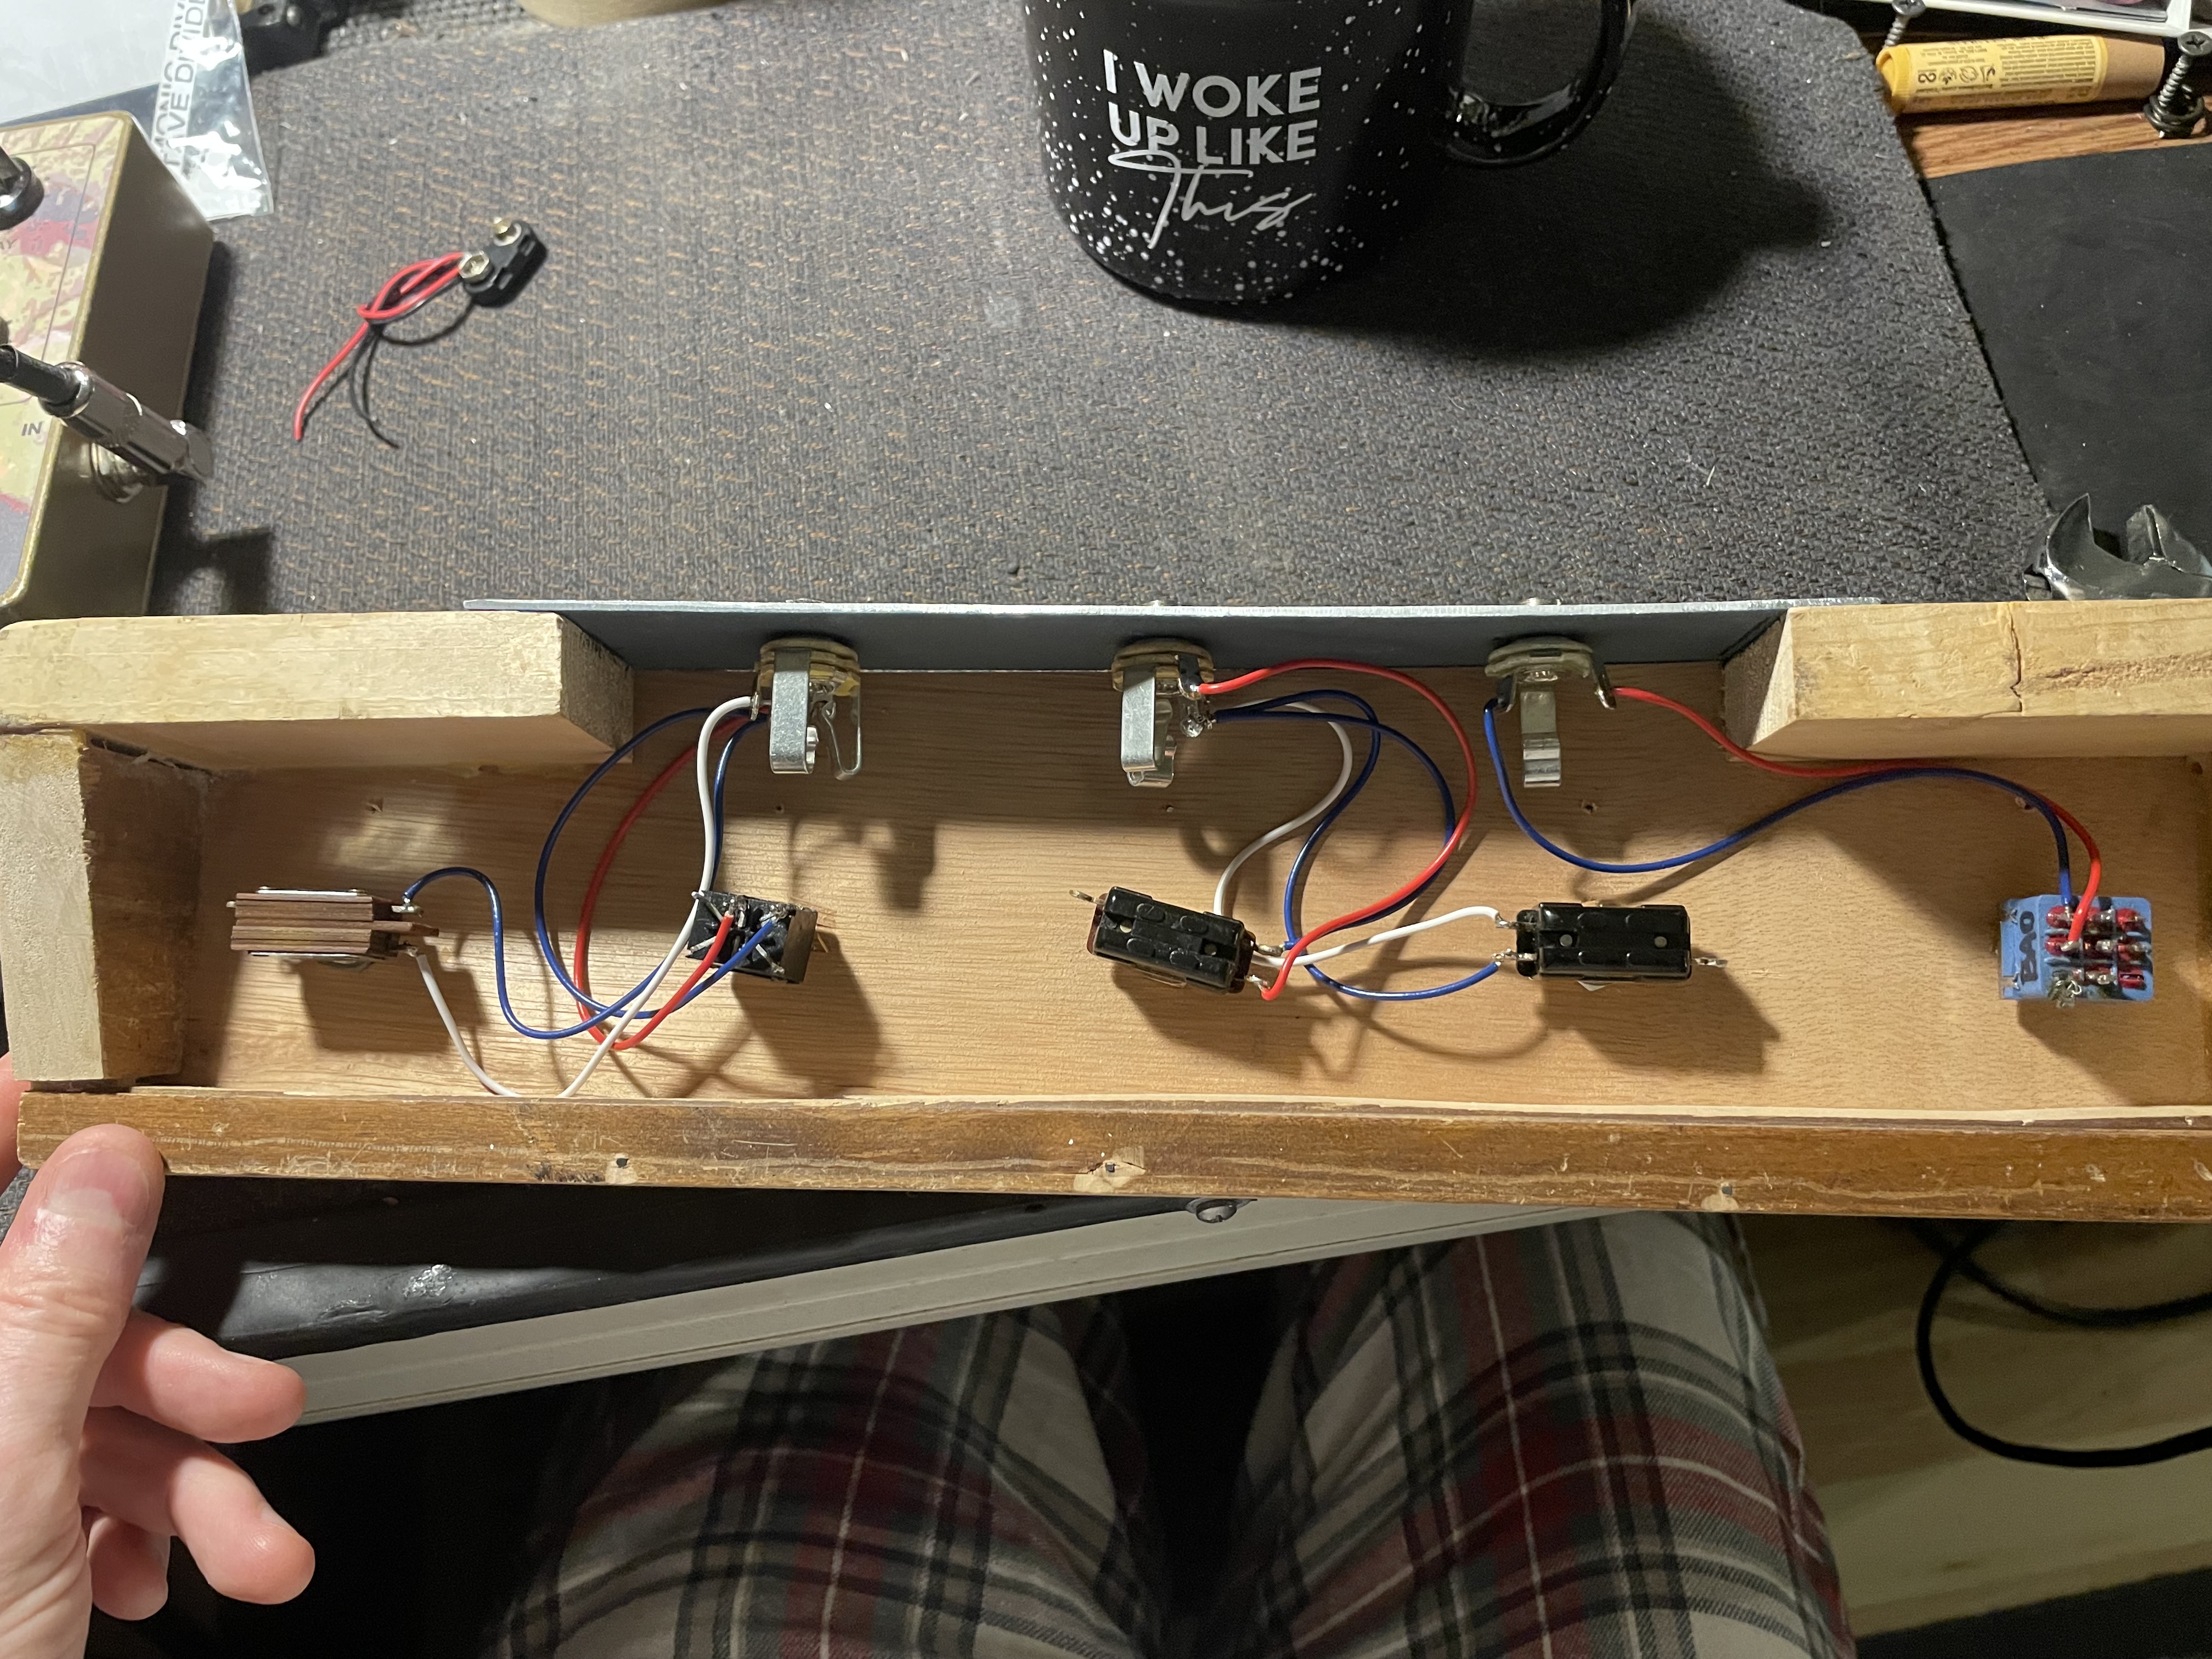
Here we can see the inside. Fortunately I was able to find a picture of the inside of an original Polytone footswitch, which was a good guide as to how to lay it out, how the LEDs were powered, etc. One side of the DPDT switches control the functions of the amp and the other side simply switches the LEDs on/off. They are all wired in parallel to a 9V battery. The 5mm red LEDs are simply glued to the enclosure via cyanoacrylate glue. I made sure to get a tight fit too. |
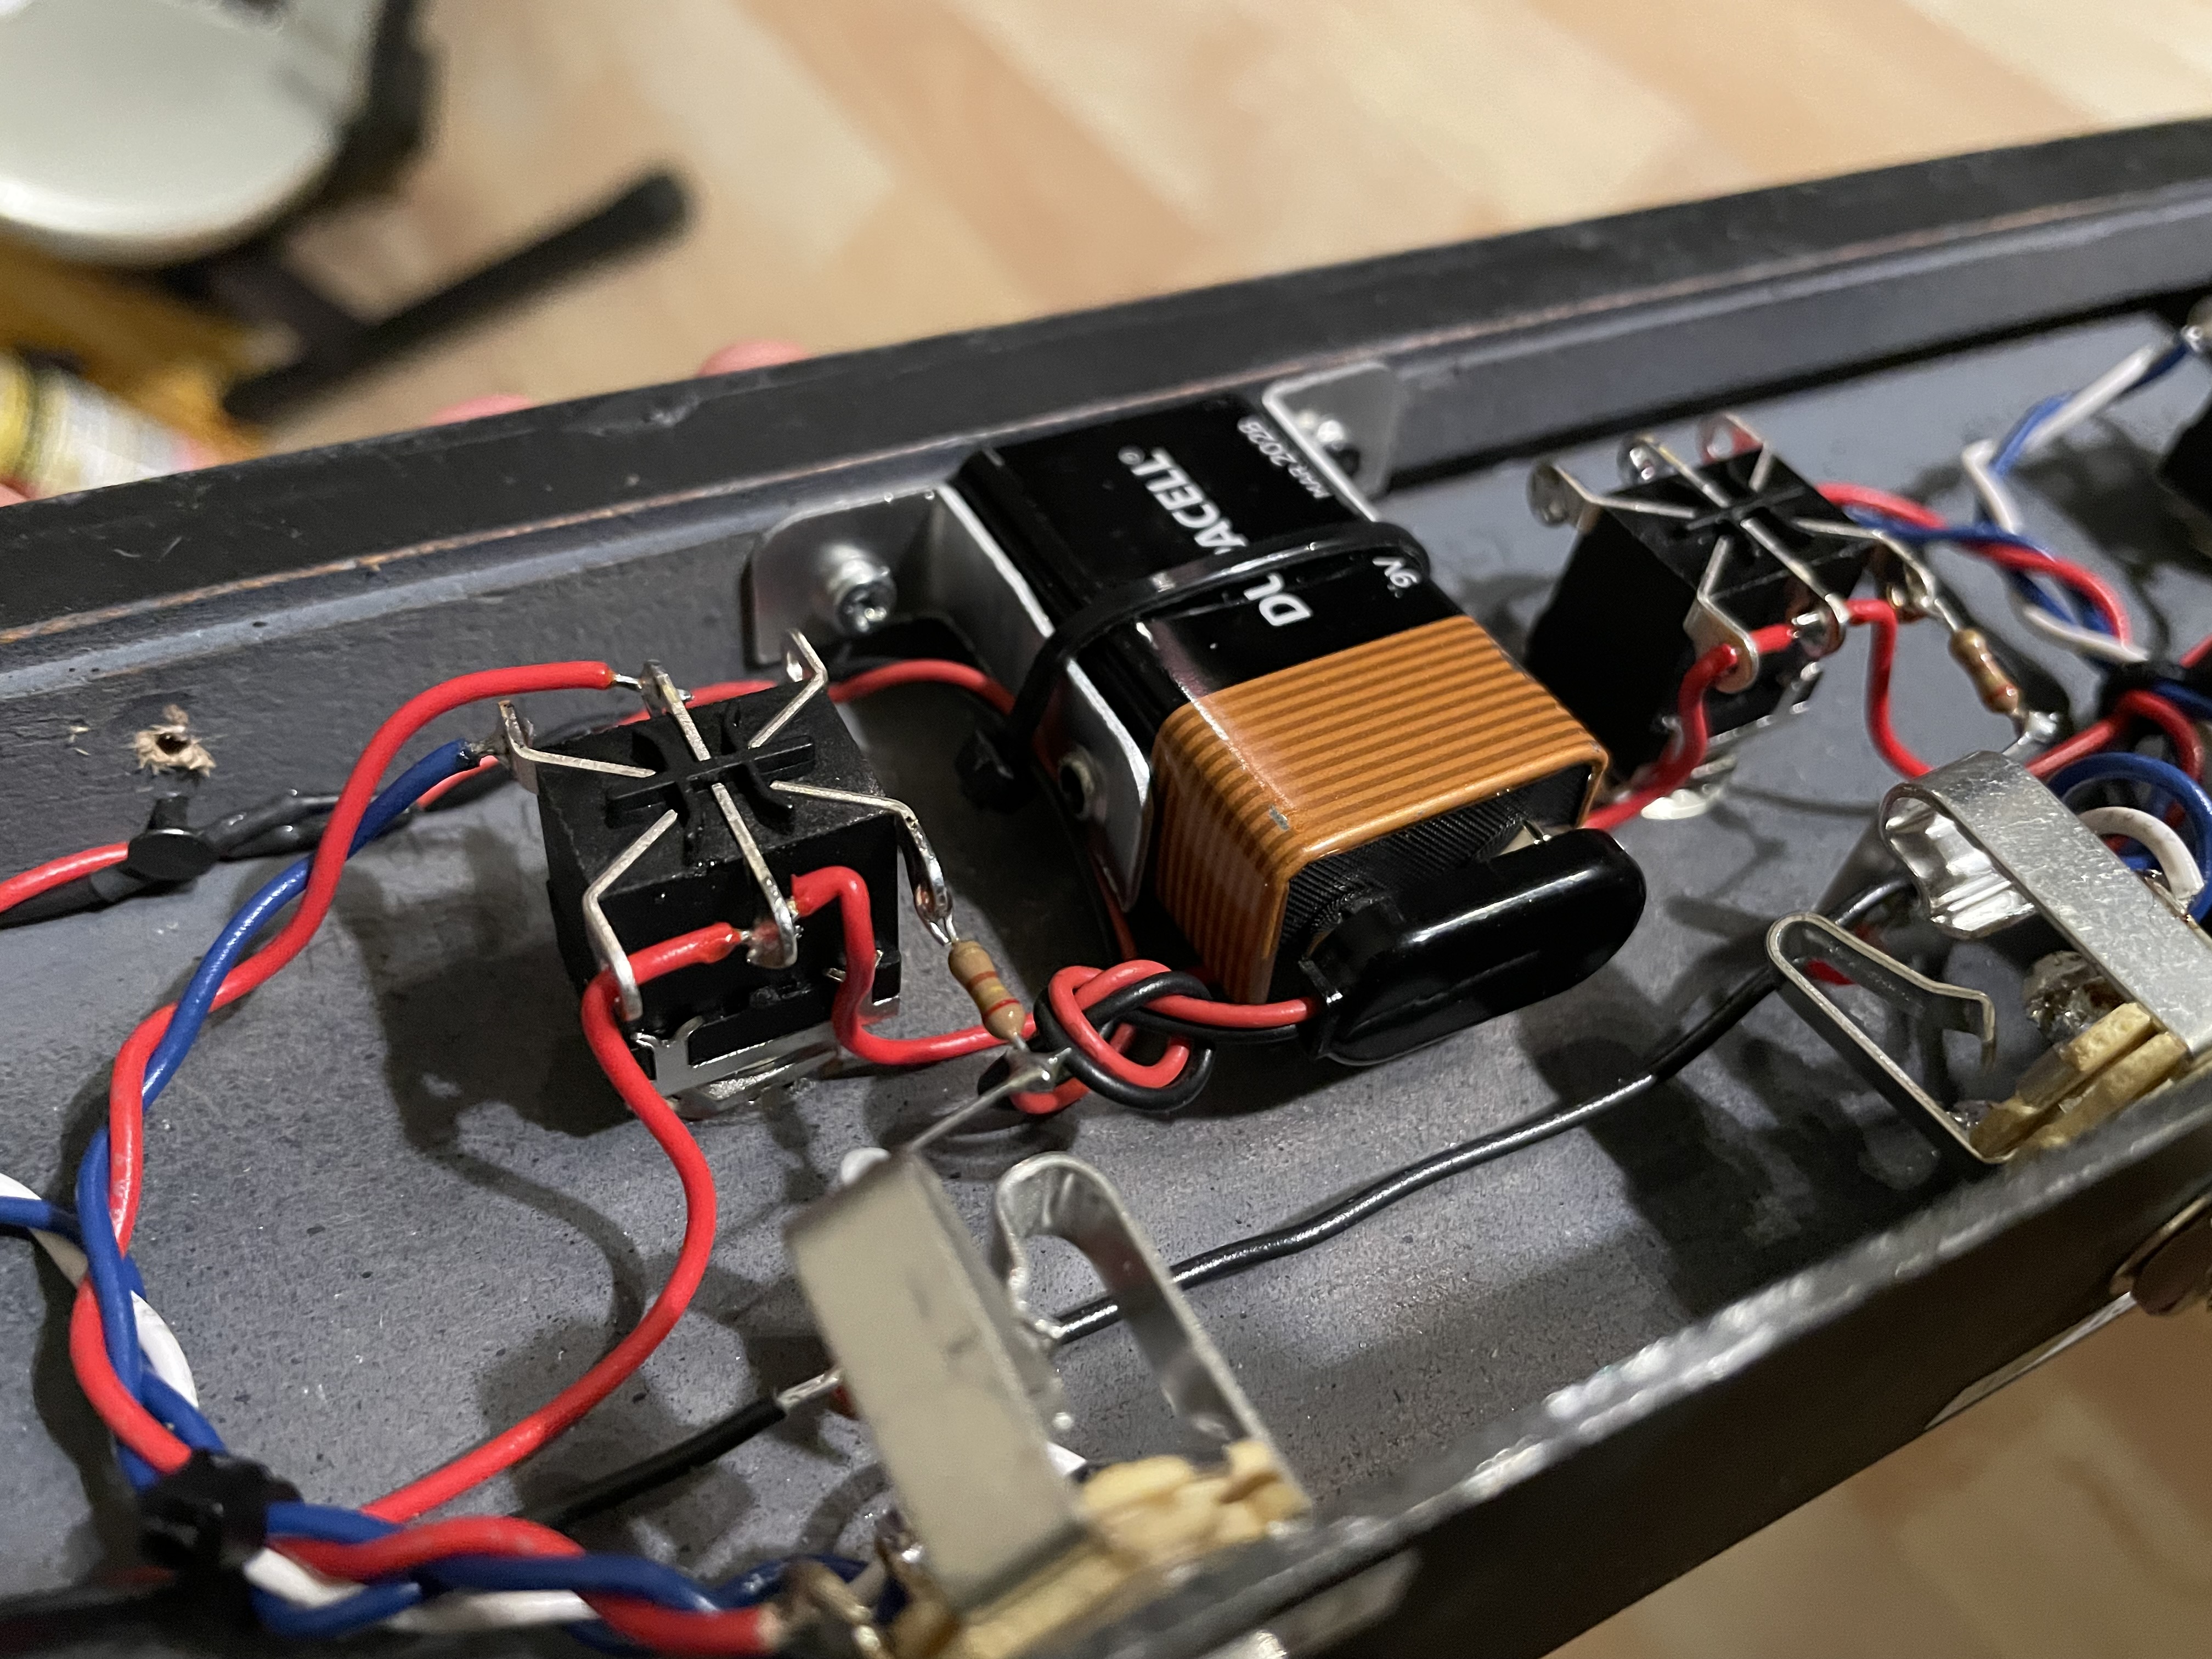 |
Here you can see how I mounted the 9V battery in such a small area. The original footswitch uses two "C" size batteries, which would give a much longer battery life. I like this though... it allows me to get the last bit of life out of the used 9V batteries that come out of my guitars and wah pedals. I'll generally have no more than two LEDs on at a time, and not for long. Should be OK for my purposes. |
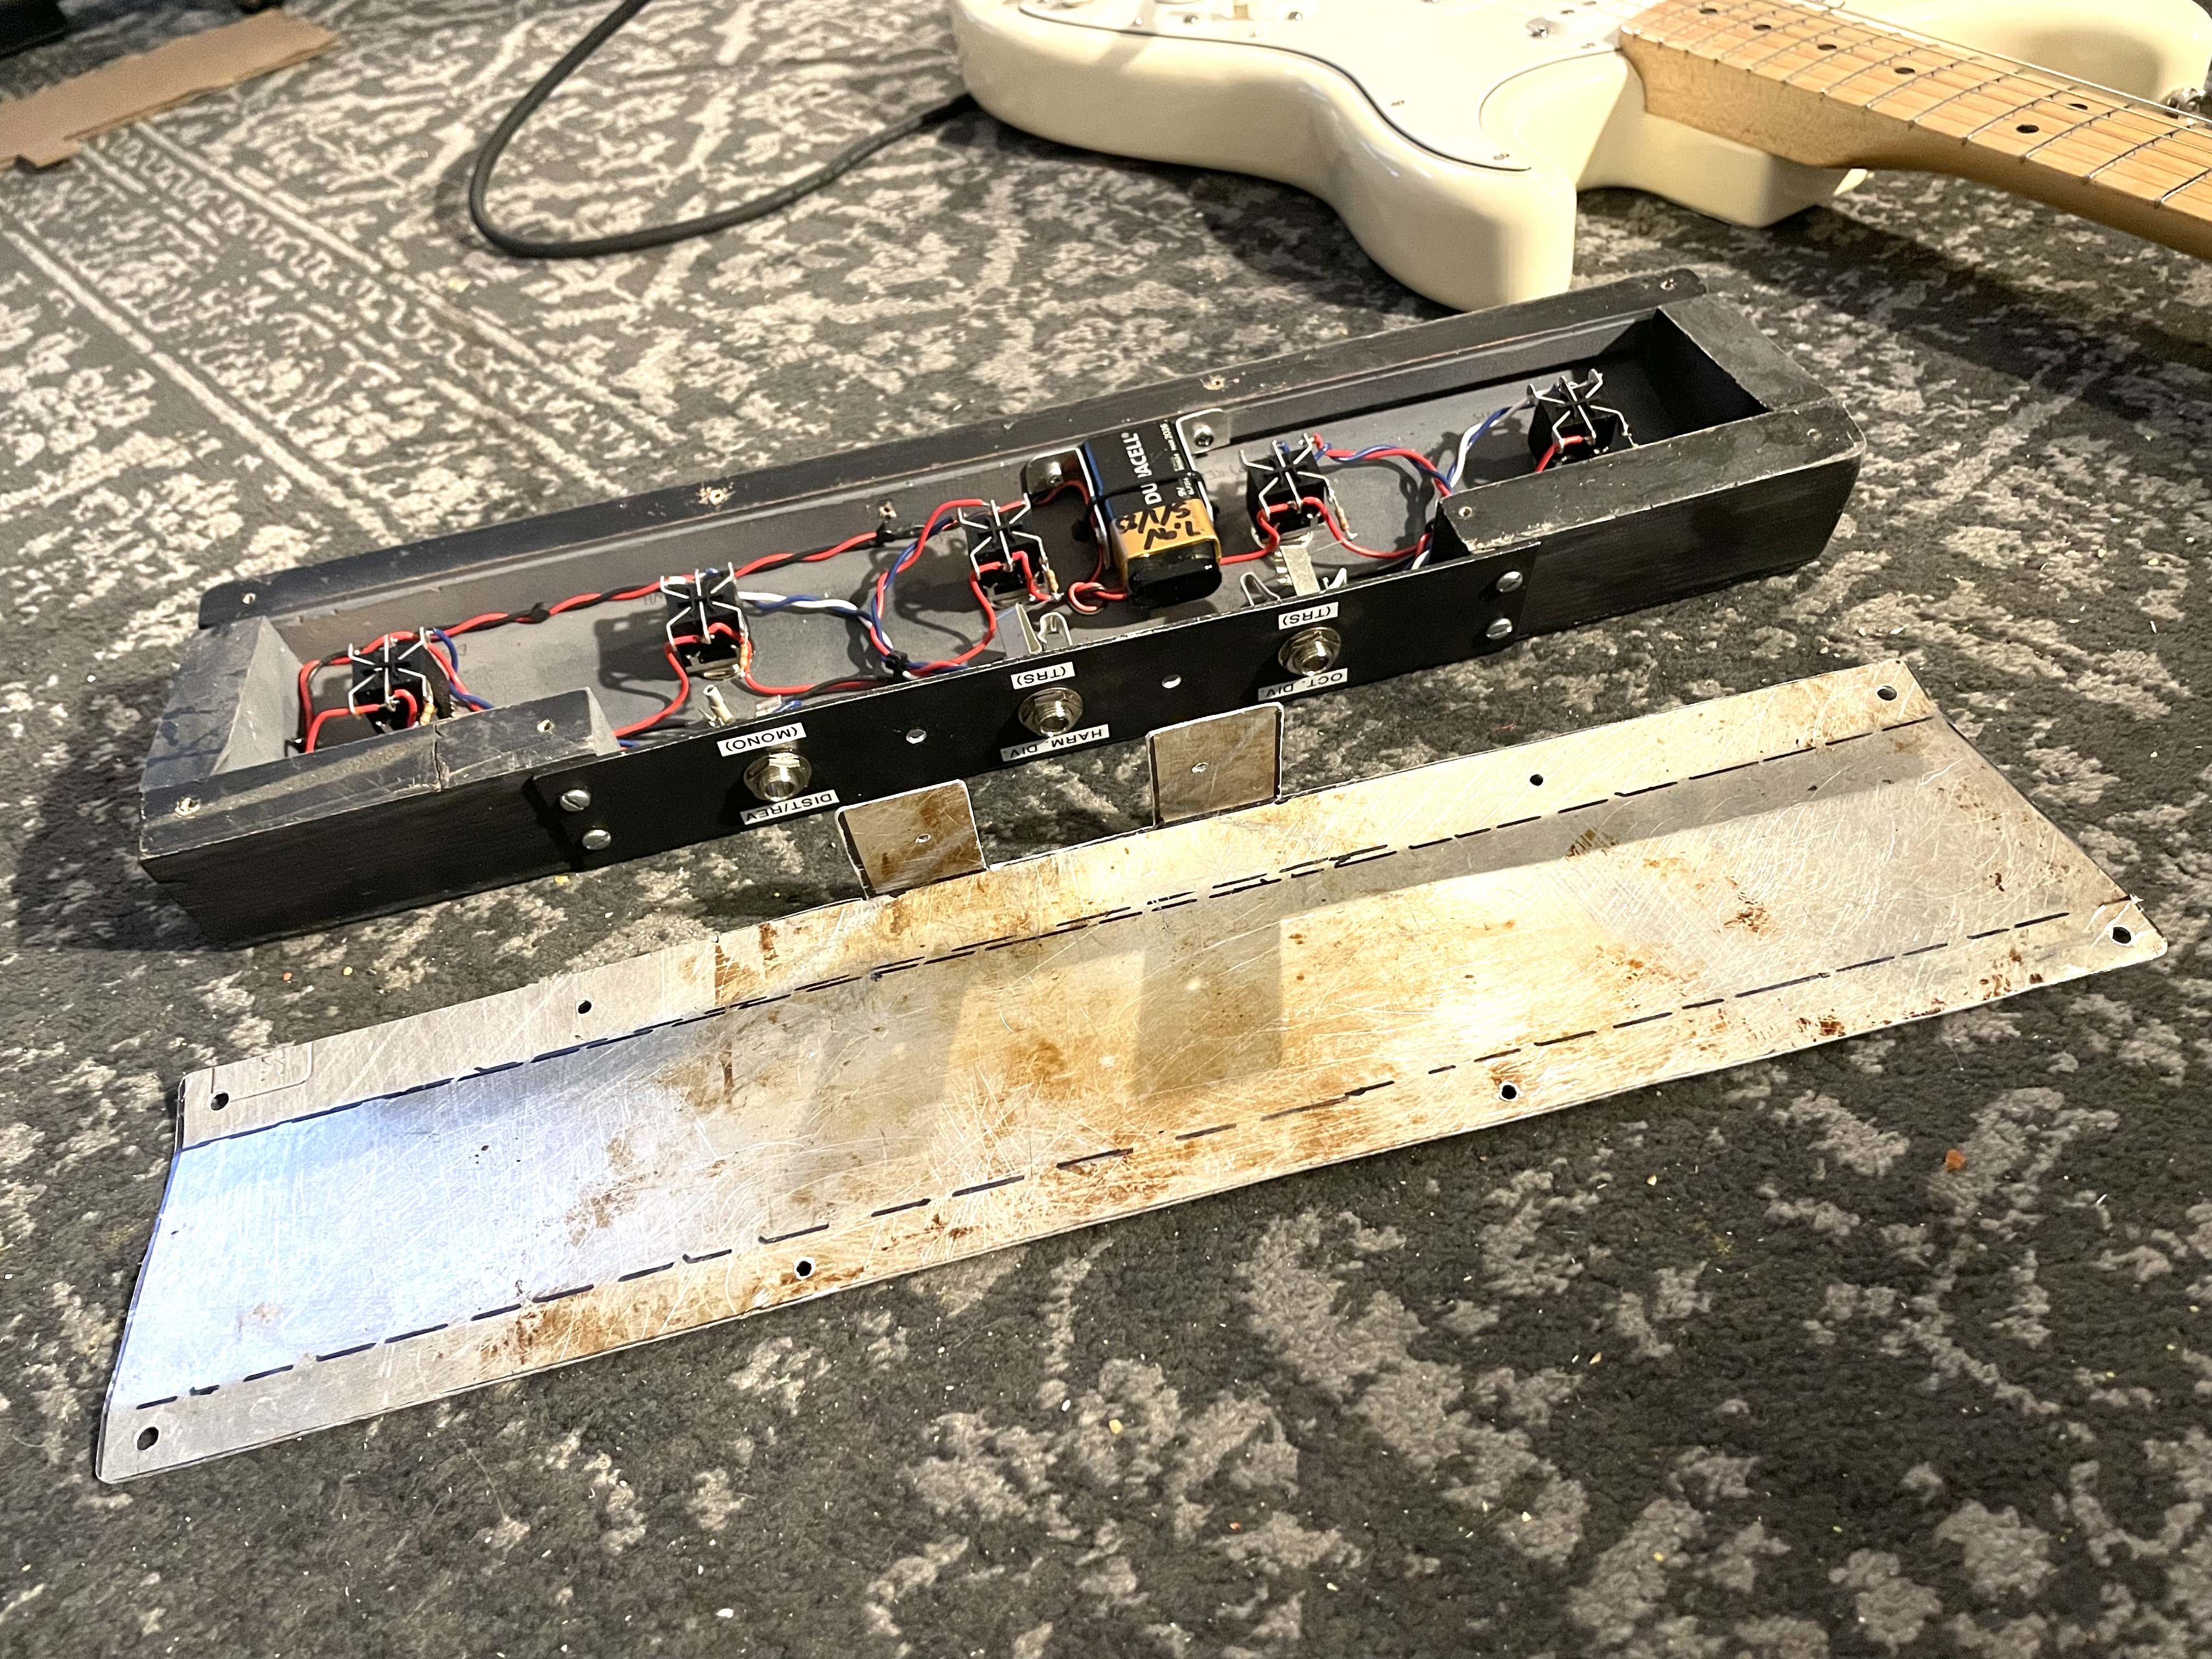 |
I acquired a well used aluminum cookie sheet after a quick visit to the thrift store. It was just large enough to work and only cost $3.49 plus tax. I cut it down and shaped it as needed. I made it so there's two tabs where the jacks are, for a couple of screws, just to make it a little more sturdy. Aluminum cookie sheets come in very handy for this sort of thing. I have used them for making odd shaped enclosures, etc. They're cheap and aluminum is very easy to work with. |
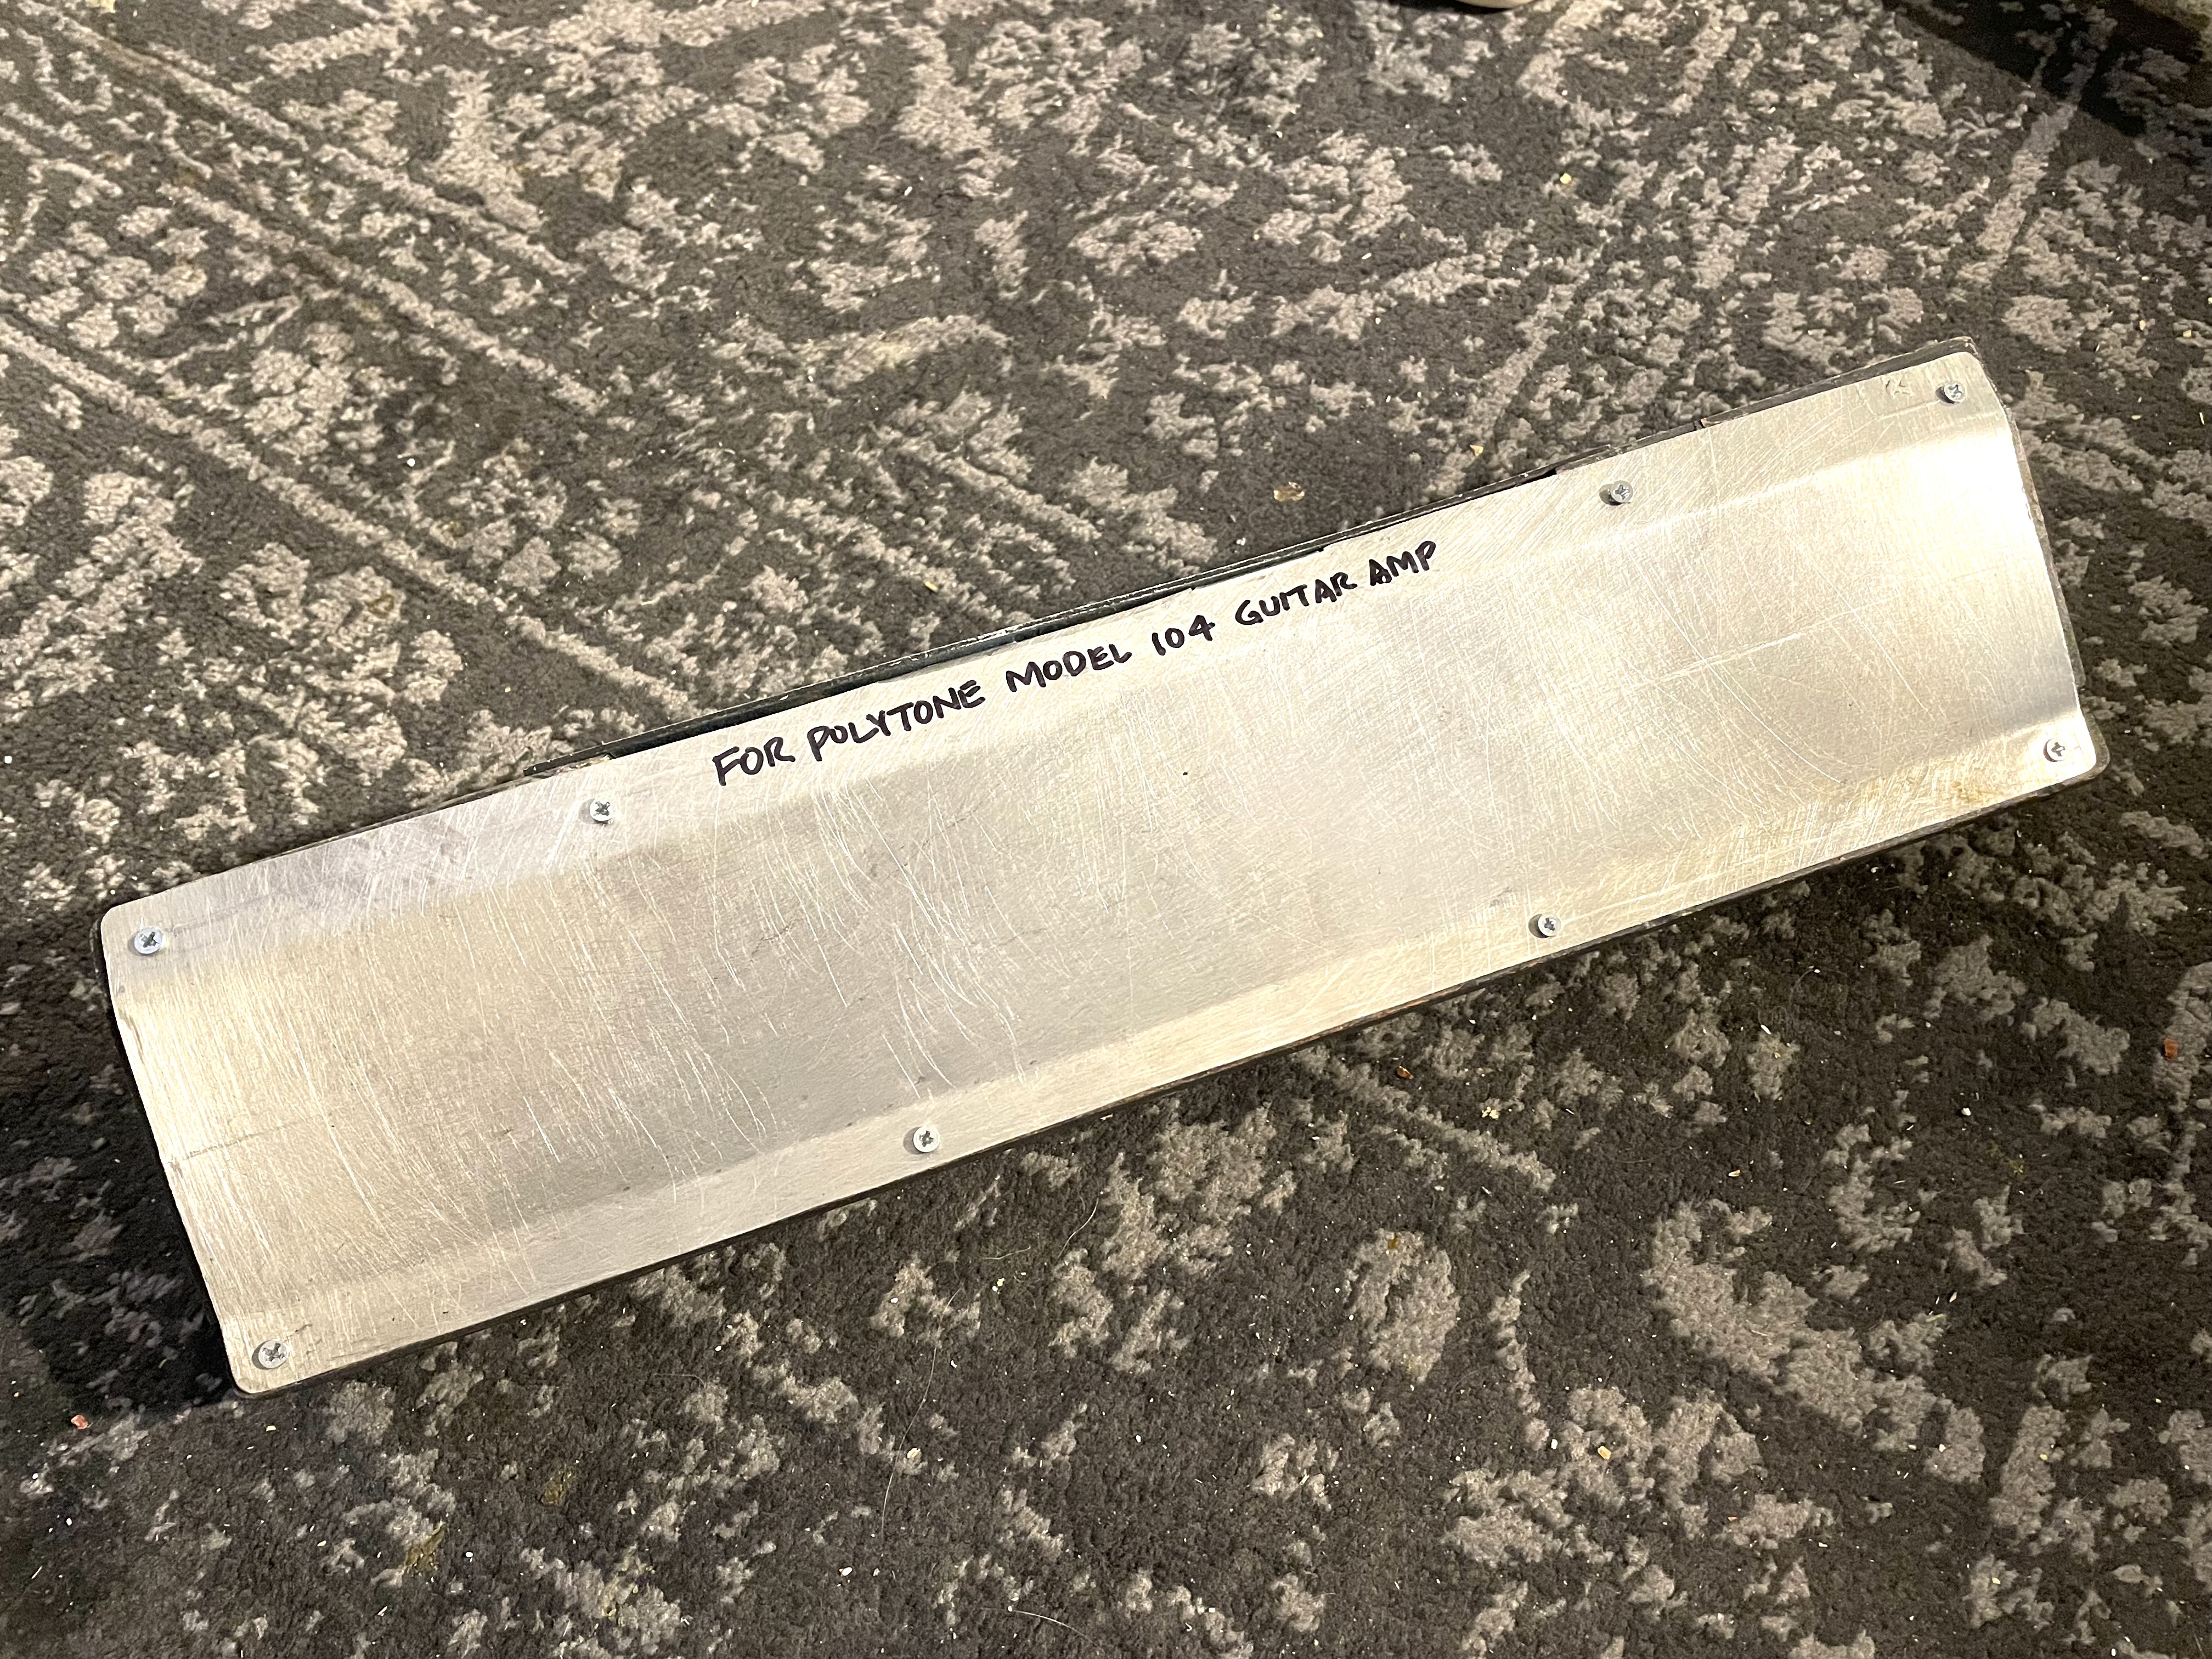 |
Here it is all buttoned up. I'll either add four rubber feet or something on the bottom which will keep it from sliding around on smooth surfaces. The main thing is that it is now fully enclosed. |
 |
Here you can see the two screws between the jacks which insert into those two tabs. |
This was very simple to make and it cost next to nothing. The major cost was the jacks and the DPDT switches. It didn't take too long
to construct either. I think it turned out pretty well only using hand tools, making it up as I went along. If you are fortunate enough
to have a metal brake, this could also be made out of sheet aluminum or steel. Wood seems to be the easiest as it is very easy to work with
and is readily available.
If you found this webpage useful, please drop me a line using the email link on my home page.